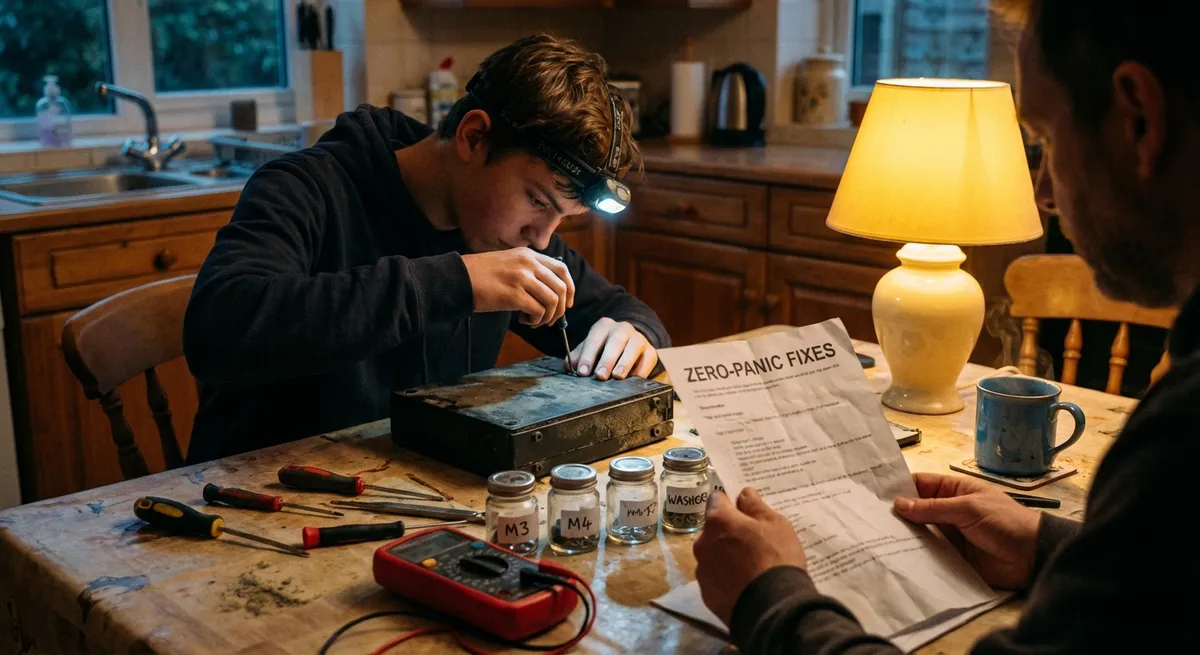
When a favorite gadget dies, most people panic, Google a repair shop, and brace for a big bill. But a surprising number of “dead” devices are only suffering from easy‑to‑fix issues: loose connections, dirty contacts, tired buttons, or stressed cables. With a calm approach and a few basic tools, you can often revive electronics at home—safely and without guesswork.
This guide walks through five practical, step‑by‑step repair tips DIYers can use on common electronics problems. No advanced skills, no special lab equipment—just patient troubleshooting, smart habits, and a focus on safety.
Ground Rules: Safety and Smart Limits
Before touching a screw:
- Unplug everything. Always disconnect from power, and remove batteries where possible. Laptop chargers, monitors, and power strips can store energy even when switched off.
- Discharge and wait. For anything with a big power supply (TVs, monitors, desktop PCs, audio amplifiers), unplug and wait at least 15–30 minutes before opening. Some components can hold a charge.
- Know what not to touch.
- Avoid working inside microwave ovens and high‑voltage power supplies.
- If something smells burned or you see scorched parts, leave deep board‑level repairs to a pro.
- Use the right work area. A clear table, good lighting, and small containers for screws go a long way. Avoid working on carpet if you can—static is not your friend.
- Take photos as you go. Before disconnecting any cable or removing any board, snap a quick photo with your phone. Reassembly becomes much less stressful.
Once you’re set up safely, you’re ready for some targeted, low-risk fixes.
Step‑By‑Step Tip 1: Revive “Dead” Devices With Power Path Checks
Countless electronics “failures” are simply power problems. Before assuming the worst, trace the entire power path.
What this helps with:
Game consoles, streaming boxes, external hard drives, routers, printers, powered speakers, and many more.
Tools: Multimeter (optional but helpful), known‑good power cable, flashlight.
Steps:
- Confirm the outlet.
- Plug in a lamp or phone charger to check the wall socket or power strip.
- If you’re using a surge protector, try bypassing it and plug directly into the wall.
- Inspect the power cable and adapter.
- Look for kinks, crushed areas, exposed copper, or loose plugs.
- Gently wiggle the connector where it enters the device—if power cuts in and out, the problem may be the cable or jack.
- Check the adapter’s output label.
- Confirm voltage (V) and polarity (+/– diagram) match the device label.
- Using the wrong adapter can cause “no power” or even damage.
- Test with a substitute.
- If you have another adapter with the same voltage and equal or higher amperage (A) and correct polarity, try it.
- If the device powers on, you’ve found your culprit: replace the adapter.
- Use a multimeter (if available).
- Set to DC volts, measure the adapter’s output (carefully, without shorting the pins).
- If the reading is significantly below the rated voltage or fluctuates wildly, the adapter is bad.
- Inspect the power jack on the device.
- Look inside with a flashlight—if the jack is bent, loose, or pushed in, it may need resoldering or replacement (this is where many DIYers choose a repair shop).
If you isolate the problem to an external cable or adapter, replacement is usually cheap and safer than board repairs.
Step‑By‑Step Tip 2: Fix Unresponsive Buttons and Sticky Controls
Buttons that don’t always register, sticky game controller triggers, or volume knobs that crackle are usually victims of dust, oxidation, and wear—not necessarily electronic “failure.”
What this helps with:
Remote controls, game controllers, keyboards, handheld gadgets, older stereos, some appliances with rubber keypads.
Tools: Isopropyl alcohol (at least 70%, ideally 90%+), cotton swabs, small screwdriver, soft brush, compressed air (optional).
Steps:
- Start with surface cleaning.
- Disconnect power and remove batteries.
- Use a slightly damp microfiber cloth (with a small amount of mild soap, if needed) to clean the outside.
- Avoid getting liquid into openings.
- Test after basic cleaning.
- Many remotes and controllers improve when dirt and skin oils are removed from around buttons.
- Open the device case carefully.
- Remove obvious screws (check under stickers and rubber feet).
- Use a plastic pry tool or old credit card to separate snap‑fit housings—metal tools can mar or crack plastic.
- Clean button contacts.
- For rubber‑dome keypads (common in TV remotes):
- Lift the rubber sheet; beneath it are black conductive pads.
- Lightly wipe pads and the matching circuit board contacts with a cotton swab dipped in isopropyl alcohol.
- Don’t soak; you just want to remove oils and grime.
- Clean mechanical switches or dials.
- For volume knobs and slide switches, gently rotate or slide them back and forth while applying a tiny amount of contact cleaner (if you have it).
- If not, a little compressed air to blow out dust can still help.
- Inspect for damage.
- Look for torn rubber pads, cracked plastic button stems, or missing springs.
- Minor cracks can often be stabilized with a tiny amount of cyanoacrylate (super glue), but avoid gluing moving surfaces together.
- Reassemble and test.
- Let any alcohol fully evaporate (a few minutes).
- Reinstall batteries and test each button.
- If one button still fails but others work, the conductive pad or board trace for that specific key may be worn, which may require a replacement part.
This type of cleaning can make an “old” remote or controller feel almost new, and it’s a perfect low‑risk starter repair.
Step‑By‑Step Tip 3: Bring Back Sound by Repairing Jack and Cable Issues
Sound cutting out in one earbud, crackling when you touch the headphone plug, or a loose speaker connection are often mechanical, not electronic, failures.
What this helps with:
Headphones, earbuds with detachable cables, external speakers, game headsets, audio cables connected to PCs or TVs.
Tools: Multimeter (optional), replacement audio cable, precision screwdriver, soldering iron (only if you’re comfortable), heat‑shrink tubing (for cable repair).
Steps:
- Rule out the source.
- Test the headphones or speakers on multiple devices (phone, laptop, another audio source).
- If the issue appears on all of them, focus on the headphones/speakers; if not, you may have a bad port on the original device.
- Check the plug and cable strain relief.
- Slowly bend the cable near the plug while playing audio at a low volume.
- If sound cuts in and out, there’s likely a break in the cable at that point.
- Test detachable cables.
- If your headphones or speakers use a removable cable (3.5 mm, 1/4", or proprietary), swap it for another known‑good cable.
- Many “broken” headphones are perfectly fine; only the cable is dead.
- Inspect the jack on the device.
- Shine a light into the headphone or speaker jack—look for lint, dust, or bent contacts.
- Many phone and laptop audio issues are just debris blocking the plug.
- Clean the jack (carefully).
- Use a wooden or plastic toothpick to gently remove lint—avoid metal tools that can bend contacts.
- You can also use a small, soft brush and compressed air from a distance.
- Repair or replace damaged cables (for DIY‑friendly users).
- If you’re comfortable soldering:
- Cut out the damaged section, strip wires, and rejoin color‑coded conductors with solder and heat‑shrink.
- Alternatively, replace the entire plug with a new 3.5 mm connector, following the wiring diagram included with quality replacement jacks.
- Re‑test with gentle strain.
- After your repair, gently flex the cable in multiple positions while audio is playing.
- If the sound is stable, your fix is solid.
Whenever possible, choose devices with detachable cables—they’re far easier and safer to repair or replace.
Step‑By‑Step Tip 4: Cool Down Overheating Laptops and Consoles
Electronics that shut down during gaming, video calls, or rendering sessions are often struggling with heat, not some mysterious board fault. Dust buildup and dried thermal compound are common culprits.
What this helps with:
Laptops, desktop PCs, gaming consoles, network gear that runs hot (routers, modems).
Tools: Compressed air, soft brush, screwdriver, isopropyl alcohol, thermal paste (for advanced users).
Steps:
- Confirm overheating symptoms.
- Device feels very hot, fans run loudly, performance drops, or it shuts down under load.
- Use software like HWMonitor (PC) or built‑in tools to check CPU/GPU temperatures, if available.
- Clean vents and grills from the outside.
- Power down and unplug (and remove battery if accessible).
- Use compressed air in short bursts at an angle, not directly into the fan.
- Vacuum around vents with a brush attachment, but don’t let the fan spin wildly—hold it still with a toothpick if needed.
- Open the device for deeper cleaning (if design allows).
- For laptops and consoles, remove the bottom or side panel following a model‑specific guide (search your model + “service manual” or “disassembly”).
- Never force panels; hidden screws are common.
- Remove dust from heatsinks and fans.
- Use compressed air and a soft brush to clear dust from fins and blades.
- Be gentle—bent fins reduce cooling efficiency.
- Check fan operation.
- Spin fans gently with your finger; resistance or grinding noise suggests wear.
- If a fan is seized or extremely noisy, look into a replacement fan specific to your model.
- Refresh thermal paste (intermediate/advanced).
- If the device is a few years old and you’re confident opening it further:
- Remove the heatsink assembly (after disconnecting power and battery).
- Clean old thermal compound from the CPU/GPU and heatsink with isopropyl alcohol and lint‑free wipes.
- Apply a small pea‑sized amount of new thermal paste and re‑install evenly.
- Follow a model‑specific guide to avoid overtightening screws.
- Reassemble and monitor temperatures.
- After reassembly, run a moderate load (streaming video, light gaming) and check temperatures.
- Improvements of 5–20°C are common after cleaning and repasting.
Regular dusting and proper ventilation (not blocking vents with blankets or soft surfaces) can extend the lifespan of heat‑sensitive electronics significantly.
Step‑By‑Step Tip 5: Rescue Battery‑Powered Gadgets With Contact and Pack Checks
A surprising number of “won’t turn on” issues in portable electronics are due to battery problems—corrosion, poor contact, or aging cells—rather than failed circuitry.
What this helps with:
TV remotes, wireless mice/keyboards, toys, handheld tools, flashlights, cameras, and some older electronics with removable packs.
Tools: Isopropyl alcohol, cotton swabs, small flat tool, white vinegar or baking soda (for corrosion), replacement batteries, multimeter (optional).
Steps:
- Inspect the battery compartment.
- Remove all batteries.
- Look for crusty white/blue/green deposits (leaked electrolyte), rust, or bent contacts.
- Clean mild corrosion.
- For alkaline battery leakage (often white and powdery):
- Dab a cotton swab with a small amount of white vinegar (acid neutralizes the alkaline residue).
- Gently clean the contacts, then wipe with a fresh swab and a bit of isopropyl alcohol to remove moisture.
- For acidic leaks (less common in consumer gear), a baking‑soda solution would be used, but for most household devices, vinegar + alcohol is fine.
- Straighten and tension contacts.
- Use a small flat tool to very gently bend spring or leaf contacts so they press firmly on the battery ends.
- Weak spring tension leads to intermittent power.
- Use fresh, known‑good batteries.
- Swap all cells at once; mixing old and new batteries can cause unequal discharge and leakage.
- Consider using reputable brands and avoid very cheap generics for important devices.
- Check battery orientation and polarity.
- Double‑check that plus (+) and minus (–) ends match the diagram in the compartment. It’s easy to miss on multi‑cell devices.
- Test removable battery packs.
- For cameras or handheld gadgets with a block‑style battery:
- Inspect contacts for dirt or burn marks. Clean with isopropyl alcohol.
- If you have a multimeter and know the pack’s rated voltage, measure across the terminals—if it reads far below spec, the pack may be dead.
- Consider long‑term storage practices.
- Remove batteries from devices you don’t plan to use for months.
- Store them in a cool, dry place (not in direct heat or humidity) to reduce leakage risk.
Restoring clean, solid battery contacts is one of the fastest, lowest‑risk repairs—and it often brings “dead” gadgets right back to life.
Conclusion
Most electronics don’t fail because of exotic, unfixable problems. They fail because dust chokes cooling systems, cables fatigue, buttons get gummy, jacks fill with lint, and batteries leak or lose contact. With a cautious mindset and simple tools, you can solve many of these issues at home.
Before you write off a gadget or schedule a repair visit, walk through these five steps: trace the power path, clean and restore buttons, stabilize audio jacks and cables, cool overheating devices, and refresh battery contacts. Each fix is practical, repeatable, and a skill you can reuse across multiple devices.
Share this guide with friends who are about to toss “broken” gear—you might help them save money, reduce e‑waste, and gain the confidence to tackle the next small repair on their own.
Sources
- [U.S. Consumer Product Safety Commission – Electrical Safety Tips](https://www.cpsc.gov/safety-education/safety-guides/electrical) - Official guidance on staying safe when working with electrical products at home
- [iFixit Repair Guides](https://www.ifixit.com/Device) - Model‑specific disassembly and repair instructions for laptops, phones, game consoles, and more
- [Dell Support – Cleaning Your Computer](https://www.dell.com/support/kbdoc/en-us/000132423/how-to-clean-your-computer) - Practical manufacturer advice on dust removal and safe cleaning of vents and components
- [Harvard University – Electronics Workshop Safety Guidelines](https://computerscience.harvard.edu/files/computerscience/files/electronics-lab-safety-handout.pdf) - Lab‑style safety recommendations applicable to DIY electronics work
- [Energizer – Battery Care and Storage Tips](https://www.energizer.com/about-batteries/battery-care-and-storage) - Official guidance on safe handling, storage, and leak prevention for household batteries
Key Takeaway
The most important thing to remember from this article is that this information can change how you think about Electronics.


