Electronics usually fail at the worst possible moment—right before a deadline, in the middle of movie night, or when you really need that device to just work. The good news: a lot of those “it’s dead” moments are fixable with basic tools, patience, and the right steps. This guide walks through five practical, step-by-step repairs that DIY enthusiasts can safely tackle at home. Each one is focused on common failures you’ll actually see, with clear directions and built-in safety checks.
1. Reviving a “Dead” Laptop That Won’t Power On
When a laptop suddenly won’t turn on, it’s tempting to assume the worst. In reality, many “dead” laptops have power or reset issues you can fix in minutes.
Tools you may need: small Phillips screwdriver, plastic spudger or guitar pick, compressed air.
Step-by-step:
Do a full power reset
- Unplug the charger. - Remove the battery (if it’s removable). - Press and hold the power button for 15–20 seconds to discharge residual power. - Reconnect the charger (leave the battery out for now) and try powering it on.
Check the charger and charging port
- Confirm the outlet works by plugging in another device. - Look for any damage or fraying on the power brick or cable. - Check the laptop’s DC jack for wobbling, debris, or burned smell. - If the power brick has an indicator light, make sure it turns on. If not, try a known-good, compatible charger if you can.
Look for life signs (even if the screen is black)
- Turn it on and listen for fans or hard drive spin. - Watch for keyboard backlight or status LEDs. - If you hear or see signs of life but the screen is dark, connect an external monitor or TV with HDMI/DisplayPort to test if it’s a display issue.
Reseat RAM (common cause of “won’t start”)
- Disconnect power and battery, then hold the power button for 10 seconds. - Remove the bottom panel (usually Phillips screws). - Locate the RAM modules, push the side clips outward, and remove them. - Gently clean contacts with a soft, dry cloth (no liquids). - Reseat the RAM firmly until the clips click, reinstall the panel, and try powering on.
Clean vents to prevent repeat failures
- While the back is open, blow out dust from vents and the fan with short bursts of compressed air. - Overheating from blocked vents can cause sudden shutdowns and “dead” behavior until the system cools.
If the laptop still doesn’t respond—no lights, no fan, no warmth at the charger port—there may be a failed internal power circuit or DC jack that usually requires professional repair.
2. Fixing a Smartphone That Won’t Charge (Loose or Dead Port)
A “finicky” charging port is one of the most common smartphone problems. Before you blame the battery, it’s worth checking for simple, fixable issues.
Tools you may need: wooden or plastic toothpick, flashlight, isopropyl alcohol (90%+), microfiber cloth, soft brush.
Step-by-step:
Rule out the easy stuff
- Test with two different cables and two different chargers—ideally including one original-brand charger. - Try a different outlet or power strip. - If your phone supports wireless charging, test that; if wireless works but cable doesn’t, the port is the likely culprit.
Inspect and clean the charging port
- Turn the phone off completely. - Use a flashlight to look into the port. Lint and pocket dust often pack tightly and block the connector. - Use a wooden or plastic toothpick (never metal) to gently scrape out debris. Work slowly and carefully to avoid bending the connector pins. - Blow out loose debris with gentle puffs of air (avoid canned air at full blast directly into the port).
Check for corrosion and sticky residue
- If you see greenish or white residue, there may be mild corrosion from moisture. - Lightly dampen a corner of a microfiber cloth with isopropyl alcohol (not dripping) and gently clean around the port exterior. Do not pour liquid into the port. - Let the phone sit powered off for at least 30 minutes to ensure any moisture evaporates before testing.
Test for “wiggle” and angle charging
- Plug in a cable and gently move the connector up/down/sideways. - If it only charges at a certain angle, the port may be partially detached from the board. - Light movement is normal; obvious looseness usually means it needs a proper re-solder or port replacement, which is more advanced.
Optimize software and battery settings to protect the fix
- Check the battery health section (on iOS or some Android devices) and enable optimized charging if available. - Restart the phone after cleaning and ensure it detects the charger promptly. - Avoid cheap, unregulated chargers—they can damage ports and internal power circuits over time.
If cleaning doesn’t improve charging at all, and other cables/chargers don’t help, the internal port or power IC may be damaged. At that point, a repair shop or manufacturer service is the safer route than board-level DIY.
3. Bringing a “Dead” TV Back: No Picture, Maybe Sound
Flat-screen TVs that suddenly go dark often have a simpler problem than a totally dead motherboard. Backlight, input, or settings issues are surprisingly common.
Tools you may need: flashlight, remote with new batteries, small Phillips screwdriver (for deeper inspection).
Step-by-step:
Check power and external devices first
- Confirm the TV’s power indicator is lit or responds when you press the power button. - Make sure the power cable is fully seated at both the outlet and the TV. - Bypass power strips or surge protectors; plug directly into a known-good wall outlet.
Look for a faint image (backlight test)
- Turn the TV on and switch to a source you know should show video (a streaming device, game console, etc.). - In a dark room, shine a flashlight closely and at an angle on the screen. - If you see a very faint image, the backlight may be dead while the image electronics still work.
Verify input and settings
- Press the “Input” or “Source” button on the remote and cycle through all inputs. - Double-check that your device (console, streaming stick, cable box) is turned on. - Try a different HDMI cable and different HDMI port. HDMI failures are extremely common.
Basic power board reset (safe level DIY)
- Unplug the TV from power. - Press and hold the TV’s physical power button (not the remote) for 15–20 seconds. - Leave it unplugged for at least 5 minutes. - Plug back in and power on again.
Inspect for obvious internal damage (advanced but doable)
- Unplug the TV and let it sit for 15–20 minutes—TVs can hold dangerous voltages. If you’re not comfortable, skip this step. - Remove the back panel screws and lift the panel carefully. - Look for bulging or leaking capacitors (tops should be flat, not puffed up), burn marks, or obviously disconnected cables between boards. - Reseating loose ribbon cables and connectors (by unplugging and firmly replugging) can sometimes restore picture, but avoid forcing anything.
If you see clear damage on the power or backlight board, those boards are often replaceable as individual parts. However, mains-voltage work inside TVs carries risk; if you’re not confident, take photos and consult a pro rather than experimenting.
4. Saving a Laptop or Keyboard After a Liquid Spill
Spills are panic-inducing, but how you respond in the first minutes can make the difference between a ruined device and a minor scare.
Tools you may need: microfiber cloths, isopropyl alcohol (90%+), small screwdriver set, silica gel packets or dry rice alternative (like dry oats or clean, dry cloths).
Step-by-step (laptop or external keyboard):
Kill the power immediately
- Unplug the device. - If it’s a laptop, hold the power button until it shuts down. - If the battery is removable, take it out. - Do not press keys repeatedly; that can push liquid deeper into the device.
Flip and drain
- For laptops: open the lid, turn it upside down in an inverted “V” or tent position to let gravity pull liquid out, not deeper in. - For external keyboards: flip them upside down and gently shake out any excess liquid. - Blot visible liquid with a dry microfiber cloth—don’t wipe it across components.
Disassemble what you safely can
- For laptops with easy bottom access, remove the back cover. - Disconnect the battery if it uses a simple connector. - For external keyboards, remove keycaps (if they’re designed to come off) and the back shell if it’s held by obvious screws.
Clean sticky or corrosive liquid
- Water is bad; sugary drinks are worse. Sugars and acids corrode and leave residue. - Lightly moisten a microfiber cloth with isopropyl alcohol and gently clean affected areas. - Avoid soaking; you’re using alcohol as a cleaner and drying agent, not a bath.
Dry completely and test
- Leave the device in a warm, dry, well-ventilated place for at least 24–48 hours. - Silica gel packets around (not inside) the device can help absorb moisture. - Do not use hair dryers on high heat—this can warp plastic or damage components. - After drying, reconnect the battery, reassemble, and test. - If keys don’t work or are sticky, you may need to replace the keyboard assembly; many laptops allow this as a separate part.
If the device behaves erratically or won’t power after a spill, internal corrosion may already be advanced. Professional cleaning with ultrasonic equipment is sometimes the only way to rescue boards at that stage.
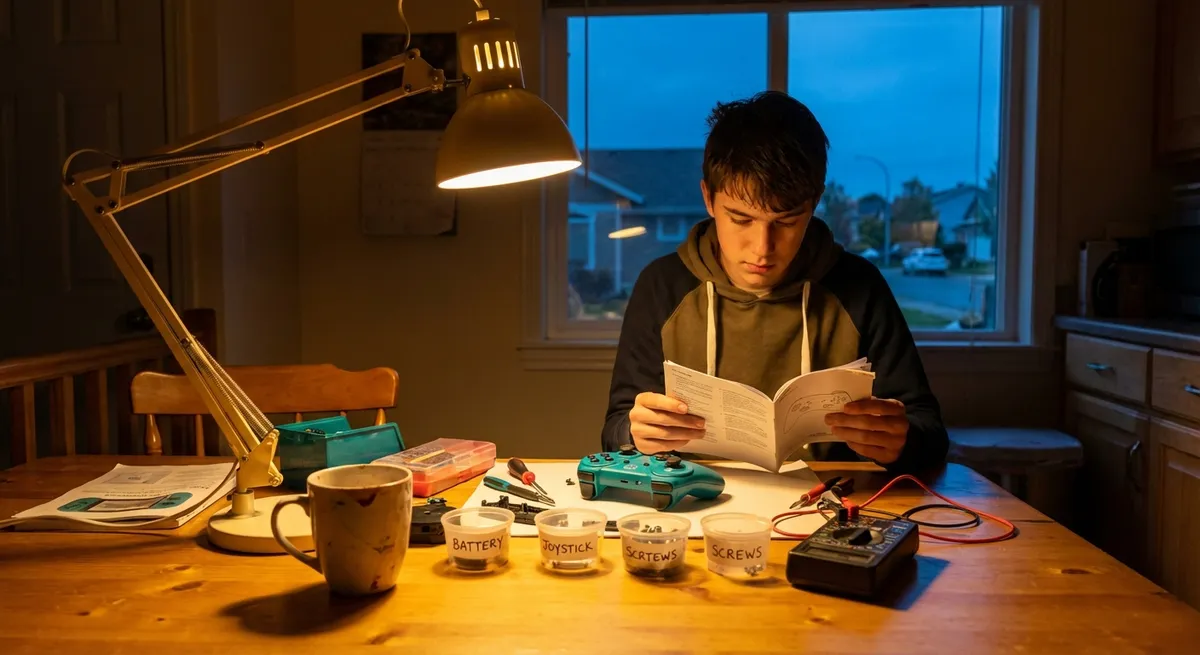
5. Quieting an Overheating Console or PC Before It Cooks Itself
Game consoles and PCs that get loud, hot, or suddenly shut down under load are usually warning you: cooling is failing. Overheating shortens component life, but it’s often fixable with basic maintenance.
Tools you may need: compressed air, Phillips screwdriver set, plastic spudger, new thermal paste (for advanced users), small brush.
Step-by-step:
Check the basics: airflow and placement
- Make sure vents are not blocked by walls, cabinets, or dust. - Move the console or PC so it has several inches of clear space on all sides. - Avoid putting consoles in closed TV cabinets where heat builds up.
Clean external vents first
- Power down and unplug the device. - Use compressed air in short bursts at an angle to blow dust out of vents. Avoid spinning fans at high speed with air; hold them still with a plastic tool if possible. - Wipe exterior grilles with a dry microfiber cloth.
Open the case for deeper cleaning (where allowed)
- Many consoles and PCs are designed to be opened with common tools; check for warranty stickers before you proceed. - Remove panels to expose fans, heatsinks, and dust filters. - Clean dust filters with a soft brush or rinse with water (only if removable and fully dried before reinstalling). - Blow dust off fans and heatsinks with compressed air, holding the fan blades steady.
Check fans for smooth operation
- After cleaning, gently spin each fan with a finger. - Any grinding, wobbling, or resistance suggests a failing fan that should be replaced. - Replacement fans for many consoles and GPUs are sold as drop-in parts; swap them carefully, matching connector types and screw positions.
Refresh thermal paste (advanced but effective)
- If you’re comfortable with more advanced work, replace the thermal paste between CPU/GPU and heatsink: - Carefully remove the heatsink, noting screw locations and order. - Clean off old paste from both surfaces with isopropyl alcohol and a lint-free cloth. - Apply a small pea-sized dot of fresh thermal paste, then reattach the heatsink evenly, tightening screws in a crisscross pattern. - Proper paste and good contact can dramatically lower temperatures and fan noise.
After reassembly, monitor temperatures using built-in tools (on PC) or by observing whether shutdowns and fan roaring stop during normal use. Persistent overheating after cleaning and paste refresh can indicate failing components or inadequate case airflow design.
Conclusion
Most electronics don’t go from “perfect” to “trash” without passing through a stage where smart DIY can still save them. Power resets, careful cleaning, basic disassembly, and visual inspection handle a surprising number of laptop, phone, TV, and console issues. Work slowly, keep safety first (especially with anything connected to mains power), and know when to stop if you hit live high-voltage areas or tightly packed boards. When in doubt, combine your own troubleshooting with clear notes or photos so a repair tech can pick up where you left off instead of starting from scratch.
Sources
- [U.S. Consumer Product Safety Commission – Electrical Product Safety](https://www.cpsc.gov/Safety-Education/Safety-Education-Centers/Electrical-Safety) – Guidance on staying safe when working with consumer electronics and mains power
- [Apple Support – If your Mac won’t turn on](https://support.apple.com/en-us/HT204267) – Official troubleshooting steps for “dead” laptops that inform safe power-reset practices
- [Samsung – How to clean the charging port of your Galaxy device](https://www.samsung.com/us/support/answer/ANS00079044/) – Manufacturer instructions on safely cleaning debris from phone charging ports
- [iFixit Repair Guides](https://www.ifixit.com/Device) – Step-by-step teardown and repair procedures for laptops, phones, consoles, and TVs, including fan, port, and board replacements
- [NIST – Electronics Reliability and Thermal Management](https://www.nist.gov/programs-projects/electronics-reliability-and-thermal-management) – Background on heat-related failures and why cleaning and thermal maintenance matter
Key Takeaway
The most important thing to remember from this article is that this information can change how you think about Electronics.


