If your favorite gadget suddenly goes silent, glitches out, or refuses to power on, you don’t always need a new one—or a repair shop bill. With a bit of patience, basic tools, and a methodical approach, you can solve many common electronics problems at home. This guide walks through five practical, step‑by‑step repair tips that DIY enthusiasts can use to diagnose and fix typical issues safely and confidently.
Before You Start: Safety and Setup
Repairing electronics isn’t just about having the right screwdriver—it’s about working safely and systematically.
First, always disconnect power. Unplug devices or remove batteries before opening anything. For devices that store charge (like TVs, monitors, power supplies, and microwaves), be aware that capacitors can hold dangerous voltages even after the device is off. If you’re not sure whether something is safe to open—especially mains‑powered equipment with big capacitors—stop and stick to external checks or consult a professional.
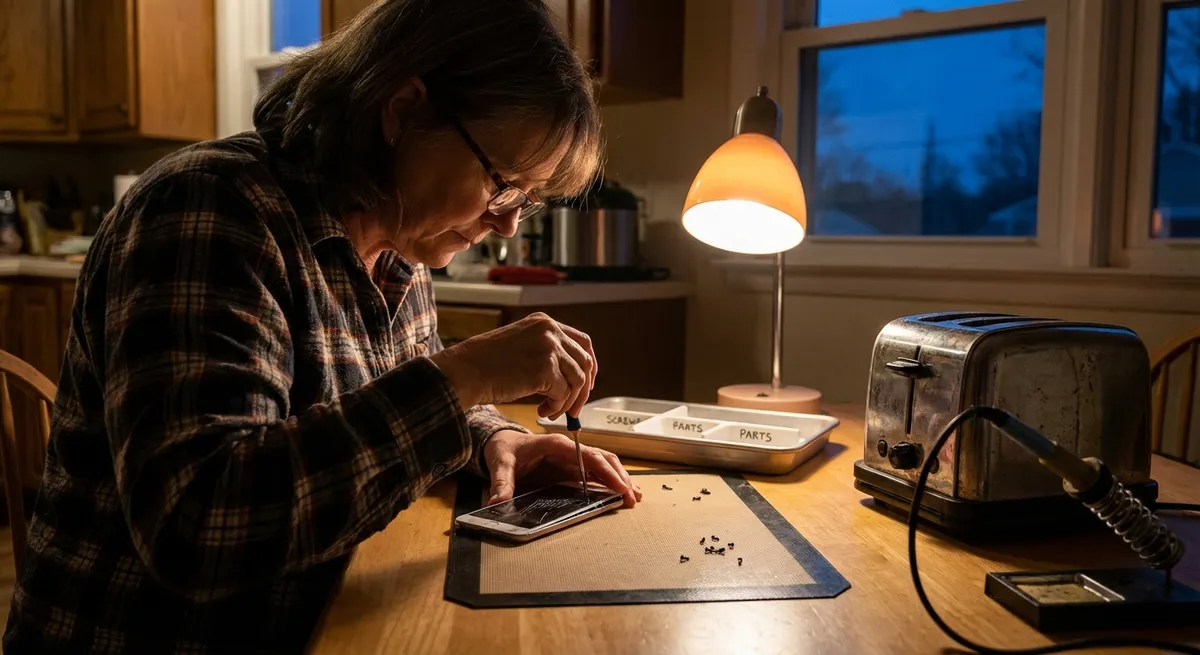
Set up a clear, well‑lit workspace with a flat surface and small containers or trays for screws. Take photos as you go so you can reverse the process later. Use the right tools: precision screwdrivers, plastic spudgers, tweezers, and, if you’ll be soldering, a temperature‑controlled iron and lead‑free solder. If possible, use an anti‑static wrist strap or at least touch a grounded metal object to discharge static before handling internal components, especially in PCs, laptops, and game consoles.
Finally, get familiar with your device. Look up the exact model number and search for an official user manual or teardown guides online. Even if you don’t follow them exactly, they give you a roadmap for hidden clips, screws, and fragile connectors.
Tip 1: Revive “Dead” Gadgets with Power Path Debugging
When a device will not turn on at all, many people assume the worst. In reality, the power path is often the culprit—and it can be surprisingly fixable.
Start at the source. If the device is battery‑powered, remove the batteries and check for corrosion (white, crusty deposits) on the contacts. Clean mild corrosion with a cotton swab lightly dampened with isopropyl alcohol (at least 70%), then dry thoroughly. For heavier corrosion, you can gently scrape with a small plastic tool or a fiberglass pen, being careful not to damage the metal. Replace with fresh, known‑good batteries.
For devices with wall adapters, test the outlet first using another device or a simple outlet tester. Then verify the power adapter: check for kinks, cuts, or loose plugs. If you have a multimeter, set it to DC voltage and measure the output against the rating on the adapter label; a reading far below the specified voltage is a red flag. Try a compatible spare adapter (matching voltage and equal or higher current) if you have one—this alone often “magically” revives the device.
If the device has a removable battery pack (like some laptops, cameras, or older phones), power it from the charger alone if possible, or test with another battery if you can borrow or buy one. Many laptops and game consoles have a “reset” pinhole or button—search your specific model plus “reset” and follow the official procedure. Only after methodically working through the entire power path should you suspect deeper board‑level issues.
Tip 2: Rescue Intermittent Devices with Connector and Port Cleaning
Glitchy behavior—charging only when the cable is at a certain angle, audio cutting in and out, or screens that flicker when you nudge the device—often points to dirty or worn connectors, not failed internal components.
Start simple: inspect the ports. Use a flashlight to look inside USB, HDMI, charging, and headphone jacks. Look for dust, pocket lint, or signs of bent pins. To clean, power down the device and remove any power source. For charging and headphone ports, gently loosen debris with a wooden or plastic toothpick (never metal), then use compressed air to blow out remaining dust. Avoid canned air at extreme angles to prevent propellant from spraying into the device.
For external connectors (like HDMI plugs, USB plugs, or audio jacks), wipe them with a lint‑free cloth lightly moistened with isopropyl alcohol. Let them dry completely before reconnecting. If you suspect oxidation on contacts (slightly dull or darkened metal), a few insert‑remove cycles can sometimes scrape enough off to restore a good connection, but don’t force anything.
Inside devices like laptops or game consoles, ribbon cables and small board‑to‑board connectors can come slightly loose after drops, heat cycles, or amateur repairs. If you open a device (and it’s safe to do so), gently press each connector straight down or reseat ribbon cables by lifting the locking tab, reinserting the cable, and closing the tab again. Take pictures first so you don’t misroute anything on reassembly.
Tip 3: Fix Overheating and Random Shutdowns with Proper Cooling Maintenance
If your laptop, game console, or desktop PC gets hot, loud, and then randomly shuts down or throttles performance, overheating is a likely cause. Dust build‑up and dried‑out thermal paste are two common problems DIYers can address.
Start externally. Clean all vents and grills with a soft brush and compressed air, blowing air across (not straight down into) vents to avoid packing dust deeper. Make sure devices have space around them—no soft surfaces blocking vents—and that fans can draw in and exhaust air freely.
For a deeper fix, open the device if you’re comfortable and it’s safe. Disconnect power and remove the battery if possible. Access the fan and heatsink area; this usually only requires removing the bottom panel on laptops or the side panel on desktops. Hold the fan blades in place with a plastic tool while using compressed air so you don’t spin them excessively, which can damage bearings or generate voltage.
If you’re up for an intermediate‑level repair, consider renewing thermal paste on CPUs or GPUs in older devices. Carefully remove the heatsink (following a guide for your exact model), clean old paste from both chip and heatsink with isopropyl alcohol and a lint‑free cloth, then apply a small pea‑sized amount of new thermal compound before reinstalling. Tighten screws gradually in a cross pattern to apply even pressure. After reassembly, monitor temperatures using manufacturer software or reputable tools; you should see lower idle and load temperatures and fewer thermal shutdowns.
Tip 4: Restore Buttons and Keyboards with Contact Cleaning and Reseating
Stuck, unresponsive, or double‑pressing buttons can make otherwise healthy electronics nearly unusable. Fortunately, many button and keyboard issues come down to dirt, spilled liquids, or worn contact points.
For remote controls, game controllers, and simple devices, open the case (usually with a small Phillips screwdriver and gentle prying). Take note of the orientation of the rubber button membrane and any small parts. Clean the rubber pads and the circuit board’s contact points with isopropyl alcohol on a cotton swab or microfiber cloth; avoid soaking. Let everything dry completely, then reassemble. This often restores failed buttons that previously required “just the right angle” or a hard press.
Laptop keyboards are trickier. For sticky or crunchy keys after a small spill (water, soda, crumbs), start by shutting down the laptop, unplugging it, and removing the battery if possible. Turn it upside down and gently shake out loose debris. Use compressed air between keys, then lightly wipe the surface with a barely damp cloth (water or a mild electronics‑safe cleaner), followed by a dry cloth.
Individual keycap removal and deep cleaning vary widely by model; some keys are easy to unclip, while others break easily. Always search for your exact model plus “keycap removal” before attempting. If multiple keys fail in the same area, the keyboard ribbon cable might be loose—opening the laptop and reseating the keyboard connector can sometimes solve the problem. For major liquid spills or entire rows of dead keys, replacement of the keyboard module is often more effective than trying to repair each contact.
Tip 5: Tame Audio Issues with Signal Tracing and Simple Component Swaps
Distorted sound, no audio from one side, or random crackling can stem from everything from bad cables to failing jacks. A systematic approach can pinpoint where the problem lives.
Begin by isolating variables. Test the same headphones or speakers on another device; then test different headphones or speakers on the original device. Swap audio cables (aux, RCA, optical, HDMI) one at a time. If the issue moves with the headphones or cable, that accessory is the culprit. If it stays with the device, focus there.
For portable speakers, soundbars, or amps with analog jacks, gently insert and remove the plug several times to clear minor oxidation. If one channel is dead but the other works, slightly wiggling the plug in the jack (while playing quiet audio) may reveal an internal jack with worn or bent contacts. Sometimes you can open the device and carefully bend the contacts back into place, but often the long‑term fix is replacing the jack module entirely.
Inside desktops or component systems, inspect speaker terminals and internal wiring for loose connections or frayed cables. Cold solder joints—dull, cracked solder where a wire or jack meets the board—can also cause intermittent audio. If you’re comfortable with soldering, reflowing these joints by heating them and adding a small amount of fresh solder can restore a solid connection.
For devices with digital audio paths (HDMI, USB audio), reinstall or update drivers, check audio output settings, and verify that the correct device is selected as the output. Uninstalling and reinstalling audio devices in the operating system’s device manager can clear up software‑side glitches that look like hardware failures.
Conclusion
Many electronics “failures” are really power, connection, heat, or contact problems that a patient DIYer can fix with basic tools. By approaching each issue systematically—starting with power checks, cleaning and reseating connectors, maintaining cooling, reviving buttons, and methodically tracing audio paths—you can bring a surprising number of gadgets back from the brink.
Respect your limits: anything involving high voltage, swollen batteries, or complex board‑level faults is best left to professionals. But for everyday laptops, controllers, speakers, remotes, and home gadgets, these practical steps give you a reliable starting framework. The more you practice, the better you’ll get at spotting patterns—and the more devices you’ll save from the trash.
Sources
- [U.S. Consumer Product Safety Commission – Safety Tips for Electronics](https://www.cpsc.gov/Safety-Education/Safety-Guides/electronics) - Guidance on safe handling and use of consumer electronic products
- [iFixit Repair Guides](https://www.ifixit.com/Guide) - Step‑by‑step teardown and repair guides for thousands of electronics, good for model‑specific reference
- [Apple Support – Clean and care for your Mac, iPhone, iPad, and more](https://support.apple.com/en-us/HT204172) - Official instructions on cleaning ports, surfaces, and components safely
- [Intel – How to Monitor and Manage System Temperatures](https://www.intel.com/content/www/us/en/gaming/resources/how-to-monitor-and-manage-system-temperatures.html) - Background on overheating, PC cooling, and temperature management
- [Harvard Environmental Health & Safety – Electrical Safety](https://www.ehs.harvard.edu/programs/electrical-safety) - General principles and precautions relevant to working around electrical and electronic equipment
Key Takeaway
The most important thing to remember from this article is that this information can change how you think about Electronics.


