Most “dead” gadgets aren’t actually dead—they’re just stuck behind one small, fixable problem. Before you send your electronics to recycling (or pay for an expensive repair), there are a few smart, low‑risk steps you can take that often bring them back to life.
This guide walks through five practical, step‑by‑step repair tips that DIY enthusiasts can use on a wide range of devices—laptops, game consoles, speakers, remotes, routers, and more. No engineering degree required, just patience, basic tools, and a focus on safety.
Start With Power: Systematic Checks for “Dead” Devices
When a device won’t turn on, you’re often dealing with a power delivery issue—not a fatal internal failure. Running through a consistent checklist can save hours of guesswork and unnecessary part swaps.
- Confirm the outlet and strip are good.
- Plug in a known‑working device (like a phone charger) to the same outlet.
- If you’re using a power strip or surge protector, try another one or go directly to the wall.
- For switched outlets (common in living rooms/bedrooms), flip wall switches on and off to see if they control the plug.
- Inspect the power cable and adapter.
- Look for frayed insulation, burn marks, kinks, or crushed sections.
- Gently wiggle the plug where it meets the brick and at the device side—if power cuts in and out, the cable or connector is suspect.
- If possible, test with a known‑good compatible charger/adapter from another device.
- Check for indicator lights or sounds.
- Many adapters have a small LED; if it’s off or flickering, the adapter may have failed.
- On laptops or game consoles, watch for charge lights, fan spin, or brief flashes when you press the power button.
- Try a “power reset” on the device.
- Unplug the device and remove the battery if it’s user‑removable.
- Hold the power button for 15–30 seconds to discharge residual power.
- Reconnect power (and battery, if applicable) and try again. This trick is often effective with laptops, routers, streaming boxes, and monitors.
- Test voltage when possible (intermediate skill).
- Use a basic digital multimeter (DMM) to measure the adapter’s output voltage, comparing it to the label on the power brick.
- If the reading is far off (or zero), the adapter is likely bad—replacing it is often cheaper and safer than opening the device.
If you find the fault is outside the device (bad strip, bad adapter, wrong outlet), you’ve solved the problem without opening anything—an ideal outcome for DIYers who want quick wins with minimal risk.
Clean Contacts and Connectors: Fix Glitches Without Replacing Parts
Intermittent connections—crackling audio, random disconnects, batteries that “don’t last”—are often caused by dirty or oxidized contacts. A careful cleaning can restore full function without any new components.
- Gather safe cleaning supplies.
- 90%+ isopropyl alcohol (higher is better), cotton swabs, and lint‑free cloths.
- Non‑lubricating electrical contact cleaner (optional but useful).
- Toothpicks or soft brushes for loosening debris—avoid metal tools.
- Remove power and batteries before cleaning.
- Unplug the device and remove any batteries or power sources.
- For rechargeable devices, power them down completely first.
- Clean battery terminals and holders.
- For mild corrosion (white or green residue) in remotes, toys, or controllers, start by gently scraping loose buildup with a wooden toothpick.
- Dampen a cotton swab with isopropyl alcohol and wipe metal contacts until they shine.
- Let everything dry fully before reinstalling batteries.
- Refresh audio, USB, and HDMI ports.
- Power off the device.
- Blow out dust with a can of compressed air (short bursts, can upright).
- Lightly dampen a corner of a lint‑free cloth with isopropyl alcohol and clean the plug (not the port) first. Insert/remove the plug a few times to help wipe internal contacts.
- For stubborn issues, a small amount of contact cleaner on a specialized cleaning swab or card can help, but avoid soaking the port.
- Reseat removable modules and cards.
- On laptops and desktops, RAM and storage drives can become slightly loose or oxidized at the connectors.
- Power down, unplug, and (for desktops) flip the power switch on the power supply off.
- Carefully remove the module (RAM, SSD, Wi‑Fi card), inspect for dirt, then gently reinsert it until fully seated.
- This often cures random crashes, failures to boot, or missing hardware.
Many “mysterious glitches” are just poor connections. A careful clean can make a flaky device behave like new, with no parts ordered and no complex disassembly.
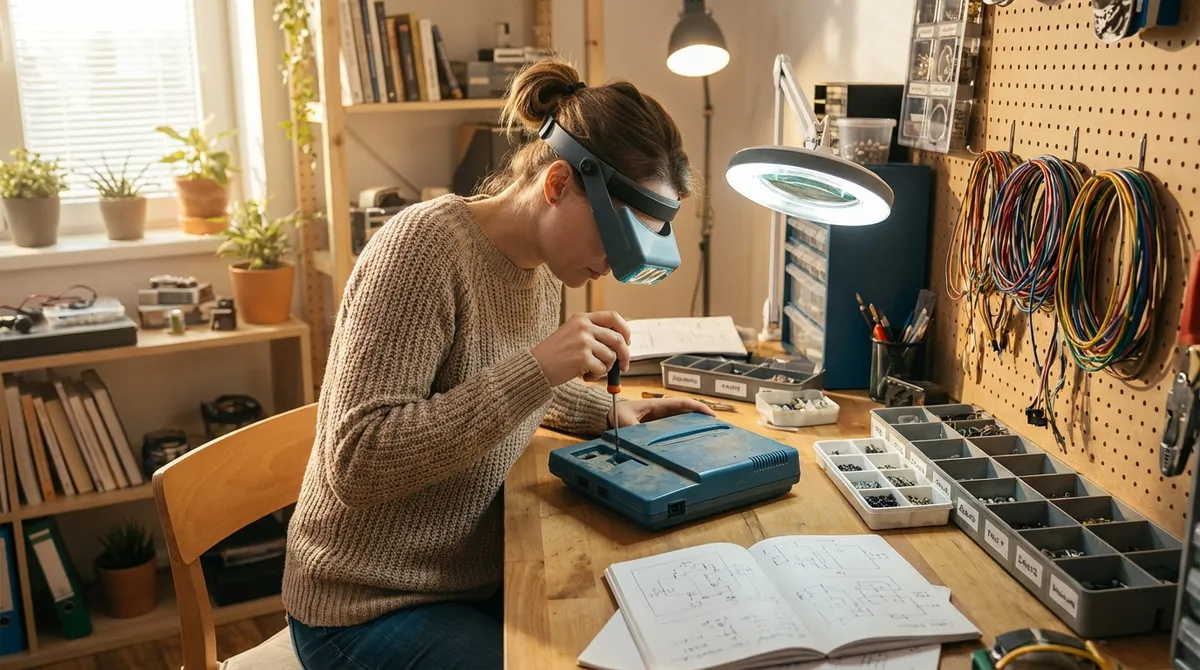
Open Safely: Basic Disassembly Habits That Prevent New Damage
If cleaning external contacts and power checks don’t solve the problem, you may need to open the device. How you do this often matters more than what you do once you’re inside.
- Document before you touch anything.
- Take clear photos from multiple angles as you go—outside, then each stage of the inside.
- Lay screws out on a white sheet or magnetic tray, grouping them by step and location.
- Mark cable locations with painter’s tape or small labels.
- Use the right tools and avoid brute force.
- Precision screwdriver set, plastic spudgers, and tweezers are worth the small investment.
- Avoid prying with knives, metal screwdrivers, or credit cards—they can cut cables and gouge boards.
- Look up a teardown or repair guide for your exact model on reputable sites before starting; hidden clips and screws are common.
- Discharge static and protect the board.
- Work on a non‑carpeted surface if possible.
- Touch a grounded metal object (like a plugged‑in but switched‑off PC case) before handling circuit boards.
- Avoid touching chips and contacts directly; hold board edges instead.
- Disconnect internal batteries early.
- Many modern electronics have internal batteries even if they’re “unplugged.”
- As soon as the device is open and the connector is visible, disconnect the battery first.
- This reduces the risk of shorts while you’re unplugging screens, speakers, or other modules.
- Back out the way you came in.
- Reassemble in reverse order, using your photos as a map.
- Double‑check every ribbon cable and connector is firmly seated before closing.
- If leftover screws remain, don’t ignore them—open back up and find where they belong; missing screws can cause strain or poor grounding.
Developing careful disassembly and reassembly habits prevents a minor repair attempt from turning into permanent damage—and makes each future project easier.
Target Heat and Dust: Cooling Fixes for Laptops and Consoles
Overheating is a major reason electronics crash, throttle performance, or shut down unexpectedly. Dust buildup and worn thermal paste are common, fixable problems in laptops, desktops, and game consoles.
- Recognize overheating signs.
- Fans running at full speed constantly.
- Device suddenly shutting down during games, video editing, or streaming.
- Surfaces becoming uncomfortably hot to touch; performance suddenly dipping.
- Clean vents and fans from the outside first.
- Power down, unplug, and if possible, remove the battery.
- Use compressed air in short bursts to blow dust out of vents.
- For laptops, aim the air at intake and exhaust vents while holding the fan blades still with a toothpick through the grill (prevent overspinning).
- Deep clean the cooling system (intermediate).
- Open the device using a model‑specific guide.
- Carefully remove dust bunnies around the fan and heatsink with a soft brush and short air bursts.
- Avoid spinning fans with compressed air like a windmill—this can damage bearings.
- Refresh thermal paste (if you’re comfortable).
- Remove the heatsink assembly following instructions closely.
- Clean old thermal paste from the CPU/GPU and heatsink base using isopropyl alcohol and lint‑free wipes.
- Apply a small pea‑sized dot of quality thermal paste at the center of each chip and reinstall the heatsink evenly, tightening screws in a cross pattern.
- Improve airflow in everyday use.
- Use laptops on hard, flat surfaces rather than beds or couches.
- Ensure consoles and set‑top boxes have clearance at the sides and back; don’t trap them in closed cabinets.
- Consider a laptop cooling pad if you regularly run heavy workloads.
These steps can dramatically lower temperatures, add years of life to internal components, and quiet noisy fans—all from a few tools and some careful cleaning.
Restore Buttons, Keys, and Switches: From Stuck to Responsive
Sticky or unresponsive buttons can make an otherwise healthy device nearly unusable. Whether it’s a game controller, TV remote, or keyboard, a few targeted fixes can restore normal control.
- Pinpoint whether it’s hardware or software.
- On keyboards, see if the key works in BIOS, a different computer, or a simple text editor.
- On controllers, test in another game or device, or use the manufacturer’s calibration tool.
- If the input is recognized sometimes but not others, it’s often a mechanical or contact issue.
- Try surface cleaning first.
- Power off and disconnect the device.
- Soak a cloth or cotton swab in isopropyl alcohol (not dripping) and wipe around the sticky button or key.
- Press the button repeatedly while cleaning to work alcohol into the gap and dissolve grime.
- Let dry fully and test again.
- Remove keycaps or open the device, if designed for it.
- For many mechanical keyboards, gently pull keycaps straight up using a keycap puller.
- Clean around and under the switch with compressed air and swabs; avoid flooding the switch with liquid.
- For remotes or controllers, remove screws and open the shell carefully; note any rubber membranes or small springs.
- Clean conductive pads and contact points.
- Inside remotes and many controllers, buttons press a rubber pad onto contacts on the circuit board.
- Wipe the rubber pads and the contact points on the board with isopropyl alcohol and a lint‑free swab.
- Allow to dry, then reassemble and test.
- Consider replacement parts for heavily used controls.
- Many controller joysticks, keyboard switches, and mouse buttons are standard components that can be replaced.
- Desoldering and resoldering a switch is an advanced but learnable skill; practice on scrap boards first.
- Once comfortable, you can bring worn controls back to “like new” without replacing the entire device.
Button and key fixes are among the most satisfying repairs—you can literally feel the result every time you use the device.
Conclusion
Most electronics failures are not dramatic board‑level disasters; they’re everyday issues with power, dust, contacts, or mechanical wear. By systematically checking power, cleaning connectors, opening devices safely, tackling heat issues, and restoring physical controls, you can rescue a surprising number of “dead” gadgets.
Start with the lowest‑risk steps and work upward as your confidence grows. With a basic toolkit, some patience, and careful documentation, DIY repair becomes less about “fixing magic boxes” and more about methodically solving small, understandable problems—one successful revival at a time.
Sources
- [U.S. Department of Energy – Tips to Save Energy in Your Home](https://www.energy.gov/energysaver/tips-save-energy-home) - Background on power strips, standby power, and safe power practices that inform basic power troubleshooting.
- [Apple Support – How to clean the outside of your Apple product](https://support.apple.com/en-us/HT204172) - Official guidance on safe cleaning methods and materials for electronic devices.
- [iFixit – Electronics Repair Guides](https://www.ifixit.com/Device) - Model‑specific disassembly and repair guides that illustrate safe opening techniques and common fixes.
- [Intel – Thermal Interface Material Application](https://www.intel.com/content/www/us/en/support/articles/000005753/processors.html) - Detailed recommendations on applying and replacing thermal paste for effective heat transfer.
- [Harvard University – Basic Laboratory Safety and Handling of Chemicals](https://ehs.harvard.edu/book/basic-laboratory-chemical-safety-guide) - General best practices for handling solvents like isopropyl alcohol safely in a home or hobby setting.
Key Takeaway
The most important thing to remember from this article is that this information can change how you think about Electronics.


