If you love taking gadgets apart “just to see how they work,” you’re in the right place. This guide walks through practical, hands-on electronics repair tips you can actually use at your workbench. These aren’t vague “clean it and reboot” suggestions—they’re specific, step‑by‑step checks and fixes for common hardware problems that hit laptops, consoles, speakers, and other everyday devices.
You’ll learn simple, repeatable workflows instead of one‑off hacks, so each repair teaches you skills you can reuse on your next project.
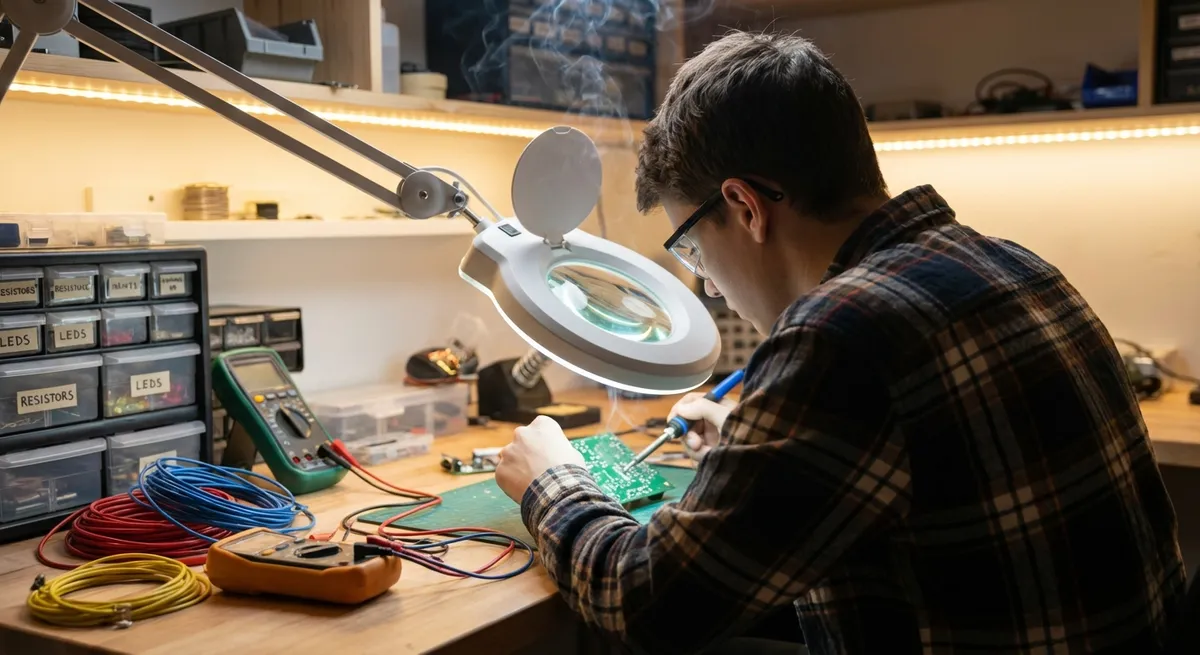
Start Smart: How to Inspect and Power-Test Safely
Before grabbing a soldering iron, you need a repeatable way to inspect and power-test electronics without destroying them—or shocking yourself.
- Unplug and discharge first. Disconnect the device and its power source (battery, power brick, USB). For anything with large capacitors (power supplies, older TVs, some audio gear), leave it unplugged for several minutes and avoid touching high-voltage sections unless you know how to safely discharge them.
- Set up a clean, lit workspace. Use a non-conductive surface (wood, anti‑static mat), good lighting, and small trays or cups for screws. Photograph each step with your phone so you can reverse it later.
- Do a “no tools” visual sweep. Look for burnt areas, cracked connectors, loose cables, corrosion, or bulging components. Gently wiggle ports and sockets—if they move more than they should, note it as a likely failure point.
- Use a multimeter to sanity-check power.
- Verify the power brick or adapter actually outputs the rated voltage.
- Check for continuity (beep mode) on suspect fuses or obvious breaks in traces.
- When safe, measure voltage at key points (battery terminals, power rails marked on the board).
- Only power up in a controlled way. Reconnect power with the device open only if necessary and only if you’re clear on what’s exposed. Keep one hand behind your back when probing powered circuits to reduce shock risk, and never work on mains voltage unless you’re trained for it.
By turning “plug it in and hope” into a structured check, you cut down both on random guessing and on expensive mistakes.
Step 1: Revive Dead Devices With Systematic Power-Path Checks
When a device shows no signs of life—no lights, no fan, no buzz—that doesn’t always mean a dead motherboard. Often, the failure is somewhere simple along the power path.
- Confirm the wall to adapter chain.
- Test a different outlet.
- Try another power strip or plug directly into the wall.
- If possible, use a second, known-good power brick with matching voltage and polarity.
- Check the adapter output.
- Set your multimeter to DC volts.
- Measure across the adapter plug.
- Compare the reading to the label. A significantly low or fluctuating value means the adapter is faulty.
- Inspect the power connector and cable.
- Look for kinks, cuts, or frayed insulation.
- Wiggle the connector while powered and watch for flickering LEDs—this points to a broken wire or worn jack.
- Open the device and locate input protection components.
- Many devices have a small fuse near the power jack or battery connector. Test it with your meter in continuity mode.
- Replace blown surface-mount fuses with same-rating parts if you’re comfortable soldering, or use an inline fuse holder for through-hole styles.
- Test the power button circuit.
- In laptops and consoles, the power button often connects via a small cable or daughterboard. Ensure it’s seated properly.
- Use continuity mode to confirm that pressing the button briefly joins the two contacts.
If you can trace power from the wall to the device’s internal rails, you’ve eliminated a whole category of potential faults before considering more complex board-level issues.
Step 2: Rescue Gadgets From Liquid Spills and Corrosion
Liquid damage scares people away from repair, but much of it is reversible if handled quickly and methodically—especially when the liquid was water or a low-sugar drink.
- Kill power immediately.
- Unplug the device and remove the battery if possible.
- Do not power it on “to test it”—that’s often what causes the real damage.
- Strip down to the affected areas.
- Remove covers, keyboards, and panels until you can see both sides of the board under the spill zone.
- Disconnect ribbon cables and note where they go using photos.
- Neutralize and clean the residue.
- For water/coffee/tea: rinse the affected area with high‑purity isopropyl alcohol (90%+). It displaces water and helps remove dried residues.
- Use a soft brush (antistatic if possible) to gently scrub around IC legs, connectors, and under components where residue collects.
- Address visible corrosion.
- Green or white fuzz on copper pads and connector pins is corrosion. Light deposits can often be brushed away with alcohol and a soft brush.
- Heavier corrosion on pins or small components may require gentle scraping with a fiberglass pen or very fine abrasive, followed by more alcohol cleaning.
- Dry completely before power-on.
- Let the board air-dry for several hours or use a gentle flow of room‑temperature air.
- Do not use ovens, hair dryers on high, or direct heat that can warp plastics or lift pads.
- Inspect connectors and test.
- Look closely at keyboard and display connectors; they’re common failure points after spills.
- Reassemble enough to test power and essential functions, then complete the rebuild if successful.
This routine often revives “dead from spill” laptops, controllers, and remotes—and even when it doesn’t, you’ve stabilized the corrosion and made further board-level repair more feasible.
Step 3: Fix Intermittent Connections With Reflow and Reseating
Glitchy behavior—random restarts, USB dropouts, speakers cutting out when you tap the case—often comes from bad connections rather than bad chips.
- Identify symptom triggers.
- Note if the fault appears when the device is moved, when it’s warm, or when specific ports are used.
- Gently flex the case or tap specific areas (while safe) to see if you can reproduce the issue.
- Reseat every removable connection.
- Open the device and systematically unplug and replug ribbon cables, socketed boards, and modular connectors.
- For ribbon cables, lift the locking tabs rather than yanking the cable; mis-handling these is a common DIY mistake.
- Clean contact surfaces.
- For plug-in connectors, use contact cleaner or a tiny amount of isopropyl alcohol on a lint-free swab.
- For pins that insert into sockets, inserting and removing them several times helps wipe oxidation off the contacts.
- Inspect solder joints on stressed parts.
- Ports (HDMI, USB, power jacks) and big components (transformers, inductors) often develop cracked joints.
- Use a magnifier to look for dull, ring-shaped cracks around pins or joints that move slightly when pressed.
- Reflow suspect joints.
- Heat a soldering iron to the appropriate temp (often ~320–350°C for leaded solder, a bit higher for lead-free).
- Touch the joint with the tip and add a small amount of fresh solder to help it reflow and bond.
- Avoid bridging adjacent pins; use solder wick to remove excess if needed.
- Secure known weak points.
- Once working, consider adding a small amount of epoxy or hot glue around stress-prone ports away from the contacts to reduce motion without gluing moving parts.
For many consoles, audio interfaces, and handhelds, this one pattern—reseat, clean, inspect, reflow—solves issues that look like deep electronics failures but are really just tired connections.
Step 4: Chase Down Overheating and Noise Problems
Fans that roar, devices that shut off mid-game, laptops that feel like hot plates—thermal problems are extremely common and very fixable.
- Confirm it’s a heat-related fault.
- Notice whether problems appear after a few minutes under load (gaming, video editing) but not when idle.
- Use monitoring software (HWMonitor, Core Temp, etc., where applicable) to see if temperatures spike before shutdown or throttling.
- Open up airflow paths.
- Disassemble enough to see the fan and heat sink.
- Use compressed air (short bursts) to blow dust out from inside the device outward, not pushing dust deeper in. Hold the fan still while blowing so it doesn’t overspin.
- Clean and re-paste the heatsink (where applicable).
- Remove the heatsink from the CPU/GPU carefully.
- Clean old thermal paste from both surfaces with isopropyl alcohol and a lint-free cloth.
- Apply a thin, even layer of new thermal paste (about a small pea-sized blob or a thin spread, depending on component size) and reattach with even screw pressure.
- Check fan behavior.
- Spin the fan by hand; it should move smoothly without scraping.
- If it’s noisy, wobbly, or seized, replace it. Some fans are standard sizes; others may be proprietary and sourced from the device or notebook manufacturer.
- Control the environment.
- Ensure vents aren’t blocked by soft surfaces (beds, carpets).
- For desktops and benches, tidy cables to improve airflow and avoid bunching warm components together.
- Address coil whine and buzzing.
- High‑frequency squealing often comes from inductors or coils under load. While not usually harmful, it’s annoying.
- Carefully applying a small amount of non-conductive varnish or hot glue around the offending coil can sometimes dampen vibration—but only if you’re comfortable working that close to live power circuitry and understand the risks.
By treating heat and noise as mechanical and airflow problems first—not just “the fan is loud”—you often get quieter, more reliable gear without spending money on replacements.
Step 5: Replace Common Failure Components With Confidence
Once you’re comfortable opening devices and doing basic diagnostics, replacing common failure parts is the next big unlock. A lot of “dead” hardware just needs a few user-serviceable components.
- Target parts with known wear-out patterns.
- Electrolytic capacitors (especially in power supplies, monitors, audio gear).
- Internal laptop batteries and swollen phone batteries.
- Mechanical parts: fans, switches, rotary encoders, and jacks.
- Spot failing capacitors.
- Bulging or domed tops, leaking brownish residue, or obviously tilted cans are classic signs.
- Note capacitance (µF), voltage rating, and temperature rating printed on the side before ordering replacements.
- Plan your desoldering and replacement.
- Heat both legs of through-hole capacitors one at a time while gently rocking and pulling the part out—or better, use a desoldering pump or braid.
- Clear old solder from holes, insert new capacitors with correct polarity (stripe usually marks negative), and solder from the underside.
- Swap batteries safely.
- Use appropriate tools (plastic spudgers, not metal prybars) to lift glued-in packs.
- Never bend or puncture lithium batteries; if they’re swollen, handle with extra care and follow local recycling guidance.
- Replace fans, jacks, and switches.
- Most fans and jacks are either screwed in or soldered directly. Match the pinout, voltage, and mechanical dimensions when ordering.
- For soldered jacks, add flux before desoldering to make removal easier and reduce pad damage.
- Document every change.
- Take photos before removing parts and after installing new ones.
- Label any wires or connectors you’ve modified so future you (or the next owner) isn’t guessing.
Learning to swap a bad capacitor, fan, or jack turns you from a “board swapper” into someone who can actually extend the life of electronics that would otherwise be e‑waste.
Conclusion
Electronics repair doesn’t have to be a mysterious art reserved for lab coats and oscilloscope wizards. With a structured approach—safe inspection, power-path checks, cleanup, connection repair, thermal fixes, and targeted component replacement—you can bring a surprising number of “dead” gadgets back from the brink.
Treat each repair as a chance to practice a repeatable workflow, not just a one-time fix. Over time, you’ll build a mental library of symptoms and solutions that makes the next project faster, safer, and more satisfying—and you’ll keep a lot of gear out of the landfill in the process.
Sources
- [iFixit Repair Guides](https://www.ifixit.com/Guide) - Step‑by‑step teardown and repair guides for hundreds of electronics, great for seeing internal layouts and typical failure points
- [US Consumer Product Safety Commission – Product Safety & Recalls](https://www.cpsc.gov/Safety-Education) - Official guidance on product safety, including warnings relevant to DIY repairs and electronics handling
- [Electronics Tutorial: Capacitors](https://www.electronics-tutorials.ws/capacitor/cap_1.html) - Educational overview from Electronics-Tutorials on capacitor types, behavior, and failure signs
- [Intel – Thermal and Mechanical Design Guidelines](https://www.intel.com/content/www/us/en/design/guide/thermal-mechanical-design-guide.html) - Technical documentation on managing heat in electronic systems, useful background for understanding overheating issues
- [EPA – Electronics Donation and Recycling](https://www.epa.gov/recycle/electronics-donation-and-recycling) - Guidance on safely disposing of or recycling electronics and batteries you can’t repair
Key Takeaway
The most important thing to remember from this article is that this information can change how you think about Electronics.


