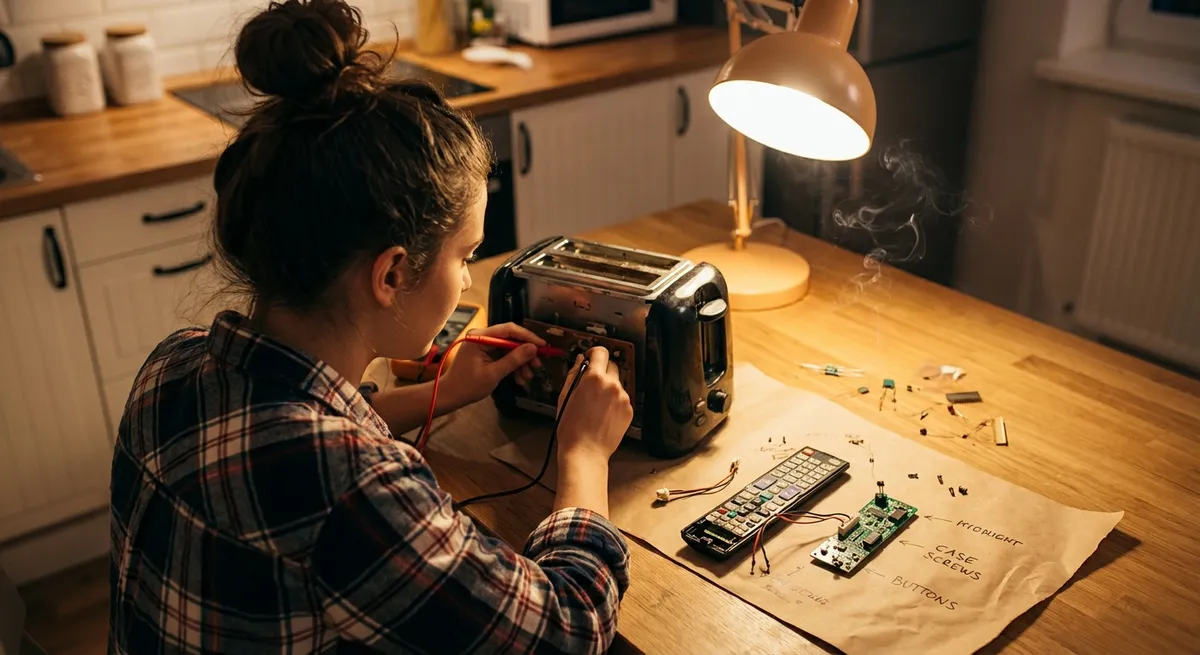
Electronics rarely fail all at once. More often, they start acting “a little weird” long before they die—random shutdowns, loose ports, glitchy screens, batteries that give up early. Learning a few simple, safe repair habits can turn those warning signs into quick wins instead of expensive replacements. This guide walks through five practical, step‑by‑step fixes that DIY enthusiasts can handle with basic tools and a bit of patience.
Before You Start: Safety, Tools, and Smart Prep
Working on electronics isn’t just about having the right screwdriver—it’s about avoiding the kind of mistakes that quietly kill devices or put you at risk.
Use this quick prep checklist before any repair:
Power and batteries
- Unplug the device from the wall. - Power it off completely—don’t just put it to sleep. - Remove removable batteries (including laptop batteries if accessible). - For anything with large capacitors (like some TVs or power supplies), let it sit unplugged for at least 10–15 minutes.
Anti-static basics
- Work on a clean, dry, non-carpeted surface. - Touch an unpainted metal object (like a computer case or metal table leg) before handling internal parts to discharge static. - If you have one, wear an anti-static wrist strap clipped to a grounded metal object.
Essential tools
- Precision screwdriver set (Phillips, flathead, and common “odd” types like Torx) - Plastic spudger or guitar pick for prying open cases - Small brush and microfiber cloth - Isopropyl alcohol (90% or higher) and cotton swabs - Tweezers - Good lighting and a small parts tray or labeled cups
Take photos as you go
- Use your phone to photograph each stage, especially cable routing and screw locations. - This turns reassembly from guesswork into a simple matching game.
With that baseline in place, you’re ready for real-world repairs.
Tip 1: Revive Unreliable Charging Ports on Phones, Tablets, and Laptops
Loose or unreliable charging is one of the most common—and fixable—electronics problems. Often the port isn’t “broken,” it’s just packed with debris or slightly misaligned.
What this helps with:
- Cables that only charge at a certain angle
- “Charging slowly” or “Not charging” messages
- Chargers that feel loose in the port
Step-by-step: Clean and check the charging port
Inspect first
- Power off the device. - Use a bright light and, if possible, a magnifying glass to look into the port. - Look for lint, dust, or anything wedged in the connector.
Remove debris safely
- Use a wooden or plastic toothpick, or a plastic spudger—not metal. - Gently scrape along the bottom and sides of the port, lifting out lint and dirt. - Do not force anything or bend the center pin (especially on USB‑C or micro‑USB).
Blow out remaining dust
- Use a manual air blower or a short burst of compressed air held upright. - Avoid long blasts too close, which can introduce moisture from the can.
Check cable and charger
- Test with a known-good, original or certified cable and charger. - Wiggle the connector gently—if it’s solid and charges consistently, you’re done.
When cleaning isn’t enough
- If the port still feels loose or only works intermittently with multiple cables, the internal port may be physically damaged or desoldered. - At this point, replacing the port usually means motherboard-level work and is best left to a professional repair shop, especially on phones and tablets.
Tip 2: Rescue a “Dead” Laptop That Won’t Power On
A laptop that appears dead doesn’t always have a catastrophic failure. Often, power issues come down to static buildup, a stuck low-level controller, or a failing power brick.
What this helps with:
- No lights, no fan, no display
- Laptop was working recently but suddenly stopped
- Laptop only works sometimes when plugged in
Step-by-step: Power reset and basic diagnosis
Check the outlet and power adapter
- Plug a lamp or phone charger into the same outlet to confirm it works. - Inspect the AC adapter and cable for visible damage or burned spots. - If the power brick has an indicator light, see if it turns on when plugged in.
Remove all power sources
- Unplug the adapter from the laptop. - If the battery is removable, take it out. - Disconnect any USB devices, SD cards, or HDMI cables.
Perform a hard reset (discharge static)
- With the battery removed and adapter unplugged, hold the power button down for 15–30 seconds. - Release the button and let the laptop sit for another 30 seconds.
Reconnect and test
- Reinstall the battery (if removable). - Plug in the AC adapter securely at both ends. - Try powering on normally.
Test with battery removed (if possible)
- Remove the battery again. - Plug in only the AC adapter. - Try to power on. - If it works on AC power without the battery, the battery may be faulty and needs replacement.
Look for life signs
- Fan noise, keyboard backlight, or indicator LEDs are good signs even if the screen stays black. - If the laptop seems to power on but the screen is blank, try connecting an external monitor or TV via HDMI or DisplayPort.
If you still get no response at all (no lights, no fan, no charging indicator), the fault may be in the DC jack, power circuitry, or mainboard—repairs that typically require board-level diagnostics.
Tip 3: Fix Sticky, Unresponsive, or “Ghost Typing” Keys
Keyboards on laptops and external boards often suffer from dust, spills, or worn contacts. Many “bad keyboard” issues can be improved dramatically with careful cleaning.
What this helps with:
- Keys that don’t register unless pressed hard
- Keys that type the wrong character or repeat
- “Ghost typing” when no one is touching the keyboard
Step-by-step: Clean and assess the keyboard
Power down and disconnect
- Shut down the computer. - Unplug external keyboards from USB/Bluetooth. - For laptops, unplug power and remove the battery if accessible.
Surface cleaning
- Turn the keyboard or laptop upside down and gently shake to dislodge loose debris. - Use short bursts of compressed air between keys in a sweeping motion. - Wipe the key tops with a slightly damp microfiber cloth (water or 70–90% isopropyl alcohol).
Target problem keys
- For external keyboards with removable keycaps, gently pry off the problem key with a keycap puller or plastic tool. - Clean the area under the key with a cotton swab lightly dampened with isopropyl alcohol. - Allow to dry fully (a few minutes) before reattaching.
Check software and settings
- On Windows, adjust keyboard repeat and filter keys settings (Control Panel → Keyboard / Ease of Access). - On macOS, check Key Repeat and Delay Until Repeat (System Settings → Keyboard). - Update your keyboard or touchpad drivers from the manufacturer’s website.
After a liquid spill
- Immediately unplug and power down. - Invert the keyboard/laptop to let liquid drain out, and gently blot with paper towels. - Do not power on until completely dry—this may take at least 24–48 hours. - For laptops, serious spills usually warrant professional cleaning or keyboard replacement to prevent corrosion.
If multiple keys in one area permanently fail after cleaning (especially on a laptop), the keyboard membrane itself may be damaged and require replacement, which is often a feasible DIY job on many external and some laptop keyboards.
Tip 4: Clear Up Flickering or No-Signal Problems on TVs and Monitors
Display issues are often blamed on the screen itself, but cables, loose connections, and source devices are frequent culprits—and all are fixable at home.
What this helps with:
- “No signal” messages
- Random flickering, momentary black screens, or color glitches
- HDMI devices dropping out intermittently
Step-by-step: Stabilize your display connection
Confirm the source and input
- Make sure the TV/monitor input matches the device (HDMI1, DisplayPort, etc.). - Test with a different source (e.g., plug in a streaming stick or another computer) to see if the problem follows the display or the original device.
Reseat all cables
- Power off both the display and the source device. - Unplug the video cable from both ends. - Inspect the cable for bent pins, kinks, or damage. - Firmly reconnect, ensuring the connector is fully seated.
Try a different cable and port
- Swap in a known-good cable—HDMI and DisplayPort cables fail more often than most people expect. - Use a different HDMI or video input on the TV/monitor. - If the issue disappears, the original port or cable is likely at fault.
Check refresh rate and resolution settings
- On a PC, set the resolution and refresh rate to values supported by your display (e.g., 1920×1080 at 60 Hz). - Avoid pushing the display beyond its rated capabilities, which can cause intermittent flicker or black screens.
Disable unnecessary signal enhancements
- On TVs, turn off extra HDMI features like “HDMI-CEC” or “enhanced” modes temporarily to test. - On PCs, disable adaptive sync (FreeSync/G‑Sync) if flickering occurs only in certain games or applications.
If you still see issues across multiple devices, cables, and ports, the problem may lie within the TV/monitor’s internal power supply or backlight system, which are advanced repairs requiring specialized skills and high-voltage precautions.
Tip 5: Restore Life to Rechargeable Batteries and Chargers
Rechargeable batteries in gadgets—from wireless headphones to cordless tools—gradually lose capacity, but a surprising number of charging “failures” are actually contact or calibration issues.
What this helps with:
- Devices that say “100%” but drain quickly
- Gadgets that randomly shut off at 20–30%
- Items that won’t start charging or are not recognized by the charger
Step-by-step: Improve charging and battery behavior
Inspect and clean contacts
- For devices with visible battery or charging contacts (metal pads or prongs), power off first. - Lightly rub contacts with a pencil eraser or cotton swab dampened with isopropyl alcohol. - Wipe clean and let dry completely before reconnecting.
Check the charger itself
- Verify the charger’s output rating (voltage and current) matches or is approved for the device. - Test the charger on another compatible device, if possible. - If the charger runs unusually hot or shows damage, stop using it.
Run a full discharge/charge cycle (where appropriate)
- For older devices with erratic battery percentage readings, let the device run down until it shuts off naturally. - Then charge uninterrupted to 100% using the original or manufacturer-recommended charger. - Avoid doing deep discharges frequently—this is mainly to recalibrate battery reporting, not a routine habit.
Avoid “charging deadlocks” on very low batteries
- Some devices won’t start charging if their battery is extremely low. - Leave them connected to a charger for at least 30–60 minutes even if there’s no immediate sign of life. - If possible, use a higher-power official charger from the same brand to “wake” the device.
Know when to replace
- If a fully charged device drops from near 100% to under 50% within minutes, the battery is likely at end-of-life. - Check if your device’s manufacturer offers official battery replacement or lists battery service options. - For many cordless tools, robotic vacuums, and headphones, user-replaceable battery packs or third-party replacements are readily available.
Respect lithium-based batteries: never puncture, crush, or overheat them, and stop using any battery that swells, leaks, or emits a strong chemical smell.
Conclusion
Most “failing” electronics aren’t truly finished—they’re just asking for targeted maintenance. Cleaning a clogged charging port, resetting power circuits, restoring keyboard function, stabilizing display connections, and refreshing charging habits can collectively save you hundreds of dollars and extend the life of gear you already own.
Approach each repair with safety, patience, and a clear process: disconnect power, inspect carefully, make one change at a time, and test. When you hit a wall, that’s your cue to research model-specific guides or hand things over to a professional, not to force a fix. The more repairs you successfully complete, the more you’ll recognize patterns—and the faster you’ll turn “this is broken” into “I can fix this.”
Sources
- [U.S. Consumer Product Safety Commission – Product Safety Guidance](https://www.cpsc.gov/Safety-Education/Safety-Guides) – General electrical and product safety recommendations relevant to working on consumer electronics
- [iFixit Repair Guides](https://www.ifixit.com/Device) – Detailed, model-specific teardown and repair instructions for phones, laptops, game consoles, and more
- [Apple Support – Battery and Performance](https://support.apple.com/en-us/HT208387) – Explains lithium-ion battery behavior, aging, and best practices for charging and usage
- [Dell Support – Laptop Power Issues](https://www.dell.com/support/kbdoc/en-us/000132453/how-to-troubleshoot-laptop-power-issues) – Manufacturer-level troubleshooting steps for laptops that won’t power on or charge
- [Energy.gov – How To Buy and Use Batteries Safely](https://www.energy.gov/energysaver/articles/how-buy-and-use-batteries-safely) – Guidance on safe battery handling, storage, and replacement practices
Key Takeaway
The most important thing to remember from this article is that this information can change how you think about Electronics.


