If you’ve ever stared at a dead gadget wondering if it’s really “done,” you’re not alone. Many electronics fail in ways that are annoying but totally fixable at home with a bit of patience and basic tools. This guide walks you through five common repair scenarios—each with clear, step‑by‑step instructions aimed at DIYers who want reliable, practical results without going straight to the repair shop.
Always remember: if a repair feels above your comfort level, or involves mains voltage in a way you don’t fully understand, stop and get professional help.
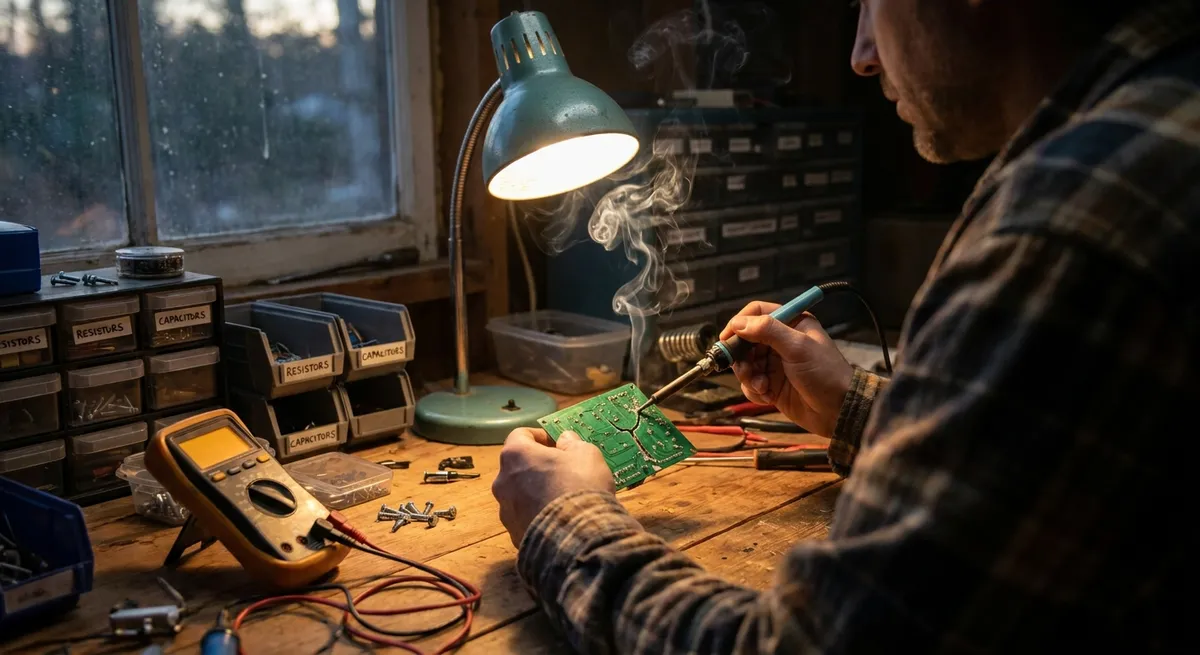
Safety First: Ground Rules Before You Grab a Screwdriver
Before you touch a single screw, build these habits into your routine:
Disconnect power completely
Unplug devices from the wall. For battery devices, remove the battery if possible. For gadgets with removable power bricks, unplug both ends.
Discharge capacitors where relevant
Power supplies, monitors, and some audio gear contain capacitors that can hold a dangerous charge after power is removed. If you’re not sure how to safely discharge them or identify high-voltage areas, avoid poking around in power-supply sections and anything directly connected to mains.
Work on a non-conductive surface
A wooden table or thick cardboard is better than bare metal. Keep drinks and metal jewelry away from your workspace.
Static protection for sensitive electronics
Integrated circuits and memory chips can be damaged by static. Ideally, use an anti-static wrist strap clipped to a grounded point. At minimum, touch an unpainted metal object (like a plugged-in PC case that’s turned off) before handling boards.
Take photos before you pull things apart
Every time you remove screws, cables, or connectors, take a quick photo with your phone. You’ll thank yourself when it’s time to reassemble.
Label screws and small parts
Use small containers, egg cartons, or labeled tape for screws. Many repairs are “lost” not because of difficulty, but because of lost hardware or mixed-up screw lengths.
Step-by-Step Tip #1: Revive a Smartphone That Won’t Charge Reliably
A flaky charging connection is one of the most common and fixable phone problems. Often, the port is just packed with years of pocket lint and dust.
Tools you’ll need:
- Wooden or plastic toothpick
- Can of compressed air (optional)
- Strong light or phone flashlight
- Isopropyl alcohol (at least 70%) and a small brush or cotton swab (optional)
Steps:
Power down the phone
Turn the phone completely off and unplug any cables. Removing a case can give you better access to the port.
Inspect the charging port
Use a bright light to look inside. If you see fuzzy buildup, tiny fibers, or a gray “wall” inside, you likely have lint or debris blocking the connector.
Gently loosen debris
Insert a wooden or plastic toothpick into the port very carefully. Scrape lightly along the bottom and sides, never forcing it. The goal is to lift debris, not gouge metal contacts.
Blow out loosened dust
Use compressed air in short bursts to push out the loosened lint. Keep the can upright to avoid spraying propellant. Check again with your light.
Optional: light cleaning with alcohol
Lightly dampen a small brush or tightly rolled cotton swab with isopropyl alcohol (not dripping). Gently wipe inside the port, avoiding aggressive pressure. Let it dry for at least 10 minutes.
Test with a known-good cable and charger
Reboot the phone, plug in a cable you know works on other devices, and see if the connection feels firmer. Check if the phone charges without needing to wiggle the cable.
When to stop:
If the port is physically loose, cracked, or has bent pins, this usually requires a board-level or port replacement—best left to professionals or experienced hobbyists with microsoldering setups.
Step-by-Step Tip #2: Fix a Remote Control That Barely Works
A remote that only works if you aim it “just right,” or doesn’t work at all, is usually suffering from dirty contacts, old batteries, or a weak IR LED.
Tools you’ll need:
- New batteries of the correct type
- Small Phillips screwdriver (if the remote has screws)
- Isopropyl alcohol and cotton swabs
- Soft cloth
Steps:
Start with the obvious: replace batteries
Install fresh, brand-name batteries, paying close attention to polarity (+ and −). Wipe any visible corrosion off the battery contacts with a dry cloth first.
Check battery contacts for corrosion
If you see white, green, or blue buildup, lightly scrub contacts with a cotton swab dipped in isopropyl alcohol. Let it dry, then insert new batteries.
Test the IR LED using a phone camera
Point the front of the remote (the LED end) at your smartphone camera, press a button, and look at the phone screen. Most phone cameras will show a pale purple/white flicker if the IR LED is working. No flicker at all suggests a deeper issue.
Open the remote housing
Remove any visible screws. If there are none, the case may be clipped together—use a plastic pry tool or an old credit card to gently separate the halves along the seam.
Clean the keypad contacts
Inside, you’ll see a rubber keypad with conductive pads, resting on a printed circuit board (PCB) with matching contact areas. - Remove the rubber pad. - Clean each black or gray pad lightly with a cotton swab and alcohol. - Clean the matching contact areas on the PCB the same way. Avoid soaking anything—just a light wipe.
Reassemble and test
Let everything dry completely. Reinstall the rubber keypad, clip or screw the housing back together, and reinstall batteries. Test again with your TV or device.
When to stop:
If the remote passes the phone camera test but still doesn’t control your device, the problem might be with the receiver or the device settings, not the remote itself.
Step-by-Step Tip #3: Quiet a Laptop That’s Overheating or Loud
Over time, dust buildup and dried thermal paste can make laptops run hot, loud, or even shut down unexpectedly. You can often improve this significantly with basic cleaning.
Tools you’ll need:
- Small Phillips screwdriver set (and Torx if your model requires it)
- Can of compressed air
- Soft brush
- Optional: new thermal paste (for more advanced users)
- Your laptop’s disassembly guide or manufacturer manual (look this up first)
Steps:
Shut down and disconnect everything
Power off, unplug the charger, and remove any external devices. If the battery is user-removable, take it out.
Access the cooling system
For some laptops, a specific bottom panel grants access to the fan. Others require removing the entire bottom cover. Follow a model-specific guide (from your manufacturer or a trusted repair community) so you don’t damage clips or hidden screws.
Hold the fan before blowing air
When using compressed air, gently hold the fan blades still with a toothpick or finger to prevent them from spinning wildly, which can damage the bearings.
Blow out dust methodically
Use short bursts of air to clear dust from: - Fan blades - Heatsink fins (the metal grill near vents) - Air intake and exhaust vents Brush away any stubborn dust bunnies with a soft brush.
Optional: refresh thermal paste (intermediate skill)
If you’re comfortable: - Remove the heatsink assembly carefully, noting screw order. - Clean old thermal paste off the CPU/GPU and heatsink with isopropyl alcohol and lint-free cloth. - Apply a small pea-sized dot of new thermal paste to the CPU (and GPU if appropriate). - Reinstall the heatsink evenly, tightening screws in a cross-pattern.
Reassemble and test temps
Put the bottom cover back, reinstall the battery if needed, and power on. Use a temperature monitoring tool (like HWMonitor or your manufacturer’s utility) to confirm that temperatures at idle and under light load are noticeably lower and the fan runs more quietly.
When to stop:
If your laptop still overheats badly after cleaning and fresh paste, you may have a failing fan or a deeper motherboard issue—time to consider professional diagnosis.
Step-by-Step Tip #4: Fix a Game Controller With Sticky or Unresponsive Buttons
Game controllers take a beating. Sweat, skin oil, and dust can make buttons stick or feel mushy. Cleaning often restores them to near-new condition.
Tools you’ll need:
- Small Phillips or Torx drivers (depending on the controller)
- Plastic pry tool
- Isopropyl alcohol and cotton swabs
- Soft cloth
- Small brush
Steps:
Disconnect and power off
Turn off the console or PC. Unplug wired controllers. For wireless units, power them off and, if possible, remove batteries.
Open the controller carefully
Look for screws on the back (some hide under stickers or battery compartments). Remove them and gently separate the shell using a plastic pry tool.
Take photos of the internal layout
Before removing anything, snap a few photos from different angles—especially around button boards, triggers, and ribbon cables.
Remove button pads and shells
Lift out rubber membranes and plastic buttons. Pay attention to their orientation. Lay them out in an organized way so you know how they go back.
Clean thoroughly but gently
- Wipe plastic buttons with a cloth lightly dampened with isopropyl alcohol. - Clean rubber membranes and their black conductive pads with alcohol and a cotton swab. - Clean the contact points on the PCB where the buttons touch. Avoid soaking or scraping pads; you just want to remove grime.
Inspect for wear or damage
If you see cracked rubber domes, broken plastic posts, or worn carbon pads, you may need replacement parts (often inexpensive from online parts suppliers).
Reassemble and test
Once dry, re-seat buttons and membranes, close the shell, and reinstall screws. Test on your console or PC, checking for responsiveness and that no buttons are stuck or constantly “pressed.”
When to stop:
If certain buttons are still dead, the problem might be with the PCB traces or surface-mount components. That’s advanced-level repair best approached with specialized tools.
Step-by-Step Tip #5: Bring a “Dead” Power Strip or Surge Protector Back to Life (Safely)
Power strips and surge protectors often fail in simple ways: tripped reset switches, worn-out switches, or childlock safety covers out of place. There are also dangerous failure modes—know which is which.
Tools you’ll need:
- Non-contact voltage tester (optional but helpful)
- Small Phillips screwdriver
- Flashlight
- Replacement power strip if yours shows serious damage
Steps:
Unplug everything
Remove all devices from the strip, then unplug the strip from the wall. Never work on a power strip while it’s connected.
Check the obvious indicators
- Does the power indicator light come on? - Is there a reset button? Press it firmly. - Check if there’s an on/off rocker switch—cycle it a few times.
Test the wall outlet first
Plug a known-working lamp or phone charger directly into the wall outlet. If that doesn’t work, your issue isn’t the strip—it’s the outlet or circuit (which may need a breaker reset or electrician).
Inspect the cord and housing
Look for cuts, melted plastic, burn marks, or a “burnt” smell. If you see any of these, do not attempt to repair—replace the strip immediately. Damaged mains wiring is not a DIY job for most people.
Check inside only if it looks intact and you’re comfortable
If the strip looks physically fine and has no burnt smell: - Open the housing if screws are present (some strips are sealed and not meant to be opened). - Look for loose wires on the switch or outlet terminals and gently tighten with a screwdriver if obviously loose. - Do not modify or bypass any safety components (like fuses, MOVs, or thermal cutoffs).
Reassemble and test carefully
Close the strip, tighten screws, then plug it into the wall. Use your non-contact voltage tester or plug in a low-power device (like a lamp) to confirm output. Avoid plugging in expensive equipment until you’re confident it’s functioning normally.
When to stop:
If you see burned components, melted parts, or smell anything burnt, discard the strip. The cost of a new surge protector is far lower than the risk of fire or damage to your electronics.
Conclusion
Most everyday electronics don’t fail in mysterious, unfixable ways—they get clogged, dirty, or suffer from simple wear in places that are surprisingly accessible. By learning a few structured repair habits—careful disassembly, gentle cleaning, smart testing—you can keep your gadgets going longer and save real money, all while sending less e‑waste to the landfill.
Start with the repairs you feel most comfortable with, build your confidence, and always respect the limits of your knowledge around high voltage and safety-critical devices. The more you practice, the more you’ll see that “dead” doesn’t always mean done—it often just means “not fixed yet.”
Sources
- [U.S. Consumer Product Safety Commission – Electrical Product Safety](https://www.cpsc.gov/Safety-Education/Safety-Education-Centers/Electrical-Safety-Center) – Guidance on staying safe when working with electrical products and power strips
- [iFixit Repair Guides](https://www.ifixit.com/Device) – Step-by-step community repair manuals for phones, laptops, game controllers, and more
- [Apple Support – Cleaning Your iPhone](https://support.apple.com/en-us/HT207123) – Official recommendations that inform safe cleaning practices around ports and openings
- [University of Wisconsin–Madison ECE Shop – ESD and Handling Guidelines](https://www.engr.wisc.edu/facilities-and-labs/electrical-and-computer-engineering-shop/using-the-shop/esd-guidelines/) – Best practices for preventing static damage to electronic components
- [Occupational Safety and Health Administration (OSHA) – Working Safely with Electricity](https://www.osha.gov/electrical-safety) – Foundational safety principles for working around electrical systems
Key Takeaway
The most important thing to remember from this article is that this information can change how you think about Electronics.


