When a phone won’t charge, a laptop overheats, or a TV refuses to power on, most people jump straight to “I need a new one.” In many cases, you don’t. With a small toolkit and a little patience, you can bring a lot of everyday electronics back from the brink. This guide walks through five practical, step-by-step repair tips that DIY enthusiasts can realistically handle at home—no engineering degree required.
Before You Start: Safety and Setup
Any repair starts with two priorities: don’t hurt yourself, and don’t make the problem worse.
Unplug devices before opening them, and power them down fully—don’t just put them to sleep. For battery-powered devices, remove the battery if it’s user-accessible. If it’s not, assume the device is still “live” inside and handle with extra care. Work on a clean, dry, non-conductive surface (a wooden table beats a metal one), and avoid carpet if you’re opening up circuit boards, since static electricity can quietly destroy components.
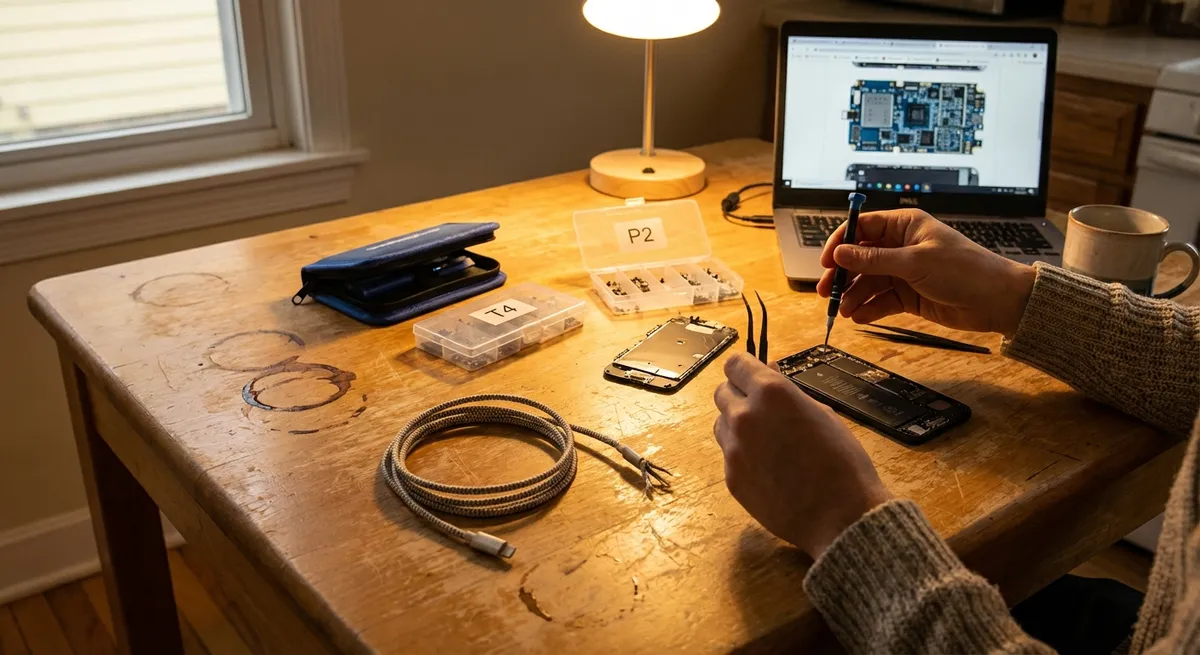
Set up basic gear: a precision screwdriver set (with Phillips, flat, and Torx bits), a plastic spudger or guitar pick for prying, cotton swabs, 90%+ isopropyl alcohol, compressed air, a small flashlight, and a container for screws. Take photos with your phone as you go so reassembly is easier. If anything looks swollen, burned, or smells strongly of chemicals—especially batteries—stop immediately and do not continue. Some jobs are better left to a pro or require safe disposal rather than repair.
Step 1: Restore Dead or Unreliable Charging Ports
Charging problems on phones, tablets, and game controllers are often mechanical, not electronic—and that’s good news for DIYers.
- Check the obvious first. Test with another cable and another charger that you know works. Try a different outlet or power strip. If it charges sometimes but only at certain angles, that’s a strong sign of a port issue or debris.
- Inspect the port with light and magnification. Use a flashlight (and, if available, a magnifying glass) to look into the port. Lint, dust, and pocket debris can compress into a dense mat that blocks proper contact.
- Clean the port safely. Power off the device completely. Use a wooden or plastic toothpick (never metal) to gently scrape and lift out lint. Work slowly; don’t force anything. Compressed air at short, controlled bursts can help dislodge loose particles.
- Clean contacts with isopropyl alcohol. Lightly dampen a corner of a lint-free swab with 90%+ isopropyl alcohol, gently swab the inside walls of the port, then let it dry for at least 10–15 minutes before turning the device back on.
- Re-test without forcing the cable. Insert the cable straight and gently. If it now sits more firmly or charges without needing to “wiggle” the connector, you’ve likely fixed it. If there’s still no connection and the cable is known-good, the internal port may be physically damaged and require desoldering/replacement—usually a pro-level job.
This same approach works for USB ports on laptops, game consoles, and Bluetooth speakers, although you should be extra careful with ports directly soldered to thin circuit boards; excessive force can crack traces and turn a cheap fix into an expensive one.
Step 2: Quiet and Cool an Overheating Laptop
Fans roaring, bottom too hot to touch, or random shutdowns under load? Overheating can shorten the life of your laptop’s CPU, GPU, and battery. Basic cleaning and airflow fixes are surprisingly effective.
- Confirm overheating symptoms. If the laptop is loud, hot, and sluggish, use a temperature monitoring tool (such as HWMonitor on Windows or macOS’s built-in Activity Monitor + third-party utilities) to see if CPU temperatures are routinely climbing well above 80–90°C under normal use.
- Power down and unplug. Shut the laptop down completely, disconnect the charger, and remove the battery if it’s removable. Press and hold the power button for 10–15 seconds to discharge residual power.
- Clean vents and fans externally. Use compressed air to blow dust out of the intake and exhaust vents. Keep the fan blades from spinning wildly (hold them still with a toothpick or plastic tool) to avoid damaging the bearings.
- Open case for deeper cleaning (if accessible). Remove the back cover screws using the appropriate screwdriver. Gently lift the panel following a guide for your exact model. Once open, use compressed air and a soft brush to clear dust from fans, heatsinks, and vents. Avoid touching exposed components with your fingers.
- Improve airflow in everyday use. Reassemble carefully, making sure all clips and screws are back in place. Use the laptop on hard, flat surfaces; soft surfaces like beds can block vents. Consider a simple cooling pad with fans if you frequently run intensive tasks. If overheating persists, thermal paste between CPU/GPU and heatsink may be dried out—a more advanced repair that’s achievable but should be approached with careful research and the right materials.
Taking these cooling steps early can prevent repeated thermal stress that eventually causes solder cracks, graphics failures, and random shutdowns.
Step 3: Rescue a Water-Exposed Phone (the Right Way)
Spills and brief dunks are common, and a fast, correct response can mean the difference between a dead device and a fully functional one.
- Kill the power immediately. If the phone is on, power it down at once. If the screen is frozen, press and hold the power button until it shuts off. Do not plug it in, and do not try to “see if it still works” by turning it back on. Electricity plus moisture is what causes most of the damage.
- Remove external accessories. Take off the case, remove SIM and memory cards, and wipe down the exterior with a clean, absorbent cloth. Gently shake out ports (without whipping the phone around) to encourage water to drip out.
- Skip the rice myth. Rice is a poor desiccant and can leave dust in ports. If you want to absorb moisture, silica gel packets (the “Do Not Eat” packs) are far more effective—but even then, drying alone doesn’t remove mineral deposits or residues.
- Use controlled airflow, not heat. Aim a fan at the phone, or place it in a dry, ventilated area. Do not use a hairdryer, oven, microwave, or direct sunlight; heat can warp components and accelerate corrosion.
- If you’re comfortable opening it, clean with isopropyl. For out-of-warranty phones—and only if you’re willing to accept the risk—follow a detailed teardown guide for your exact model. Disconnect the battery first, then gently clean visible corrosion and moisture with 90%+ isopropyl alcohol and a soft brush. Allow several hours to dry completely before reassembly and testing. If you’re not comfortable opening it, let it air-dry at least 24–48 hours before attempting to power it on, and consider a professional repair shop, especially if the phone was in salt water or sugary liquids.
Time matters. The sooner you cut power and begin drying/cleaning, the better your odds of avoiding permanent board damage.
Step 4: Revive a TV or Monitor That Won’t Power On
Flat-screen TVs and monitors commonly fail due to a handful of repeatable issues: power problems, bad capacitors, or a failed backlight. Some basic checks can narrow things down.
- Confirm the power source. Test the outlet with another device. Try the TV/monitor in a different outlet or room. If the power cable is detachable, test with a known-good cable of the same type (often a standard IEC or figure-8).
- Look for life signs. Check if any standby lights are on, or if the screen flashes briefly at power-up. If there’s sound but no image, you may be dealing with a backlight problem, not total failure.
- Try a flashlight test. In a dark room, shine a strong flashlight at an angle on the screen while the TV is “on.” If you can vaguely see menus or images, the LCD panel is working but the backlight is not—a more advanced repair involving LED strips or the power/inverter board.
- Inspect for external damage. Unplug the set and remove it from the wall mount or stand. Look through the vents for any obvious burn marks or bulging capacitors (tops domed or leaking). A bulging capacitor on the power board is a classic failure point in many older TVs and monitors.
- Decide on your repair depth. If you’re comfortable opening the case, remove the back panel (after confirming it’s fully unplugged and waiting several minutes for internal capacitors to partially discharge). Visual inspection can sometimes reveal bad caps you can replace with careful soldering and exact-rating replacements. However, because TVs contain high-voltage circuits and charged capacitors, you must know how to discharge capacitors safely and accept the risks. If unsure, use your basic diagnostics (does it power some, have sound, have partial image) to communicate clearly with a professional technician; this can avoid unnecessary “just buy a new one” advice.
Even if you don’t dive into board-level repairs, going through these steps can prevent you from discarding a TV that only had a bad cable or trivial power issue.
Step 5: Fix Sticky or Non-Responsive Buttons on Remotes and Controllers
Remotes, game controllers, and other handheld electronics often fail in one of the easiest-to-fix ways: dirty contacts and worn pads.
- Start with the simple checks. Replace all batteries with fresh ones, making sure polarity matches the markings. Confirm the problem isn’t just distance or interference; move closer to the device and check the line of sight for IR remotes.
- Test individual buttons. Note which buttons fail. If some work fine and others don’t, dirt or worn contacts are probable. If none work, it’s either power/battery contacts or a deeper board failure.
- Open the shell carefully. Remove batteries. Use a small Phillips or Torx screwdriver to remove visible screws. Many remotes and controllers also have hidden clips; use a plastic spudger or guitar pick to gently work around the seam without cracking the case.
- Clean the pads and board. Inside, you’ll usually see a rubber membrane with conductive pads touching a printed circuit board (PCB). Dampen a cotton swab with 90%+ isopropyl alcohol and gently clean the rubber pads and the PCB contact points for all buttons, especially the problem ones. Let everything dry thoroughly (alcohol evaporates quickly).
- Reassemble and test. Put the membrane and any buttons back in place, close the shell, reinstall screws, and insert fresh batteries. Test all buttons. If some are still unreliable, the conductive coating on the rubber pads may be worn. Conductive repair kits (with small adhesive pads or conductive paint designed for remotes) can restore contact without replacing the device.
This same contact-cleaning technique also applies to some older keyboards, calculator buttons, and other membrane-based controls.
Conclusion
Most electronics don’t fail overnight—they slowly accumulate dust, heat, wear, and the occasional accident until one more small issue pushes them over the edge. By tackling problems early with safe cleaning, basic disassembly, and systematic testing, you can extend the life of phones, laptops, TVs, and everyday gadgets significantly. These five repair steps are a solid foundation for DIY enthusiasts: they’re hands-on enough to feel satisfying, but don’t demand exotic tools or advanced electronics knowledge. As you gain confidence, you can move from “first-aid fixes” into deeper repairs, saving money, reducing e-waste, and understanding your gear in the process.
Sources
- [U.S. Department of Energy – Appliances and Electronics](https://www.energy.gov/energysaver/appliances-and-electronics) - General guidance on using and maintaining electronics efficiently, with tips that overlap with good care practices.
- [Apple Support – Cleaning your iPhone](https://support.apple.com/en-us/HT207123) - Official recommendations on safely cleaning ports and surfaces, especially relevant for charging port maintenance.
- [iFixit Repair Guides](https://www.ifixit.com/Device) - Step-by-step teardown and repair guides for thousands of electronics, useful for model-specific disassembly and part identification.
- [Mayo Clinic – Electrical Injuries](https://www.mayoclinic.org/first-aid/first-aid-electrical-injury/basics/art-20056695) - Safety information that underscores why proper precautions around powered electronics are important.
- [Occupational Safety and Health Administration (OSHA) – Working Safely with Electricity](https://www.osha.gov/sites/default/files/publications/3075.pdf) - Detailed safety guidance on electrical hazards, applicable to anyone opening or working near live circuits.
Key Takeaway
The most important thing to remember from this article is that this information can change how you think about Electronics.


