When a favorite gadget glitches out, most people either panic or give up and replace it. But a lot of “dead” electronics are only mostly dead—usually because of something simple like a bad cable, dirty contacts, or a confused circuit. With a few basic checks and safe habits, you can bring a surprising number of devices back to life and keep them running longer.
This guide walks you through five practical, step‑by‑step repair tips any DIYer can learn, using tools you may already own. The focus is on safe, repeatable processes you can apply across many electronics, not just one specific model.
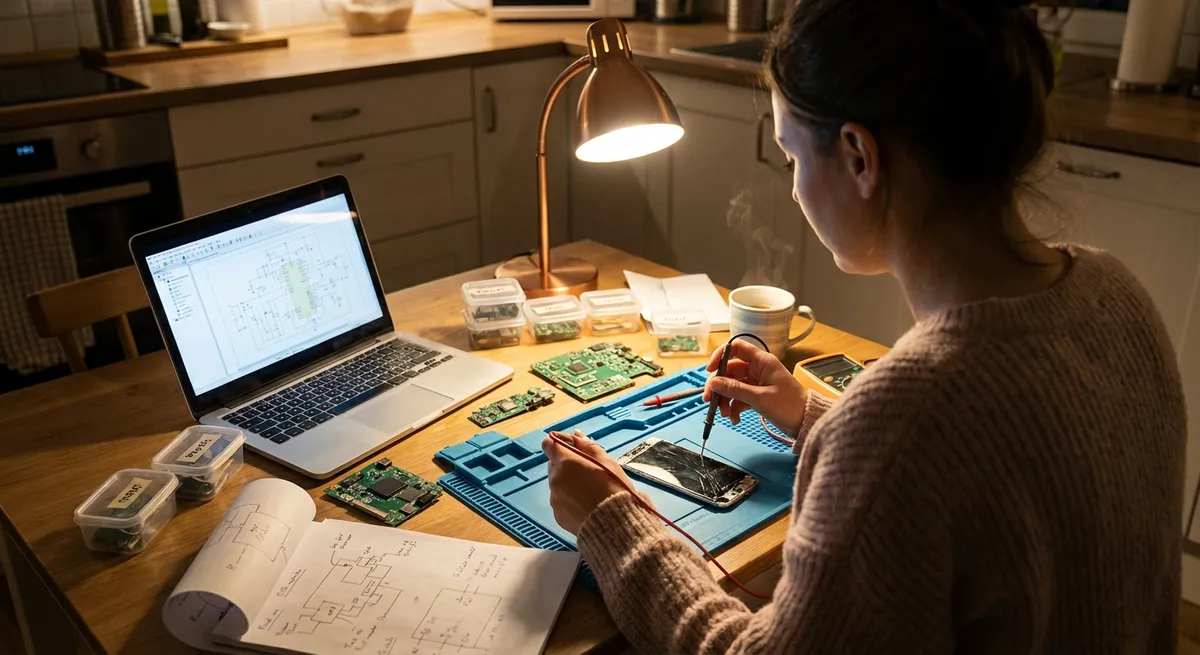
Before You Start: Safety and Smart Setup
Electronics repair doesn’t have to be dangerous, but you do need to respect electricity and static discharge.
First, always unplug or power down devices before opening them. For anything with a battery, fully shut it off, then remove the battery if possible. Capacitors in power supplies and older TVs can hold a charge even when unplugged, so if you’re not sure, don’t dig into high‑voltage sections.
Second, work in a clean, dry, well‑lit area. A non‑conductive surface—like a wooden table or an anti‑static mat—is best. Keep drinks away, and lay out a small tray or container to hold screws so they don’t disappear.
Third, control static. Touch a grounded metal object (like a plugged‑in but switched‑off desktop PC case) or wear an anti‑static wrist strap clipped to ground when handling internal components, especially circuit boards and memory modules.
Finally, start with basic tools: a small Phillips/flat screwdriver set, a precision driver kit, a flashlight, plastic pry tools or guitar picks, cotton swabs, 90%+ isopropyl alcohol, a soft brush, and if you can, a basic multimeter. With that, you’re ready for first‑aid level repairs.
Step 1: When a Device Won’t Power On – Systematic Power Path Check
A “dead” device is very often a power problem, not a fatal failure. Instead of guessing, walk the power path step by step.
- Verify the outlet or USB port. Plug in a different, known‑working device to the same outlet or USB port. For power strips or surge protectors, check any reset/breaker switches and indicator lights.
- Inspect the power cable or charger. Look for kinks, fraying, bent connectors, or burn marks. Gently wiggle the cable at both ends while a device is plugged in—if power cuts in and out, the cable or connector is suspect.
- Test a different charger or cable. Use a compatible, known‑good charger or power cord. Many “dead” laptops, game controllers, and phones revive instantly with a new cable or adapter.
- Check the power button and indicators. Hold the power button for at least 10–20 seconds. Some devices need a hard reset press. Watch for faint LEDs, screen flickers, or fan noise—any sign of life helps narrow down the issue.
- Try a power reset (if applicable). For laptops and some electronics: unplug the power, remove the battery (if removable), hold the power button for 15–30 seconds to discharge residual power, then reconnect and try again.
- Measure with a multimeter (optional). If you’re comfortable and know the rated output (printed on the adapter), set your multimeter to DC volts and check whether your charger is actually delivering that voltage.
If a device still shows no response after all this, the fault may be internal (like a blown fuse on the board or a failed power IC). At that point, weigh the value of the device against the cost and risk of deeper disassembly, or consider a professional repair.
Step 2: Fixing Intermittent Charging and Loose Ports
Wiggling the cable to “find the spot” is your early warning sign that a connector or cable needs attention. You can often solve this without replacing the whole device.
- Rule out a bad cable. Swap in another compatible cable first. If the charging behavior improves, retire the old cable; internal wire breaks or bent pins are common.
- Inspect the port visually. Use a flashlight to examine the charging port or USB connector. Look for lint, dust, corrosion, or bent pins. Smartphones, game controllers, and laptops frequently collect pocket lint in ports.
- Clean the port gently. Power off the device. Use a wooden or plastic toothpick to gently lift out debris—never use metal tools that can short pins or scratch contacts. Follow with a short burst of compressed air to blow out remaining dust.
- Address mild corrosion. If you see greenish or whitish buildup on metal contacts (especially on battery or charger contacts), power the device off, then lightly clean with a cotton swab dampened with 90%+ isopropyl alcohol. Let it dry fully before reconnecting power.
- Check for mechanical looseness. Gently plug and unplug the connector. If the port moves or feels detached from the board, the internal solder joints may be cracked. That usually requires micro‑soldering, which is not a beginner job—get a quote from a repair shop and compare against replacement cost.
- Prevent future damage. Avoid using devices while charging if the cable gets bent sharply at the connector. Use right‑angle connectors or magnetic adapters if you’re constantly plugging/unplugging, to reduce wear on the device’s internal port.
Many “can’t charge” issues are fixed in minutes with a toothpick and fresh cable; addressing them early can help avoid more expensive board‑level failures later.
Step 3: Recovering “Dead” Remote Controls and Battery Gadgets
Remotes, wireless mice, toys, and small gadgets often fail in the same simple ways—dead batteries, poor contact, or minor corrosion.
- Start with new batteries. Replace all batteries at once with fresh ones from the same pack. Mixing old and new cells or brands can cause inconsistent voltage and leaks.
- Check battery orientation. Confirm the + and – ends match the diagram in the compartment. Incorrect placement is more common than most people admit.
- Clean the terminals. If you see dull, chalky, or rusty contacts, or any white/green crust:
- Put on gloves and eye protection.
- Remove and safely dispose of leaking batteries according to local guidelines.
- Lightly scrub the terminals with a cotton swab or small brush dipped in a mix of baking soda and water for alkaline leaks, or just isopropyl alcohol for mild corrosion.
- Wipe dry and let the compartment air‑dry completely.
- Check for loose springs or tabs. Gently bend metal springs or tabs outward a little to improve contact, but don’t over‑flex them. A small flat screwdriver or needle‑nose pliers works well.
- Test the remote functionally. For TV remotes, point it at your smartphone’s camera—press a button and look at the phone’s screen. Most phone cameras can “see” infrared light as a pulsing white/purple glow, confirming that the remote is transmitting.
- Inspect the case. Cracked or warped cases can prevent buttons from pressing correctly. If needed, open the remote carefully (often with a screwdriver and plastic pry tool), remove the rubber keypad, and clean the underside of the buttons and circuit board contacts with isopropyl alcohol.
These same steps apply to many battery devices—if it’s powered by AA/AAA/coin cells, a good clean and fresh batteries solve an impressive number of failures.
Step 4: When Screens Go Blank, Flicker, or Show Weird Colors
From monitors and laptops to handhelds and e‑readers, display issues often look scary but may have simple causes: loose connections, wrong settings, or mild physical stress.
- Check brightness and display settings.
- Confirm brightness isn’t turned all the way down.
- For laptops and PCs, make sure the correct display output is selected (try the function key that toggles external/duplicate displays, or Windows + P on Windows).
- Inspect video cables and adapters. For external displays:
- Reseat HDMI/DisplayPort/VGA cables at both ends.
- Try a different cable and, if possible, a different port on the device and monitor/TV.
- Avoid sharp bends or tension on cables that can damage internal wires.
- Test with a different device or screen.
- Plug the same computer into another monitor or TV.
- Plug a different device (like a laptop or game console) into the suspect screen.
- Look for backlight clues. For laptops:
- In a dark room, shine a flashlight at an angle across the screen while the device is on.
- If you can faintly see the desktop, the screen is working but the backlight may have failed. That usually means a bad backlight, inverter (older laptops), or a cable—repairs are possible but more advanced.
- Check for pressure damage. Localized dark spots, cracks, or “ink blot” patterns suggest physical LCD damage. That generally requires screen replacement; it’s often DIY‑able on monitors and many laptops if you’re comfortable ordering a compatible panel and following a model‑specific guide.
- Reseat internal display cables (intermediate). If you’re up for opening a laptop or monitor:
- Disconnect power and battery.
- Carefully open the case using a screwdriver and plastic pry tools.
- Find the display ribbon cable and gently unplug/replug it, ensuring it’s fully seated and any locks are engaged.
- Reassemble and test.
This helps you determine whether the problem is the display or the source device.
If a display only fails under certain angles or when you jiggle the lid, that’s a strong hint of a flaky cable or connector—not necessarily a dead panel.
Step 5: Quietly Eliminating Overheating and Random Shutdowns
Many “mystery” crashes, sudden shutdowns, or sluggish performance come down to overheating. Fans and vents packed with dust are one of the most fixable issues in electronics.
- Confirm overheating symptoms.
- The device gets hot to the touch, especially near vents.
- Fans run loudly or constantly.
- The device shuts down during gaming, video editing, or other heavy tasks.
- Check for blocked airflow.
- Ensure vents aren’t pressed against soft surfaces (pillows, blankets, carpets).
- For laptops, use them on hard, flat surfaces or a cooling pad, not directly on a bed or couch.
- Clean vents externally.
- Power down and unplug.
- Use short bursts of compressed air to blow dust out of vents.
- Hold fans still with a toothpick or plastic tool while blowing air, so they’re not spun at high speed, which can damage bearings.
- Open the case for deeper cleaning (where safe). For desktops and many laptops:
- Remove the access panel.
- Use compressed air and a soft brush to gently remove dust from fans, heatsinks, and power supply grilles.
- Avoid vacuum cleaners directly on components—they can generate static.
- Refresh thermal paste (intermediate/advanced). On older PCs and laptops, dried thermal paste between the CPU/GPU and heatsink can reduce cooling. If you’re comfortable:
- Remove the heatsink, clean old paste with isopropyl alcohol and lint‑free cloth.
- Apply a small pea‑sized amount of new, reputable thermal compound.
- Re‑install the heatsink firmly and evenly.
- Adjust software behavior.
- Update device drivers and firmware.
- For laptops, use balanced or power‑saving performance modes if overheating persists.
- Limit heavy workloads when vents feel hot, or use a cooling pad to supplement airflow.
Regular dust cleanouts and better airflow can add years to the life of computers, game consoles, and networking gear, while making them run quieter and more reliably.
Conclusion
You don’t need an electronics lab to rescue many everyday gadgets—just a deliberate process, a few basic tools, and good safety habits. By checking power paths, cleaning ports and battery contacts, watching for loose connections, and controlling heat, you can solve a surprising number of “fatal” problems yourself.
Use these five procedures as your core first‑aid toolkit: apply them before you assume anything is truly dead, and before you spend money on a replacement. Over time, you’ll learn to spot patterns, gain confidence with disassembly, and decide which repairs you’re ready to tackle and which are better left to pros.
Every device you successfully revive is money saved, waste reduced, and one more reason to keep building your DIY repair skills.
Sources
- [U.S. Department of Energy – Portable Electric Appliance Safety](https://www.energy.gov/energysaver/portable-heaters-and-electric-appliances) - General guidance on safe use and handling of household electric devices
- [iFixit Repair Guides](https://www.ifixit.com/Device) - Model‑specific teardown and repair instructions for a wide range of electronics
- [United States Consumer Product Safety Commission (CPSC)](https://www.cpsc.gov/Safety-Education/Safety-Guides/Electrical) - Safety tips and hazard information related to electrical products
- [Apple Support – If your device won’t turn on or start up](https://support.apple.com/en-us/HT201412) - Official troubleshooting steps for power‑on issues (many concepts apply broadly)
- [Intel – How to Improve PC Cooling](https://www.intel.com/content/www/us/en/gaming/resources/pc-cooling.html) - Practical advice on airflow, dust management, and overheating prevention for computers
Key Takeaway
The most important thing to remember from this article is that this information can change how you think about Electronics.


