When a favorite gadget stops working, most people either toss it or pay for a replacement. But a lot of “dead” electronics can be revived with simple, safe steps you can do at home—no engineering degree required. This guide walks you through five practical, step‑by‑step repair tips that can bring laptops, game consoles, TVs, and other gear back from the brink, while saving money and cutting electronic waste.
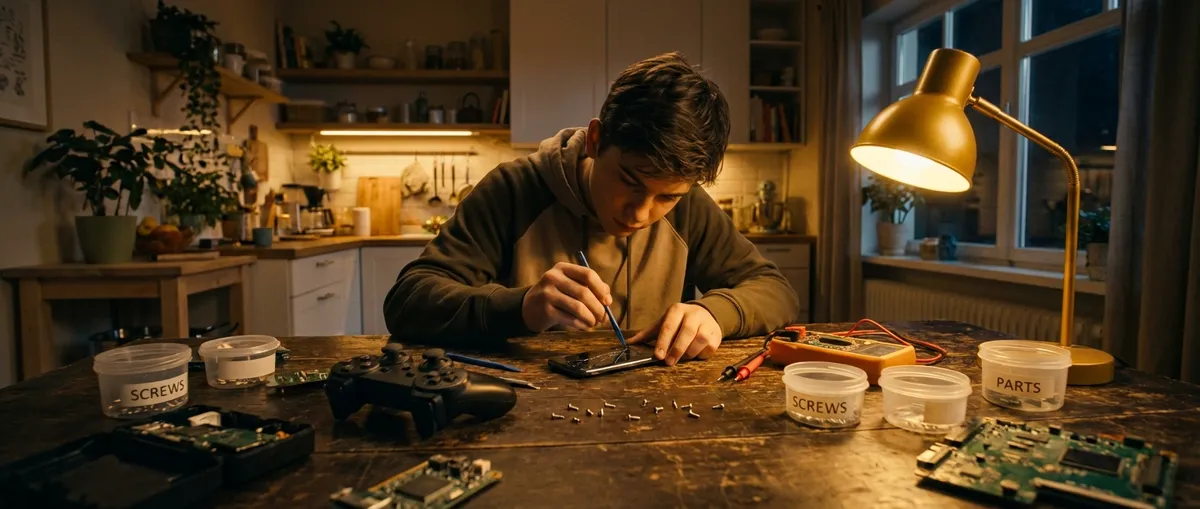
Before You Start: Safety and Setup
Before grabbing a screwdriver, give yourself a safe, organized workspace. Unplug everything first—never open or work on a device connected to power, and remove batteries if possible. If a gadget has been exposed to liquid, wait until it’s fully dry before applying power or opening it. For devices with capacitors that hold charge (like power supplies, old CRT TVs, some audio gear), do not work inside unless you clearly understand discharge procedures; stick to external checks and connections.
Set up a clean, well-lit table. A white towel or sheet under your project makes it easy to see tiny screws. Keep a small container or magnetic tray for fasteners, and take photos with your phone at each step so you can reassemble confidently. At a minimum, have a precision screwdriver set, a plastic spudger or guitar pick for prying plastic clips, cotton swabs, isopropyl alcohol (90%+ is best), and a can of compressed air. These basics cover a surprising number of electronics repairs.
Tip 1: Revive “Dead” Devices with a Smart Power Check
Many “broken” electronics actually have power problems, not internal failures. Before assuming the worst, walk through a power check systematically.
- Test the outlet first. Plug in a known working device (like a lamp or phone charger). If that doesn’t work, you may have a tripped breaker or GFCI outlet. Reset any GFCI buttons and check your home’s breaker panel.
- Inspect the power cable and adapter. Look for kinks, crushed spots, frayed insulation, or burn marks. Gently flex suspect areas; if power cuts in and out, the cable is likely damaged and should be replaced, not taped.
- Use the “charger swap” test. If a device uses a removable adapter (router, streaming box, laptop, monitor), try a compatible spare with the same voltage and equal or higher amperage. If the device wakes up, your original adapter is the culprit.
- Check removable batteries. For laptops, cameras, game controllers, and remotes, remove the battery, hold the power button down for 15–30 seconds to discharge residual power, then reinstall or replace the battery. Clean battery contacts with a cotton swab and a small amount of isopropyl alcohol.
- Look for tiny reset or power switches. Some power strips, portable speakers, and projectors have physical reset buttons or rocker switches that get bumped off. Check the case thoroughly, including under flaps and next to ports.
If the device shows signs of life (LED blink, sound, brief startup) but immediately shuts off, you’ve at least confirmed that power reaches it. That’s useful information when deciding whether to dig deeper, replace a part, or seek professional help.
Tip 2: Fix Overheating Laptops and Consoles with a Thorough Clean
Overheating is one of the top reasons electronics crash, slow down, or shut off unexpectedly. Dust buildup chokes airflow in laptops, PCs, and game consoles. A careful cleaning can restore performance and extend lifespan.
- Power down and disconnect. Shut the device down properly, unplug the power cord, and remove the battery if possible. Let it cool completely before opening.
- Access the vents and fans. On laptops, most air intake/exhaust is on the bottom and sides; consoles often have side or rear grills. If there’s a removable panel for RAM or storage, open it to expose more internal space for airflow.
- Blow out dust the right way. Use short bursts of compressed air, keeping the can upright. Blow from vents outward, not directly into the device for long periods. If you can see the fan, hold it stationary with a plastic tool or toothpick while blowing air so it doesn’t spin excessively and get damaged.
- Clean external grills and filters. Wipe vents with a soft, dry brush or microfiber cloth. Some consoles and PCs have removable dust filters; gently wash these with water, let them dry fully, then reinstall.
- Reassemble and monitor temperature. Put panels and screws back, then power up. Listen for fan noise; it should run more smoothly, often at lower speeds. If the device had been shutting down, use it for 20–30 minutes and see if the issue improves.
For advanced DIYers comfortable opening cases safely, replacing dried-out thermal paste on CPUs and GPUs can further reduce temperatures. However, if you’re not sure how to handle delicate connectors or ribbon cables, stick to cleaning and airflow improvements.
Tip 3: Rescue “Liquid Damaged” Gadgets the Right Way
Spills happen—coffee on a laptop, water on a game controller, juice on a TV remote. How you respond in the first few minutes often determines whether the device survives.
- Shut it down immediately. Unplug the power cable and turn the device off. For laptops, hold the power button down if necessary. Remove any removable batteries, controllers, or external drives.
- Remove excess liquid. Tilt the device so liquid drains away from sensitive areas like keyboards, ports, or vents. Gently blot (don’t wipe) with a paper towel or lint-free cloth. Avoid pressing liquid deeper into openings.
- Open access points. Take out SIM cards, memory cards, back covers, and battery doors where applicable. For keyboards and laptops, if you’re comfortable, remove the bottom panel to allow better airflow and drainage.
- Dry slowly and thoroughly—no heat guns. Do not use hair dryers or ovens. Instead, place the device in a warm, dry area with good airflow for at least 24–48 hours. A fan on low speed blowing near (not directly hot air onto) the device helps. Rice is less effective than many think; airflow and time matter more.
- Clean corrosion if necessary. If you later open the device and see greenish or white residue on metal contacts, lightly clean the area with a cotton swab dipped in 90%+ isopropyl alcohol, then let it dry fully before reassembly.
After at least a full day of drying (longer for major spills), reconnect only essential components and try powering on. If the device was expensive and holds important data (like a work laptop or phone), consider professional repair early—they may be able to clean and rescue internal components more safely.
Tip 4: Solve “No Signal” Screen Problems with a Cable and Port Reset
A blank TV or monitor screen doesn’t always mean the display is dead. Often the issue is a bad cable, wrong input, or a confused port. A structured reset can restore your picture with minimal tools.
- Confirm power and input. Make sure the TV/monitor’s power light is on and not blinking an error code. Use the remote or on-device buttons to cycle through all inputs (HDMI 1, HDMI 2, etc.), pausing a few seconds on each.
- Unplug and reseat cables. Disconnect HDMI, DisplayPort, or other cables on both ends—device and TV/monitor. Inspect the connectors for bent pins, dust, or damage. Wipe them gently with a dry cloth, then plug them back in firmly until they click.
- Try a different cable. Cables fail more often than the ports themselves. Swap in a known good HDMI or DisplayPort cable. If that fixes the issue, label the bad cable and recycle it responsibly.
- Move to a different port. Plug the same cable into another HDMI/DisplayPort input on the TV/monitor and change the input selection correspondingly. If one port is dead but others work, you’ve pinpointed the failure without opening anything.
- Reset the source device. Turn off the connected device (laptop, streaming stick, console), unplug it for 30–60 seconds, then plug it back in and power up while the TV/monitor is on the correct input. Some devices have display settings that can be reset to default or “auto-detect” to renegotiate the connection.
If you still see “No Signal” but the device’s lights and sounds suggest it is working, it may be outputting at a resolution the display can’t handle. On a PC, try safe mode or connecting to a different screen and lowering the resolution, then reconnecting to the original display.
Tip 5: Bring “Dead” Buttons and Sticky Controls Back to Life
Unresponsive buttons and sticky controls are incredibly common in remotes, game controllers, keyboards, and older audio gear. Often this comes down to grime, oxidation, or worn conductive pads. Basic cleaning can restore functionality.
- Start with power and pairing. For remotes and controllers, replace batteries first, ensuring correct orientation. On Bluetooth devices, remove and re-pair them to rule out software glitches.
- Surface cleaning. Power off the device. Lightly dampen a microfiber cloth or cotton swab with isopropyl alcohol and clean around the stuck or dead buttons. For keyboards, remove loose keycaps (if designed to be removable) to clean underneath.
- Open the case carefully. If surface cleaning doesn’t help and you’re comfortable proceeding, remove visible screws (often hidden under labels or rubber feet) and gently separate the shell with a plastic spudger or guitar pick. Avoid metal tools that can mar the case or short components.
- Clean internal contacts. Inside many remotes and controllers, you’ll find a rubber keypad sitting on top of a printed circuit board (PCB). Clean the black conductive pads on the rubber side and the matching contact points on the PCB with a cotton swab and a small amount of isopropyl alcohol. Let everything dry fully.
- Inspect for wear and reassemble. If certain pads look worn or cracked, their conductivity may be compromised; replacement rubber keypads or low-cost universal remotes can be a better choice than further DIY. Once clean and dry, reassemble the device, taking care not to pinch any wires, then test each button.
Sticky volume knobs and analog sticks on controllers can also benefit from careful cleaning around the base with isopropyl alcohol. For severe drift or intermittent behavior, the underlying potentiometer or joystick module may need replacement—a job suited to DIYers who are comfortable with soldering.
Conclusion
Many electronics that seem “dead” or “too far gone” are actually suffering from simple, fixable issues: bad cables, clogged vents, minor corrosion, or dirty contacts. With basic tools, a safe workspace, and a methodical approach, you can solve a surprising number of problems yourself, stretch your budget, and keep more gear out of the landfill. Start with power checks and cleaning before assuming the worst—and document your steps so you can confidently undo anything that doesn’t work out. Over time, these first-aid repair habits will turn panic into a practical, calm checklist every time a gadget acts up.
Sources
- [U.S. Environmental Protection Agency – Electronics Donation and Recycling](https://www.epa.gov/recycle/electronics-donation-and-recycling) - Explains the impact of electronic waste and why repairing and reusing devices matters
- [Harvard University IT – Laptop Care and Cleaning Tips](https://huit.harvard.edu/node/1089681) - Offers guidance on safe cleaning practices and basic laptop maintenance
- [Apple Support – If your Mac or Apple display doesn’t turn on](https://support.apple.com/en-us/HT204267) - Example of a structured power and display troubleshooting process
- [Microsoft Support – Troubleshoot blue screen errors](https://support.microsoft.com/en-us/windows/troubleshoot-blue-screen-errors-5a348b84-6c66-8fbb-4f75-6f36c2b2cb04) - Details on how overheating and hardware issues can affect system stability
- [iFixit – Electronics Repair Guides](https://www.ifixit.com/Device) - Step‑by‑step tear-downs and repair instructions for a wide variety of consumer electronics
Key Takeaway
The most important thing to remember from this article is that this information can change how you think about Electronics.


