When a favorite gadget suddenly stops working, it’s tempting to panic—or immediately shop for a replacement. But many “dead” electronics are only suffering from simple, fixable issues. With a calm approach and basic tools, you can often bring devices back to life, save money, and keep e‑waste out of landfills.
This guide walks through five practical, step-by-step repair tips you can safely try at home before giving up on your electronics.
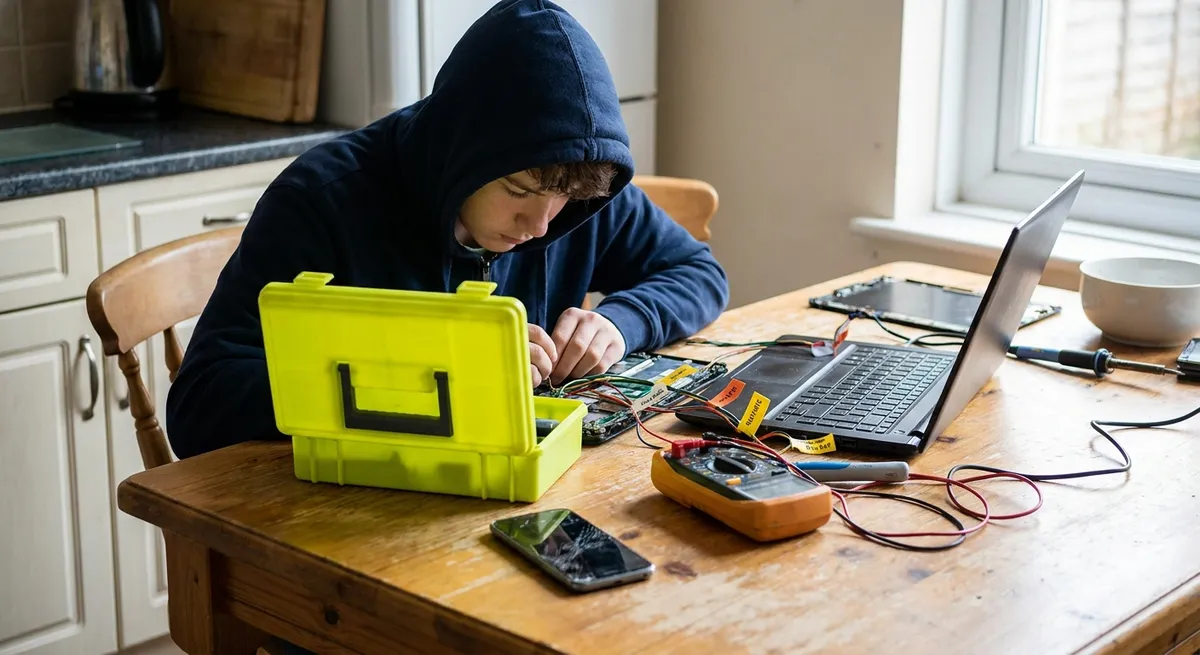
Before You Start: Safety and Tools You Actually Need
Before diving into specific fixes, set yourself up for safe, effective troubleshooting.
Unplug or power down every device before opening anything or touching internal parts. For battery-powered gadgets, remove the battery if it’s accessible. Avoid working on anything connected directly to mains power unless you’re absolutely sure it’s designed for user access (like a power strip or removable power cord).
For most basic electronics repairs, a simple toolkit is enough:
- Small Phillips and flathead screwdrivers (precision set)
- Plastic spudger or guitar pick for prying plastic housings
- Multimeter (even an inexpensive one) for basic testing
- Isopropyl alcohol (90%+ preferred) and cotton swabs
- Small soft brush (like a clean makeup brush or antistatic brush)
- Canned air or a hand air blower
- Microfiber cloths
Take photos as you disassemble so you can reverse the process later. Work over a tray or light-colored towel so tiny screws don’t vanish.
Step 1: Revive “Dead” Devices With a Power Path Check
Many “completely dead” electronics fail for very simple reasons—power isn’t getting where it needs to go. Instead of assuming the worst, trace the power path methodically.
Step-by-step:
- Confirm the outlet or USB port works.
Plug in a known-good device. For USB ports on computers, test in another port and avoid unpowered hubs.
- Inspect the power cord and adapter.
Look for kinks, cuts, loose plugs, or burn marks. Ensure the adapter matches the device’s voltage and polarity (check the label).
- Test the charger or adapter output (if you have a multimeter).
- Set the multimeter to the correct DC voltage range.
- Touch black probe to the outer/negative contact, red to inner/positive.
- Compare the reading to the printed output rating. If it’s wildly off or zero, the adapter may be bad.
- Check for loose power jacks.
Gently wiggle the plug where it connects to the device. If the device powers on/off with movement, the jack may be loose inside and need professional resoldering—but you’ve at least narrowed down the cause.
- Try a known-good compatible adapter.
Only if voltage, polarity, and connector size match. Many laptops, routers, and monitors use similar-looking but incompatible adapters, so double-check labels.
If the device suddenly works with a different adapter or outlet, you’ve solved the problem without opening anything. Label bad adapters and recycle them properly so they don’t get reused accidentally.
Step 2: Bring Water-Exposed Electronics Back From the Brink
Spills and accidental dunks don’t always mean instant death, especially for small electronics without direct mains power (like phones, remotes, headphones, or game controllers). Fast, correct action is more important than anything else.
Step-by-step:
- Power off immediately.
If it’s on, shut it down. Do not press extra buttons or keep “testing” it. If the battery is removable, take it out right away.
- Unplug and disconnect everything.
Remove chargers, accessories, memory cards, and detachable batteries. More connectors mean more potential corrosion points.
- Gently shake out excess liquid.
Hold the device with openings facing down and let gravity help. Avoid vigorous shaking that might spread liquid deeper inside.
- Blot, don’t wipe.
Use a lint-free cloth or paper towel to blot visible moisture around seams, ports, and buttons.
- Use controlled airflow.
Blow gently with canned air or a hand blower to push moisture away from ports and openings. Don’t use high heat from hair dryers; it can warp plastics and screens.
- Clean contacts with isopropyl alcohol.
For accessible battery compartments or exposed circuit boards, lightly dab a cotton swab in isopropyl alcohol and clean any visible corrosion or residue. Alcohol displaces water and evaporates quickly.
- Let it dry—properly.
Leave the device open (if safe to do so) in a warm, dry room for at least 24–48 hours. Avoid sealing it in airtight bags without desiccant; “rice fixes” are mostly myth compared to simply letting air circulate.
- Reassemble and test.
Once fully dry, reinstall the battery or reconnect power and test. If it’s still unstable or overheating, disconnect again and consider a professional board-level cleaning.
If the device was connected to mains power when it got wet (like a plugged-in appliance), do not attempt this yourself—unplug it and consult a qualified technician due to shock and fire risks.
Step 3: Fix Buttons and Keys That Don’t Respond
Remote controls, game controllers, keyboards, and other input devices often fail because of dust, skin oils, or worn contact pads—not because the electronics are fried.
Step-by-step:
- Rule out simple issues.
Replace batteries in remotes or wireless mice with fresh ones. For keyboards, try another USB port or a different computer.
- Clean from the outside first.
- Turn off/unplug the device.
- Use canned air around keys or buttons.
- Wipe surfaces with a slightly damp microfiber cloth (water or 70%+ isopropyl alcohol).
- Perform a basic keypress test (for keyboards).
On a computer, use an online key tester (search “keyboard tester”) to see which keys fail consistently. That tells you where to focus.
- Open the device carefully (if it’s designed to be opened).
- Remove screws, noting their locations.
- Use a plastic spudger to gently separate plastic shells.
- Watch for ribbon cables connecting top and bottom halves.
- Clean contacts and membranes.
- For rubber membrane keypads (like TV remotes):
- Lift the rubber sheet gently.
- Clean both the rubber “dots” and PCB contacts with isopropyl alcohol on a cotton swab.
- For mechanical keyboards:
- Remove keycaps (if design allows).
- Clean switches with compressed air and gentle alcohol swabs around, not inside, the switch.
- Check for torn membranes or broken mounts.
If a rubber keypad is cracked or a key stem is broken, you may need replacement parts. Many popular remote controls and keyboards have compatible replacement membranes or keys available online.
- Reassemble and test thoroughly.
Before putting all screws back, test the device carefully. If keys now respond, finish reassembly; if not, double-check ribbon cable connections and contact cleanliness.
Often, a careful cleaning will restore “dead” buttons and save you from replacing an entire controller or remote.
Step 4: Quiet Noisy Fans and Overheating Laptops
Overheating and fan noise are common issues in laptops, game consoles, and desktops. Dust buildup restricts airflow, forcing fans to work harder and sometimes causing thermal shutdowns.
Step-by-step:
- Shut down and unplug.
Turn off the device, unplug it, and remove the battery if possible (for devices with removable batteries).
- Inspect vents and intakes.
Look for dust mats blocking grills on the sides, back, or bottom. Use a flashlight to see deeper into vents.
- Blow out dust—carefully.
- Use canned air with short bursts from different directions.
- Keep the fan blades from spinning wildly (you can hold them gently with a toothpick or plastic tool) to avoid damaging bearings.
- Open the device for deeper cleaning (if feasible).
For many laptops and desktops:
- Check that fans spin freely.
Manually rotate each fan blade. If it feels gritty, wobbly, or stuck, the fan may need replacement rather than cleaning.
- Adjust software settings.
- Update BIOS/firmware and system drivers from the manufacturer’s website.
- Use built-in power settings to reduce performance slightly, which can lower heat output.
- On consoles and some laptops, operating system updates can improve fan control profiles.
- Reassemble and monitor temperatures.
After reassembly, run the device under typical load and monitor temperature with a reputable utility (e.g., HWMonitor on Windows, built-in Activity Monitor + third-party sensor tools on macOS). Fans should run smoother and quieter; if the device still overheats quickly, thermal paste or internal components may need professional service.
Regular dust maintenance can dramatically extend the life of electronics that rely on active cooling.
Step 5: Rescue Gadgets With Broken or Dirty Ports
Loose or glitchy connections from USB, headphone jacks, HDMI, and charging ports often come down to physical wear or debris. Basic inspection and cleaning can restore stable connections.
Step-by-step:
- Rule out cable problems first.
Test with a known-good cable. Many issues blamed on devices actually come from damaged or low-quality cables.
- Inspect the port closely.
- Use a bright light and, if possible, a magnifying glass.
- Look for dust, lint, bent pins, or corrosion.
- Clean out debris.
- Power off the device.
- For open ports (USB-A, headphone jacks):
- Use a wooden or plastic toothpick to gently lift lint and dust.
- Blow out with canned air afterward.
- For smaller ports (USB-C, Lightning):
- Use a soft brush and very gentle air. Avoid metal tools that might bend internal contacts.
- Clean light corrosion with isopropyl alcohol.
- Lightly dampen a microfiber cloth or foam swab with isopropyl alcohol.
- Wipe the port edges and surrounding area; for headphone jacks, insert and rotate a swab gently.
- Allow to dry completely before powering on.
- Check for mechanical looseness.
Connect the cable and gently wiggle. A small amount of play is normal, but obvious looseness, intermittent charging, or audio dropouts when touched suggests the port’s internal solder joints or retaining clips are worn.
- Try alternate connection methods (where possible).
- For a laptop with a failing USB port, try another port or a powered USB hub.
- For phones and tablets, some functions can be offloaded to wireless (Bluetooth headphones, Wi‑Fi file transfer) while you plan a port repair.
- Decide on DIY vs. professional repair.
In many modern phones and tablets, ports are soldered directly to the motherboard and require skill to replace. For some laptops and game consoles, ports are on separate daughterboards that are easier for DIY replacement. Search specifically for your model’s teardown or repair guide before proceeding.
A simple port cleaning is often enough to fix “cable must sit at a weird angle” problems and restore solid connections.
Conclusion
Most everyday electronics failures aren’t mysterious—they’re the result of poor power delivery, dust, moisture, grime, or worn physical connections. By systematically checking power paths, responding correctly to liquid exposure, cleaning buttons and ports, and clearing dust from cooling systems, you can often revive gear that seems beyond hope.
Work slowly, prioritize safety, and know your limits. If a repair involves mains wiring, swollen batteries, or board-level soldering you’re not comfortable with, it’s worth bringing in a professional. But the five step-by-step fixes in this guide are well within reach for careful DIY enthusiasts—and they can save you money, sharpen your repair skills, and keep your favorite electronics going longer.
Sources
- [U.S. Environmental Protection Agency – Electronics Stewardship](https://www.epa.gov/smm-electronics) - Background on electronics waste, reuse, and repair benefits
- [iFixit – Electronics Repair Guides](https://www.ifixit.com/Device) - Detailed, model-specific disassembly and repair instructions for many electronics
- [Apple Support – If your iPhone or iPod touch gets wet](https://support.apple.com/en-us/HT205628) - Official guidance on handling liquid exposure for mobile devices
- [CDC – Electrical Safety](https://www.cdc.gov/niosh/topics/electrical/) - Safety information relevant to working around electrical devices
- [Intel – Keeping Your Computer Cool](https://www.intel.com/content/www/us/en/gaming/resources/pc-overheating.html) - Practical advice on overheating, airflow, and cooling maintenance
Key Takeaway
The most important thing to remember from this article is that this information can change how you think about Electronics.


