Small problems around the house rarely stay small. A loose hinge becomes a sagging door, a tiny drywall dent turns into a full-blown eyesore, and that dripping faucet quietly adds up on your water bill. The good news: you don’t need a truck full of tools or contractor skills to handle many of the most common issues.
These five step-by-step repairs are designed for real DIYers—practical, manageable, and totally doable in a weekend afternoon.
Fix 1: Quiet a Squeaky Door (Without Removing It)
A squeaky door is usually just metal rubbing against metal with not enough lubrication. You can almost always fix it without taking the door down.
What you’ll need:
- Paper towel or rag
- Lubricant: silicone spray, white lithium grease, or petroleum jelly
- Small flathead screwdriver (optional)
Step-by-step:
- Check where the sound is coming from.
Open and close the door slowly. Listen at the hinges and around the latch to find the squeak.
- Protect nearby surfaces.
Place a paper towel or rag under the hinge to catch drips if you’re using spray lubricant.
- Apply lubricant to the hinge pins.
- For spray: Insert the straw and give a short burst at the top of each hinge.
- For jelly/grease: Use your finger or a cotton swab to work a small amount around the pin and moving parts.
- Work the door back and forth.
Open and close the door 10–15 times to pull the lubricant into the hinge. Wipe away any excess that drips out.
- Address stubborn squeaks.
If it’s still noisy, gently pry the hinge pin up slightly with a flathead screwdriver, add a bit more lubricant directly to the pin, then tap it back down and test again.
When to call a pro:
If the door is badly misaligned, rubbing hard on the frame, or won’t latch properly, you may need carpentry adjustments beyond simple lubrication.
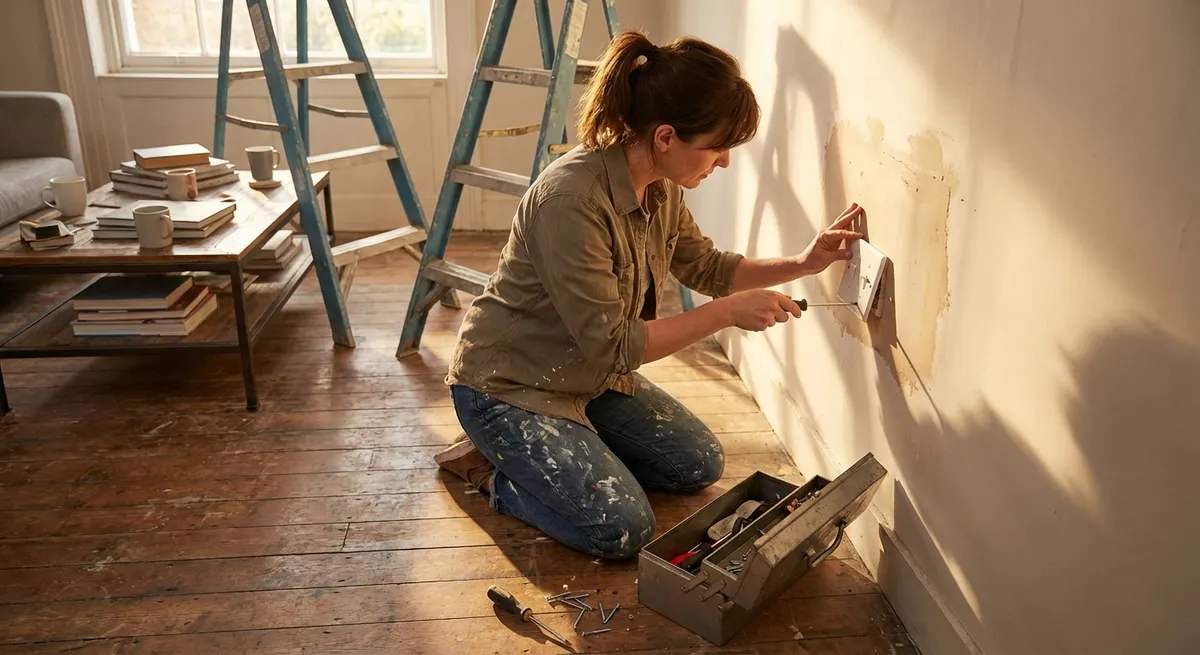
Fix 2: Patch a Small Hole in Drywall for a Clean Finish
Nail pops, doorknob dents, and small wall damage are common—and surprisingly easy to fix cleanly if you follow the right order.
What you’ll need:
- Pre-mixed lightweight spackling or joint compound
- Putty knife (2–4 inch)
- Fine-grit sandpaper (120–220 grit)
- Damp sponge or cloth
- Primer and matching paint
Step-by-step:
- Prepare the hole.
Gently scrape around the damaged area with your putty knife to remove loose paint or drywall dust. Wipe with a damp cloth to clean.
- Apply the spackle.
Scoop a small amount on your putty knife and press it firmly into the hole, slightly overfilling it.
- Feather the edges.
Hold the knife at a low angle and drag it outward from the center, thinning the compound toward the surrounding wall. This reduces visible ridges after sanding.
- Let it dry completely.
Follow the product instructions (often 30 minutes to a few hours). Don’t rush—sanding wet compound creates a mess and weak repair.
- Sand and spot-check.
Lightly sand the patched area until it’s flush with the wall. Run your fingers over it; it should feel smooth and level. Wipe dust with a damp cloth.
- Prime before painting.
Apply a small amount of primer over the patch. Once dry, paint with your wall color, feathering the edges for a seamless blend.
When to call a pro:
If the hole is larger than your hand (or if the wall feels soft or damp), you may be dealing with structural or moisture issues that need professional evaluation.
Fix 3: Stop a Dripping Bathroom Faucet
A dripping faucet wastes water and can stain sinks over time. Many standard faucets can be fixed with a simple cartridge or washer replacement.
Important: Turn off water supply and plug the sink drain so you don’t lose small parts.
What you’ll need:
- Adjustable wrench or socket set
- Screwdriver (Phillips and flathead)
- Replacement cartridge or washers (check brand/model)
- Towel
Step-by-step:
- Shut off the water.
Turn the shutoff valves under the sink clockwise until they stop. Open the faucet to relieve pressure and confirm water is off.
- Remove the handle.
Look for a decorative cap or visible screw. Pry the cap gently with a flathead screwdriver, then remove the screw and lift off the handle.
- Expose the cartridge or stem.
Take note (or a photo) of the assembly order. Unscrew the retaining nut with your wrench and gently pull out the cartridge or stem.
- Inspect for wear.
Look for cracked rubber seals, worn O-rings, or mineral buildup. If you’re unsure, take the old part to a hardware store and match it.
- Install the new part.
Insert the new cartridge or reassemble with new washers/O-rings exactly as the old one was positioned. Tighten the nut snugly but don’t overtighten.
- Reassemble and test.
Put the handle back on, secure the screw, and replace the cap. Turn the shutoff valves back on slowly and test for leaks and drips.
When to call a pro:
If the shutoff valves won’t turn, the faucet body is cracked, or you see corrosion on supply lines, it’s safer to have a plumber handle it.
Fix 4: Reanchor a Loose Towel Bar or Toilet Paper Holder
A wobbly or falling towel bar is usually caused by screws pulling out of drywall. Fixing it the right way once is better than tightening it every week.
What you’ll need:
- Phillips screwdriver
- Drywall anchors (toggle or self-drilling)
- Drill and drill bits
- Level (optional but helpful)
- Pencil
Step-by-step:
- Remove the fixture.
Loosen the set screw underneath the bracket (if present) and slide the bar or holder off. Unscrew the mounting brackets from the wall.
- Check the old holes.
If they’re enlarged or crumbly, they won’t hold screws alone. You’ll need anchors or to move the brackets slightly.
- Install drywall anchors.
- For self-drilling anchors: Screw them directly into the wall at your marked locations.
- For toggle bolts: Drill a pilot hole to the correct size, then insert the toggle through the hole.
- Reposition if needed.
If the old holes are too damaged or close to an edge, move the brackets a small amount up/down or sideways and mark new, solid anchor points. Use a level to keep the bar straight.
- Attach the brackets.
Screw the brackets into the anchors until snug. They should feel firm with no movement.
- Reinstall the bar or holder.
Slide the bar back onto the brackets, tighten the set screws, and test with moderate pressure.
When to call a pro:
If the wall feels soft, crumbles excessively, or has signs of moisture, you may have a bigger drywall or water issue that needs professional assessment.
Fix 5: Refresh a Drafty Exterior Door with New Weatherstripping
Drafty doors make your home less comfortable and raise energy bills. Replacing worn weatherstripping is a straightforward fix with a real payoff.
What you’ll need:
- New weatherstripping (adhesive foam, vinyl, or rubber—match your existing type if possible)
- Measuring tape
- Scissors or utility knife
- Screwdriver (if your old stripping is screwed in)
- Cleaning cloth
Step-by-step:
- Inspect existing weatherstripping.
Close the door and look for light coming through around the edges. Check for cracks, gaps, or crushed sections in the current seal.
- Remove the old material.
Peel off adhesive strips or unscrew nailed/screwed types. Scrape any stubborn residue with a plastic scraper if needed.
- Clean the surface.
Wipe the door frame where the new weatherstripping will go. For adhesive types, a clean, dry surface is critical for a good bond.
- Measure and cut.
Measure the top and sides of the frame. Cut your weatherstripping to size, leaving a snug but not overly compressed length for each edge.
- Install along the top first.
For adhesive: Peel off a small section of backing, stick it in place, and continue peeling and pressing along the length.
For screw-on: Position, pre-drill if necessary, then screw in loosely before final tightening.
- Seal the sides.
Install along the latch and hinge sides, making sure the door can still close smoothly while creating a firm seal. Trim any excess.
- Test and adjust.
Close the door and check for remaining drafts with your hand or a lit incense stick (watch for smoke movement). Adjust or re-seat sections as needed.
When to call a pro:
If the door frame is out of square, badly warped, or has rot, basic weatherstripping won’t solve the problem and a door specialist or carpenter is a better option.
Conclusion
Home repairs don’t have to mean a full weekend of frustration or a big bill from a contractor. With a modest toolkit and a little patience, you can quiet noisy doors, clean up wall damage, stop wasteful drips, solidify loose fixtures, and block out drafts—all with straightforward, step-by-step fixes.
Start with the smallest repair on this list, build your confidence, and keep a running list of little problems you can knock out in under an hour. Over time, those quick wins add up to a home that looks better, works better, and costs less to run.
Sources
- [U.S. Department of Energy – Weatherstripping](https://www.energy.gov/energysaver/weatherstripping) - Guidance on types of weatherstripping and best practices for improving home efficiency
- [EPA WaterSense – Fix a Leak Week Resources](https://www.epa.gov/watersense/fix-leak-week) - Information on water waste from leaks and basic faucet/toilet leak repairs
- [This Old House – How to Patch a Hole in Drywall](https://www.thisoldhouse.com/walls/21015109/how-to-patch-a-hole-in-drywall) - Step-by-step reference for drywall repair techniques
- [Family Handyman – How to Replace a Faucet Cartridge](https://www.familyhandyman.com/project/how-to-replace-a-cartridge-faucet/) - Detailed walkthrough of cartridge replacement for common faucets
- [Energy Star – Drafts and Air Leaks](https://www.energystar.gov/campaign/seal_insulate/methodology) - Background on how air leaks affect comfort and energy bills
Key Takeaway
The most important thing to remember from this article is that this information can change how you think about Home Repairs.


