If you’ve got basic tools, a driveway, and a free afternoon, there are plenty of car jobs you can tackle without a shop visit. The key is knowing where the “safe wins” are: repairs that are realistic for DIYers, can save serious money, and don’t require a lift or expensive specialty equipment. This guide walks through five practical, step‑by‑step auto repair tasks you can do yourself, what to watch out for, and when it’s smarter to stop and call a pro.
Before You Start: Safety, Tools, and When to Stop
Every DIY repair should begin with a quick safety and reality check. Park on a flat surface, set the parking brake, and, if you’re lifting the car, always use jack stands rated for your vehicle’s weight—never work under a car supported only by a jack. Disconnect the negative battery terminal when working near electrical components, sensors, or moving parts like fans that can start unexpectedly.
Gather your tools before you start: a basic socket set (metric and SAE), screwdrivers, pliers, a torque wrench, jack and jack stands, a work light, shop towels, and safety glasses. Check your owner’s manual for torque specs, fluid types, and fuse locations; if you don’t have a paper copy, most manufacturers host manuals on their websites. Finally, know when to quit: if fasteners are severely rusted, fluids are leaking heavily, warning lights indicate brake or airbag issues, or you feel out of your depth at any point, it’s not a failure to stop—it’s good judgment.
Step‑By‑Step: Changing Your Engine Oil and Filter
An oil change is one of the best intro jobs: it builds confidence and helps you understand your car’s underside.
Confirm specs and gather supplies
Check your manual for oil type (e.g., 0W‑20, 5W‑30), capacity, and filter part number. Buy the correct oil, a new drain plug washer (if required), oil filter, drain pan, funnel, and nitrile gloves. A dedicated oil filter wrench makes removal easier.
Warm the engine slightly and secure the car
Run the engine for 3–5 minutes so the oil flows more easily, then shut it off. Park on level ground, set the parking brake, and chock a rear wheel. If needed, raise the front with a jack and support it safely with jack stands.
Drain the old oil
Place the drain pan under the oil drain plug on the oil pan. Loosen the plug with a wrench, then finish removing it by hand, keeping your arm out of the flow path. Let the oil drain until it slows to a drip. Inspect the plug threads and replace the washer if your manual specifies it.
Replace the oil filter
Move the pan under the filter. Loosen the filter with your wrench and spin it off by hand. Check that the old rubber gasket came off with the filter—if it’s stuck to the engine, remove it. Lightly coat the new filter’s gasket with fresh oil, then spin it on by hand until the gasket contacts the base. Tighten per the filter’s instructions, typically ¾ turn past contact, by hand only.
Reinstall the drain plug and refill
Reinstall the drain plug with a new washer and tighten to the torque spec in your manual (over‑tightening can strip threads). Lower the car if it’s on stands. Add oil through the oil filler cap using a funnel, starting with about 80–90% of the capacity. Wait a minute, then check the dipstick and add in small increments until you reach the proper level.
Start, inspect, and recheck
Start the engine and let it idle for 30–60 seconds while you look underneath for leaks around the plug and filter. Shut it off, wait a couple of minutes, and verify the level on the dipstick again. Properly recycle used oil and the old filter at an auto parts store or municipal facility; never dump oil down drains or on the ground.
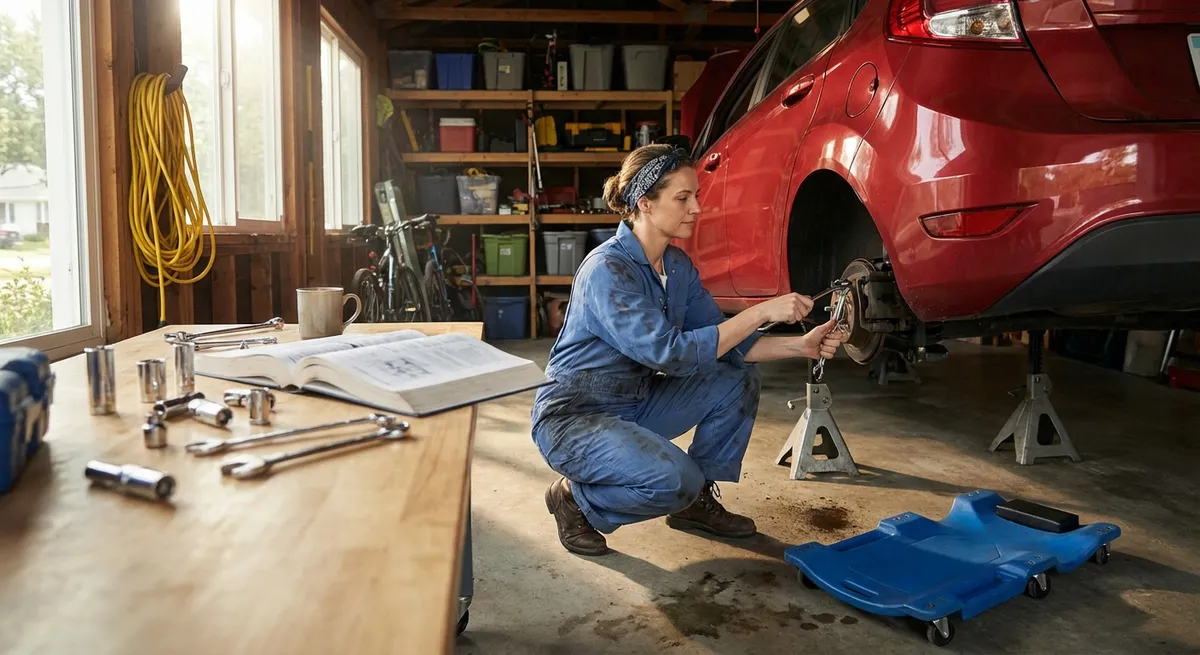
Step‑By‑Step: Replacing Front Brake Pads (Safely)
Brake work is doable for careful DIYers, but it demands attention to detail and safety. If anything seems unclear, get help—your stopping power depends on it.
Prepare and lift the vehicle
Loosen the front wheel lug nuts slightly with the car still on the ground. Jack up the front of the car at the factory jack points and support it securely with jack stands. Remove the wheels and set them aside.
Inspect rotors and hardware
Look at the brake rotors (the discs): deep grooves, heavy rust, or a pronounced lip at the outer edge may mean the rotors need replacement or machining. Examine rubber brake hoses for cracks or bulges. If you see fluid leaks, stop and consult a professional.
Remove the caliper and old pads
Locate the caliper bolts (usually on the back side). Remove them with a socket or wrench and carefully slide the caliper off the rotor, supporting it with a bungee cord or wire so it doesn’t hang by the brake hose. Slide the old pads out of the caliper bracket. Note how any clips or shims are arranged; take a photo if needed.
Compress the caliper piston
Remove the brake fluid reservoir cap under the hood to relieve pressure. Use a C‑clamp or disc brake spreader against the old pad (or a block of wood) to slowly push the caliper piston back into its bore. Watch the reservoir—if it starts to overflow, remove a little fluid with a clean syringe or turkey baster and dispose of it properly.
Install new pads and hardware
Clean the pad slides with a wire brush and apply a thin layer of high‑temperature brake lubricant to the contact points (but not on pad friction surfaces or rotor faces). Install any new clips that come with the pad kit. Slide the new pads into place, ensuring they’re seated correctly and facing the rotor. Reinstall the caliper over the new pads and torque the caliper bolts to spec.
Reassemble, test, and bed in
Reinstall the wheels, snug the lug nuts by hand, lower the vehicle, then torque the lugs in a star pattern to the manufacturer’s spec. Before driving, pump the brake pedal several times until it feels firm—this seats the pistons against the new pads. Perform a short, low‑speed test drive and follow the pad manufacturer’s bed‑in procedure to ensure even performance and long life.
Step‑By‑Step: Swapping Worn Wiper Blades and Re‑Filling Washer Fluid
Visibility fixes are quick, cheap, and make a big difference in safety, especially in bad weather.
Identify the correct blade size
Check your owner’s manual or use the fitment guide at an auto parts store to find the correct length for each wiper. Many cars use different lengths for driver and passenger sides.
Remove old wiper blades
Lift the wiper arm away from the windshield until it locks or stands on its own. Most blades use a small tab where the blade meets the arm—press this tab and slide the blade down and off the hook. Keep one hand on the arm so it doesn’t snap back and hit the windshield.
Attach new blades properly
Align the new blade’s connector with the wiper arm hook and slide it up until it clicks securely. Gently lower the arm back onto the glass. Tug lightly on the blade to ensure it’s locked in place.
Top up washer fluid
Open the hood and locate the washer fluid reservoir—usually marked with a windshield/water symbol. Remove the cap and pour in washer fluid designed for your climate (winter blends resist freezing). Fill to near the top but don’t overfill, then replace the cap firmly.
Test the system
Turn on the ignition and activate the washers and wipers. Confirm that the new blades clear the glass smoothly without skipping or streaking, and that fluid sprays evenly. If the spray is weak, gently clean the nozzle openings with a pin, taking care not to enlarge them.
Step‑By‑Step: Replacing a Blown Fuse to Fix Electrical Gremlins
Many “dead” accessories—like a radio, cigarette lighter outlet, or power windows—are brought back to life by a simple fuse replacement.
Locate the fuse panels and diagram
Most cars have at least one interior fuse panel (often under the dash or behind a side panel) and sometimes one under the hood. Use your owner’s manual to find panel locations and a diagram showing which fuse controls which circuit.
Identify the suspect fuse
If a single accessory stopped working suddenly, locate the fuse labeled for that circuit (e.g., “AUX PWR,” “RADIO,” “P/WDW”). Turn off the ignition and all accessories before removing anything.
Remove and inspect the fuse
Use a fuse puller (often included inside the panel) or a pair of needle‑nose pliers to gently pull the fuse straight out. Hold it up to the light: if the metal strip inside is broken or burned, the fuse is blown and needs replacement.
Install a new fuse with the correct rating
Replace the blown fuse with a new one of the same type and exact same amperage rating (printed on the fuse body and in the panel diagram). Pushing in a higher‑amp fuse can create a fire risk by allowing wiring to overheat before the fuse blows.
Test the circuit and monitor
Turn the ignition on and test the accessory. If it works normally and the fuse doesn’t blow again, you likely had a one‑time overload. If the new fuse blows immediately or repeatedly, stop troubleshooting and have a professional inspect the circuit—there may be a short or failing component needing deeper diagnostics.
Step‑By‑Step: Fixing a Slow Air Leak with a Plug Repair (Tires Off the Rim Stay to the Pros)
A slow leak from a nail or screw in the tread can sometimes be repaired in your driveway with a plug kit. This is a temporary or semi‑permanent fix; sidewall damage or large punctures should be handled by a tire shop.
Confirm the leak location and type
Inflate the tire to the recommended pressure on the door jamb sticker. Mix dish soap with water and brush it over the tread area—bubbles will form at the leak. Only proceed if the puncture is in the tread area, not the sidewall or shoulder, and is from something like a small nail or screw.
Prepare the area and mark the puncture
Put the vehicle in park with the brake set. If needed, jack up that corner to rotate the wheel so the puncture is easy to access, then lower it back onto the ground for stability. Mark the spot with a marker or chalk.
Remove the object and clean the hole
Use pliers to pull the nail or screw straight out. Immediately insert the rasp tool from your plug kit into the hole and work it in and out several times to clean and slightly enlarge the puncture for the plug. This takes some force—keep your other hand clear and brace yourself properly.
Insert the plug
Thread a rubber plug halfway through the eye of the insertion tool, forming a “U” shape. Apply rubber cement if included in your kit. Push the plug into the puncture until about ½ inch remains above the tread surface, then quickly pull the tool straight out—leaving the plug in place. Trim excess plug material flush with the tread using a razor blade.
Re‑inflate and check for leaks
Inflate the tire to the proper pressure and repeat the soapy water test around the repair. If no bubbles appear, reinstall any valve caps and monitor pressure over the next several days. For high‑speed highway use or any doubt about the repair, have the tire inspected and possibly patched from the inside at a professional shop.
Conclusion
With the right prep, a bit of patience, and respect for safety, many routine car fixes are well within reach of a DIYer. Changing your own oil and pads, keeping visibility and washer systems in shape, chasing down blown fuses, and repairing minor tire punctures can cut costs and give you a clearer picture of your car’s health. Use your manual, follow torque specs, and don’t hesitate to stop if something doesn’t look right. The more comfortable you become with these jobs, the more confident you’ll be when deciding what belongs in your weekend garage and what truly belongs at a professional shop.
Sources
- [U.S. Department of Energy – Maintaining Your Vehicle](https://www.energy.gov/energysaver/maintaining-your-vehicle) - Covers basic maintenance practices that improve efficiency and reliability
- [National Highway Traffic Safety Administration (NHTSA) – Vehicle Maintenance](https://www.nhtsa.gov/vehicle-maintenance) - Safety-focused guidance on brakes, tires, and other critical systems
- [AAA – Basic Car Care and Maintenance Tips](https://www.aaa.com/autorepair/articles/basic-car-care-and-maintenance-tips) - Practical advice on routine DIY tasks and when to see a mechanic
- [Bridgestone Tire – Can I Repair a Flat Tire?](https://www.bridgestonetire.com/learn/maintenance/can-i-repair-a-flat-tire/) - Explains when plug/patch repairs are appropriate and safe
- [Toyota Owners – DIY Maintenance Resources](https://www.toyota.com/owners/resources/maintenance) - Example of manufacturer guidance and manuals useful for specs and procedures
Key Takeaway
The most important thing to remember from this article is that this information can change how you think about Auto Repair.


