Small problems in a house rarely stay small. A tiny drip, a loose hinge, or a drafty window can quietly eat your time, comfort, and money. The good news: many of these “everyday annoyances” are safe, doable fixes for DIY‑minded homeowners with basic tools and a little patience. This guide walks you through five practical, step‑by‑step repairs that deliver real impact—without requiring a workshop full of gear or contractor‑level skills.
Fix a Dripping Faucet (Without Replacing the Whole Thing)
A dripping faucet can waste gallons of water a day and slowly drive you up the wall. In many cases, the culprit is a worn cartridge or washer—something you can replace in under an hour.
Tools & materials: Adjustable wrench, Phillips/flathead screwdrivers, replacement cartridge/washer set (matched to your faucet brand), plumber’s grease, small towel.
Step‑by‑step:
- Shut off the water supply.
Look under the sink for the hot and cold shutoff valves. Turn both clockwise until they stop. Open the faucet to relieve pressure and confirm the water is off.
- Plug the drain and prep the area.
Close the sink stopper or stuff in a rag. You don’t want tiny screws or parts vanishing down the drain. Lay out a towel and a small container for parts.
- Remove the handle.
Find the small cap or screw on the handle (it may be hidden under a decorative plug). Pry the cap off with a flathead screwdriver, then unscrew the handle and lift it off.
- Take out the cartridge or stem.
Under the handle will be a retaining nut or clip. Carefully loosen it with your wrench. Gently pull out the cartridge or stem—note how it’s oriented so you can reinstall it correctly.
- Match and replace the part.
Take the old cartridge/washer to a hardware store and match it exactly (brand, size, and style matter). Apply a light coat of plumber’s grease to O‑rings on the new part, then insert it in the same orientation as the original.
- Reassemble and test.
Reinstall the retaining nut/clip, handle, and decorative cap. Open the shutoff valves slowly, then run the faucet and check for leaks. If you still see dripping, double‑check that the cartridge is fully seated and the retaining nut is snug but not overtight.
Quiet a Squeaky Door the Right Way
A squeaky door is more than an irritation—it’s a subtle sign that friction is wearing on the hinge pins. Rather than blasting it with random sprays, a quick clean and lube will quiet it down and help it last longer.
Tools & materials: Hammer, small nail or punch, rag, household lubricant (silicone spray or white lithium grease), optional: steel wool or fine sandpaper.
Step‑by‑step:
- Support the door.
Place a door wedge or a sturdy book under the door to keep it from shifting when you remove the hinge pins.
- Remove one hinge pin at a time.
Starting with the top hinge, place the tip of a nail or punch under the bottom of the pin and gently tap upward with a hammer until you can pull it out from the top. Do this with the door closed for stability.
- Clean the hinge pin.
Wipe off old grime and rust with a rag. If the pin is rough, lightly buff with steel wool or fine sandpaper until smooth, then wipe clean again.
- Lubricate the pin.
Apply a thin, even layer of lubricant to the pin. Avoid using cooking oil—it gums up over time and attracts dust.
- Reinsert the pin and repeat.
Push the pin back into the hinge from the top and tap gently if needed. Repeat the same process for the middle and bottom hinges.
- Open and close the door.
Swing the door several times to work the lubricant through the hinge. Wipe any excess lube that squeezes out so it doesn’t drip onto floors or walls.
Restore Suction on a Weak Bathroom Fan
A weak bathroom exhaust fan leaves moisture hanging in the air—perfect conditions for mold, mildew, and peeling paint. Often, the fan itself is fine; it’s dust and grime choking the airflow.
Tools & materials: Screwdriver, vacuum with brush attachment, soft brush, mild cleaner, step stool, flashlight, optional: replacement fan cover or motor kit (if needed).
Step‑by‑step:
- Cut the power.
Turn off the fan switch and, for extra safety, flip the breaker that controls the bathroom circuit. Test by trying to turn the fan on—nothing should happen.
- Remove the cover.
Most covers either pull down and release from metal spring clips or are held by a couple of screws. Gently pull or unscrew, taking care not to crack the cover.
- Clean the cover itself.
Rinse dust and grime from the cover using warm, soapy water. Let it dry thoroughly before reinstallation.
- Vacuum the fan housing.
Use a vacuum with a brush attachment to remove dust from the fan blades, motor, and housing. Be gentle; don’t bend the blades.
- Wipe and inspect.
Use a soft brush or cloth to loosen stubborn debris. Look for signs of damage: cracked blades, burnt smell, or a noisy, loose motor. If you notice these, consider a replacement motor kit compatible with your existing housing.
- Reassemble and test airflow.
Once everything is dry and clean, reinstall the cover. Turn power back on and test the fan. To check suction, hold a square of toilet paper near the grille; it should pull and hold it in place.
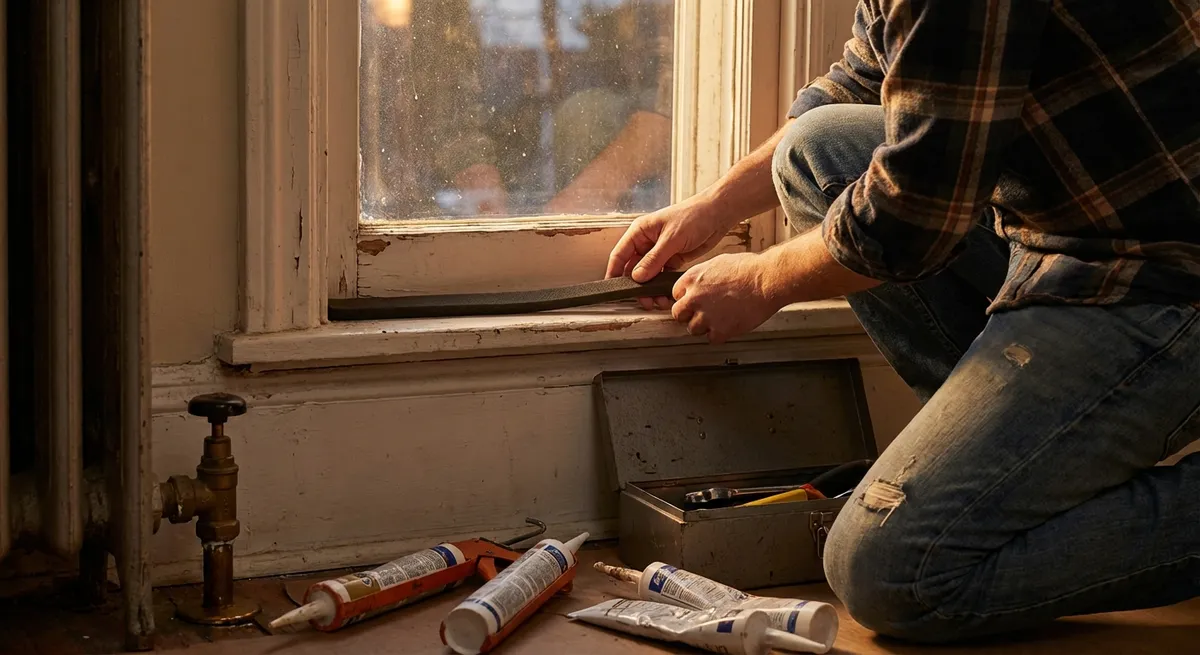
Seal a Drafty Window to Cut Energy Waste
Drafty windows don’t just feel uncomfortable—they can spike your heating and cooling bills. Simple sealing steps can dramatically improve comfort without replacing the entire window.
Tools & materials: Utility knife, caulk gun, exterior‑grade caulk (for outside gaps), interior caulk or removable caulk (for inside), weatherstripping, rubbing alcohol or mild cleaner, rag.
Step‑by‑step:
- Find the draft.
On a windy day, hold a lit incense stick or a damp hand near the window edges and watch where the smoke or cool air moves. Note gaps around the frame, sash, and trim.
- Clean the surfaces.
Wipe window frames and surrounding trim with mild cleaner or rubbing alcohol and let dry. Caulk sticks best to clean, dry surfaces.
- Remove old, cracked caulk.
Use a utility knife or caulk removal tool to cut away loose or brittle caulk along the seams. Scrape clean and wipe away dust.
- Apply new exterior caulk (if accessible).
From the outside, run a steady bead of exterior‑grade caulk where the window frame meets the siding or exterior trim. Smooth with a damp finger or caulk tool to seal gaps without blocking weep holes (small drainage openings).
- Seal interior gaps and add weatherstripping.
Indoors, apply a thin bead of caulk along gaps between the frame and trim. For movable parts (where the sash meets the frame), use adhesive foam weatherstripping instead of caulk so the window can still open.
- Let it cure and recheck.
Allow caulk to cure per the manufacturer’s instructions. Re‑test with incense or your hand to confirm the draft is gone. If you still feel air, consider adding a temporary window film kit in colder seasons for extra insulation.
Repair a Small Drywall Hole for a Clean, Paint‑Ready Finish
Door handles, moving furniture, or an errant doorknob can leave ugly holes in drywall. Patching them properly keeps your walls looking solid and protects against further crumbling.
Tools & materials: Utility knife, putty knife, pre‑mixed joint compound or spackle, self‑adhesive mesh patch (for holes larger than nail pops), sanding sponge or fine sandpaper, primer, matching paint.
Step‑by‑step:
- Cut away loose material.
Use a utility knife to trim any torn paper, loose drywall, or ragged edges around the hole. You want a clean, solid border so the patch adheres well.
- For nail/screw holes: fill directly.
For small nail pops or screw holes, press joint compound or spackle into the hole with a putty knife, then smooth flush with the wall. Let dry, then lightly sand.
- For medium holes: apply a mesh patch.
For holes roughly the size of a quarter up to a few inches, place a self‑adhesive mesh patch over the hole, centered and pressed firmly.
- Apply the first coat of compound.
Load your putty knife with compound and spread a thin layer over the patch, feathering the edges outward so it tapers smoothly into the surrounding wall. Don’t try to make it perfect in one coat—thin and even is better than thick.
- Sand and add a second coat.
Once dry, sand lightly to knock down ridges. Apply a second, slightly wider coat to blend the patched area. Let dry again and sand until smooth, keeping the patch area as flat as possible.
- Prime and paint.
Apply primer over the patched area to seal the fresh compound; this helps prevent flashing (a visible patch outline) through your paint. Once the primer dries, paint with your wall color, feathering the edges to blend.
Conclusion
Most homes don’t fall apart from one big failure—they wear down from lots of small, ignored issues. Learning a handful of practical repairs—like stopping drips, quieting doors, boosting ventilation, sealing drafts, and patching walls—puts control back in your hands and protects your investment. Start with one project, gather the right tools, and follow each step methodically. As your confidence grows, so will your ability to keep your home comfortable, efficient, and looking the way you want it to.
Sources
- [U.S. Environmental Protection Agency – Fix a Leak](https://www.epa.gov/watersense/fix-leak-week) - Information on water waste from leaks and basic leak repair guidance
- [Energy.gov – Air Sealing Your Home](https://www.energy.gov/energysaver/weatherize/air-sealing-your-home) - Official guidance on identifying and sealing drafts to improve efficiency
- [Family Handyman – How to Fix a Leaky Faucet](https://www.familyhandyman.com/project/how-to-fix-a-leaky-faucet/) - Step‑by‑step faucet repair examples with photos for different faucet types
- [This Old House – How to Patch a Hole in Drywall](https://www.thisoldhouse.com/walls/21016426/how-to-patch-drywall) - Detailed drywall patching techniques for different hole sizes
- [Home Ventilating Institute – Proper Bathroom Ventilation](https://www.hvi.org/faq/bathroom-ventilation-faq/) - Overview of bathroom fan performance, moisture concerns, and best practices
Key Takeaway
The most important thing to remember from this article is that this information can change how you think about Home Repairs.


