When an appliance starts acting up, it’s tempting to ignore it until it completely dies—or to jump straight to replacement. But a lot of “failing” appliances are just asking for a simple, low‑cost fix. With a few tools, basic safety habits, and a calm approach, you can often restore performance, extend the life of your gear, and save yourself from rushed, expensive service calls. This guide walks through five practical, step‑by‑step repair tips that DIY‑minded homeowners can tackle with confidence.
Safety and Setup: What to Do Before Any Appliance Repair
Before turning a single screw, take a few minutes to make the job safer and smoother. Rushing the setup phase is one of the most common mistakes new DIYers make, and it’s where injuries and accidental damage usually begin.
First, cut the power. For anything that plugs in, unplug it before opening a panel or putting your hands inside. For hard‑wired appliances like some dishwashers or ovens, shut off the correct circuit breaker and verify with a non‑contact voltage tester if you have one. For gas appliances, also close the gas shutoff valve if you’re working near gas lines or burners.
Next, clear your workspace. Pull the appliance out from the wall if needed, but do it carefully—hoses and power cords can be shorter than they look. Place towels or cardboard on the floor to protect surfaces and to catch screws and clips. Keep a container or magnetic tray nearby and drop every screw or fastener into it immediately; this alone can prevent a lot of frustration.
Gather a basic tool kit: a Phillips and flat‑head screwdriver, adjustable wrench, nut driver set or socket set, needle‑nose pliers, flashlight or headlamp, and a multimeter if you’re comfortable testing continuity or voltage. Have your phone handy to take photos as you disassemble; those pictures are invaluable when it’s time to reassemble.
Finally, have your model number ready. Look for the data plate sticker—often on door frames, behind kick plates, or on the back of the appliance. With that number, you can look up parts diagrams online and confirm that any replacement components you buy are correct for your exact model.
Step‑by‑Step Tip 1: Revive a Warm Fridge with Better Airflow and Clean Coils
A refrigerator that’s “cool but not cold” often isn’t dying—it’s suffocating. Dust‑packed coils and blocked airflow can undermine cooling performance long before the compressor actually fails.
Start by checking the basics inside. Make sure food items aren’t pushed tight against the rear wall or covering air vents; cold air must circulate between the freezer and fresh‑food sections. If you’ve recently packed it full, rearrange items so there are gaps for air to flow and avoid blocking fan outlets.
Next, focus on the condenser coils. Unplug the fridge and pull it away from the wall. Depending on the model, the coils may be on the back or underneath behind a lower grille. Remove any panel or kick plate, then use a vacuum with a brush attachment to gently remove dust, pet hair, and debris from the coils and surrounding area. A long coil‑cleaning brush (often sold specifically for refrigerators) can help reach tight spots and dislodge stubborn buildup.
Once the coils are clean, inspect the condenser fan (if accessible). Spin the blades gently by hand with the power off; they should move freely without grinding. If they’re blocked by lint or debris, clean them carefully. If they feel stiff or don’t spin, the motor could be failing and may need professional replacement.
Before pushing the fridge back, check that there’s enough clearance from the wall for ventilation—usually at least a couple of inches. Plug it back in, set the thermostat to recommended settings (often around 37–40°F for fresh food and 0°F for the freezer), and give it several hours to stabilize. If cooling improves, you’ve likely dodged an unnecessary service call.
Step‑by‑Step Tip 2: Fix a Dishwasher That Cleans Poorly by Clearing Its “Circulation System”
When dishes come out gritty or still dirty, many people blame detergent or assume the pump is shot. In reality, partially clogged spray arms and filters are much more common—and very fixable.
Start by powering off the dishwasher and opening the door fully. Remove the bottom rack and locate the filter assembly at the bottom of the tub. Most modern dishwashers use a twist‑lock filter; turn it counterclockwise to lift it out. Rinse it under warm water, using a soft brush or an old toothbrush to remove grease and food particles. Avoid using anything sharp that could damage the mesh.
Next, find the spray arms—usually one at the bottom and one under the top rack, sometimes a third at the top. Most arms either snap out or are held by a simple screw or retaining nut. Remove them and inspect the holes along the arms. Use a wooden toothpick or soft brush to clear any food particles or hard water buildup; then run warm water through the arms in the sink to flush them out thoroughly.
While everything is out, check the area under the filter. Remove any visible debris around the sump (the small well where water collects). If your model has a removable cover or screen leading to the pump inlet, take it off and clear any lodged fragments like glass, bone, or seeds. Reinstall filters and spray arms in the reverse order, ensuring everything locks securely.
Finish by running a hot cycle with the dishwasher empty, optionally with a dishwasher cleaner or a cup of white vinegar on the top rack (avoid mixing vinegar with commercial cleaners unless the manufacturer specifically approves it). After this deep clean, observe the next couple of loads. If performance improves, you’ve restored the water pathways and saved your dishwasher from unnecessary strain.
Step‑by‑Step Tip 3: End the “Endless Cycle” on a Washing Machine That Won’t Spin or Drain
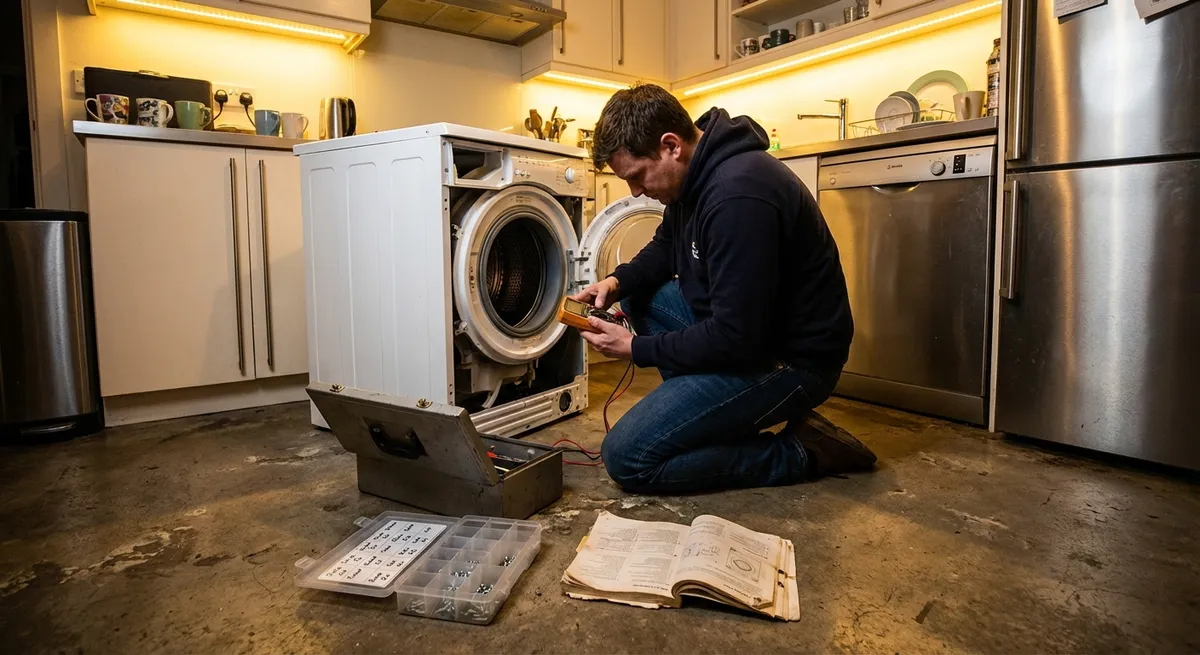
A washer that refuses to drain or spin can stop your laundry routine cold, but the cause is often a clogged drain pump filter or a simple safety switch issue rather than a dead machine.
First, confirm the symptoms. If the machine fills and agitates but stalls before spinning, or leaves clothes soaking wet, you’re likely dealing with a drain or lid/door lock problem. Unplug the washer before opening any panels.
If you have a front‑loader, look along the bottom front of the machine for a small access door. Behind it, many models hide a drain pump filter. Place a shallow pan or baking sheet and some towels under the door—there will be water. Open the small drain hose (if present) to slowly release water into the pan, then unscrew or pull out the filter. Remove coins, buttons, lint, and other debris, then rinse and reinstall the filter snugly.
For top‑loaders, clogs may be in the drain hose. Carefully pull the machine away from the wall and inspect the hose for kinks. Detach it at the back of the washer (have a bucket ready) and check for clogs at both ends. Flush it with water in a laundry sink or outside. Reattach securely, ensuring the hose height and routing match the manufacturer’s guidance to avoid siphoning issues.
If the washer still won’t spin but drains, suspect the lid switch (on traditional top‑loaders) or door lock (on front‑loaders and newer models). Check that the lid or door closes firmly and that any latch or strike plate isn’t broken or misaligned. Sometimes a small piece of plastic breaks off and prevents the safety switch from engaging. If you’re comfortable and have a multimeter, you can test the switch for continuity according to the machine’s service manual. Faulty switches are usually replaceable with basic tools, but if you’re uncertain, this is a good point to call in a professional.
Step‑by‑Step Tip 4: Restore Dryer Performance by Tackling Heat and Airflow Issues
A dryer that runs forever but leaves clothes damp is often not a heating element failure—it’s an airflow problem. Restricted vents not only hurt performance, they also increase fire risk, so this is one repair task that doubles as a safety upgrade.
Start with the simplest check: clean the lint filter before and after each load. If the filter looks clean but water pools on it when you run it under the tap, invisible residue from dryer sheets or fabric softener may be clogging the mesh. Wash the filter gently with warm, soapy water and a soft brush, then rinse and dry thoroughly.
Next, unplug the dryer and pull it out from the wall. Disconnect the vent hose at the back. Inspect the hose for lint buildup and kinks. If it’s crushed, excessively long, or made of thin plastic foil, consider replacing it with a rigid or semi‑rigid metal duct, which is safer and performs better. Use a vent brush or vacuum attachment to clean from the dryer outlet into the hose, and then from the hose toward the exterior vent.
Go outside and locate the vent hood. Check that the flap or louvers move freely and aren’t jammed with lint, nests, or debris. Clean the hood thoroughly so air can exhaust without obstruction. If your vent run is long or has several bends, a dedicated dryer vent cleaning kit with flexible rods can help you reach deeper into the duct.
Once reassembled, run the dryer on a timed heat setting with no clothes inside and feel the airflow at the outside vent. It should be strong and warm. If airflow is still weak after a full cleaning, or if the dryer heats inconsistently, you may be looking at internal components like thermostats, thermal fuses, or heating elements—which are repairable but usually require disassembly, a wiring diagram, and careful testing. At that point, weigh your comfort level against calling a qualified technician.
Step‑by‑Step Tip 5: Quiet and Correct an Oven That Won’t Heat Evenly
Uneven baking or long preheat times can make every meal a gamble. Often the culprit is a failing heating element (electric) or ignition system (gas), but you can perform some straightforward checks before pricing a new range.
For electric ovens, start by visually inspecting the bake element (usually at the bottom of the oven cavity) and the broil element (at the top). Unplug the range or switch off the breaker. Look for blisters, cracks, or spots where the element looks burned through. A damaged element usually needs replacement, which is commonly a DIY‑friendly task: remove a couple of screws, gently pull the element forward, disconnect the wires (taking a photo for reference), attach the new part, and reinstall.
If the elements look intact, try a simple performance check. With power restored, set the oven to a common temperature like 350°F and let it preheat. Use an oven thermometer placed in the center to compare the displayed temperature with the actual. If there’s a consistent offset (for example, always 25°F low), many modern ovens allow you to calibrate the temperature in the settings menu; check your manual.
For gas ovens with poor or uneven heating, watch the burner during startup (through the oven door window if possible). When you turn the oven on, you should see the igniter glowing or hear a quick click if it’s a spark ignition. The burner should light within a short window. A weak or failing igniter may glow but fail to open the gas valve properly, resulting in slow or uneven heating. Replacing an igniter involves shutting off gas and power, removing a few screws, and swapping the part, but gas work carries higher risk; if you smell gas, see sooting, or feel unsure, shut everything down and call a professional.
Don’t overlook the simple stuff: make sure racks are placed according to your recipe, avoid covering entire racks with foil (which can block airflow and sensors), and check that the oven door gasket is intact. A compressed or torn gasket lets heat escape and can sabotage baking even if the elements are fine.
Conclusion
Most appliance “emergencies” start as small, fixable issues: a clogged filter, a blocked vent, a dirty coil, a tired switch. By learning a handful of step‑by‑step repair habits—cleaning coils on a warm fridge, clearing a dishwasher’s spray system, freeing a washer’s drain, restoring dryer airflow, and checking oven heating parts—you can keep your appliances running longer, more safely, and more efficiently.
Work methodically: power off, inspect, clean, test, and only then consider replacing parts or calling for help. Document what you do, keep your model numbers handy, and don’t hesitate to stop and reassess if something feels beyond your comfort level. Over time, each repair builds your confidence—and turns “I guess it’s time to replace it” into “Let me see if I can fix that first.”
Sources
- [U.S. Department of Energy – Appliances and Equipment](https://www.energy.gov/energysaver/appliances-and-electronics) - Offers official guidance on efficient appliance use and maintenance that helps extend service life
- [Consumer Product Safety Commission – Home Electrical Safety](https://www.cpsc.gov/Safety-Education/Safety-Education-Centers/Electrical-Safety) - Covers essential electrical safety practices relevant to DIY appliance work
- [Mayo Clinic – Electrical Injury: First Aid](https://www.mayoclinic.org/first-aid/first-aid-electrical-shock/basics/art-20056695) - Provides medically reviewed advice on what to do in case of accidental electrical shock
- [Whirlpool: Refrigerator Coil Cleaning Tips](https://www.whirlpool.com/blog/kitchen/how-to-clean-refrigerator-coils.html) - Manufacturer instructions that support best practices for cleaning fridge coils
- [GE Appliances: Dryer Venting Safety Guidelines](https://www.geappliances.com/ge/appliance-service-tips/dryer-venting) - Explains proper dryer venting and cleaning to improve performance and reduce fire risk
Key Takeaway
The most important thing to remember from this article is that this information can change how you think about Appliances.


