When a major appliance acts up, it’s tempting to jump straight to “time to replace it.” But many common issues come down to clogs, loose parts, or simple wear items that are surprisingly fixable with basic tools. With a bit of patience and the right steps, you can often restore performance, buy yourself a few more years of use, and avoid an emergency shopping trip.
Below are five step‑by‑step repair tips for common appliance troubles. Each one is designed for DIYers who are comfortable with a screwdriver and willing to follow safety basics—but not interested in tearing a machine completely apart.
Safety First: Simple Rules That Prevent Big Problems
Before touching any appliance, treat safety as part of the repair, not an extra step you can skip.
Unplug or disconnect power completely. For electric appliances, pull the plug, not just flip the wall switch. For gas appliances, shut off the gas supply if you’re working near burners, igniters, or gas lines. If a unit is hard‑wired, turn off the breaker and verify power is off with a non‑contact voltage tester.
Protect yourself from sharp edges and hot parts. Inside appliances, metal panels and brackets can be razor sharp. Wear cut‑resistant work gloves, and wait until heating elements and motors have cooled completely before working.
Take photos before you disconnect anything. Use your phone to document wire connections, panel orientation, and part placement. These photos are your roadmap when it’s time to reassemble.
Work in a dry, stable space. Never work on appliances while standing in water or on a wet surface. Use a sturdy step stool, not a chair, when reaching overhead appliances or high cabinets, and keep pets and kids away from the work area.
Know when to stop. If you smell gas, see burning or melted wiring, find water near electrical components, or need to cut into a sealed system (like a refrigerator’s coolant lines), stop and call a licensed pro. DIY is about safe savings, not gambling with your home.
Tip 1: Restore Dryer Efficiency by Clearing Hidden Lint Blockages
A dryer that runs but doesn’t dry well usually isn’t “dying”—it’s suffocating. Even if you clean the lint screen every load, hidden lint can choke airflow, lengthen dry times, and become a fire risk. This step‑by‑step clears the most common blockages.
Tools you’ll need: vacuum with hose, long lint brush or flexible dryer vent cleaning brush, screwdriver (usually Phillips), flashlight.
Step 1 – Disconnect and access the back.
Unplug the dryer. Pull it gently away from the wall, being careful not to crush or tear the vent hose. If it’s a gas dryer, shut off the gas valve before moving it and don’t stress the gas line.
Step 2 – Inspect and clean the vent hose.
Loosen the clamp attaching the vent hose to the dryer. Remove the hose and check for lint buildup and crushed or kinked sections. Use the vent brush or vacuum to clean out lint from both the hose and the dryer’s exhaust outlet. Replace any hose that’s torn, heavily crushed, or made of flimsy plastic—rigid or semi‑rigid metal ducting is safer and performs better.
Step 3 – Clean the wall or roof duct.
From inside, vacuum as far as you can into the duct opening in the wall. If you have outdoor access to the vent cap, clean from that side, too. A long flexible brush specifically designed for dryer vents can pull out surprising amounts of lint.
Step 4 – Check inside the lint filter housing.
Remove the lint screen. Use a vacuum crevice attachment and/or a long lint brush to clean down into the lint filter slot. This area often hides compacted lint that never reaches the main filter.
Step 5 – Reassemble and test.
Reconnect the vent hose with a snug clamp, ensuring there are no sharp bends or sags where lint can collect. Push the dryer back carefully. Plug it in (and turn gas back on if applicable), then run it on a heated cycle for 10–15 minutes. Outside, confirm that warm air is blowing strongly from the vent.
If airflow is weak even after cleaning, or the dryer overheats and shuts off, the internal blower, thermostat, or heating element may be at fault—at that point, a service call or deeper disassembly is warranted.
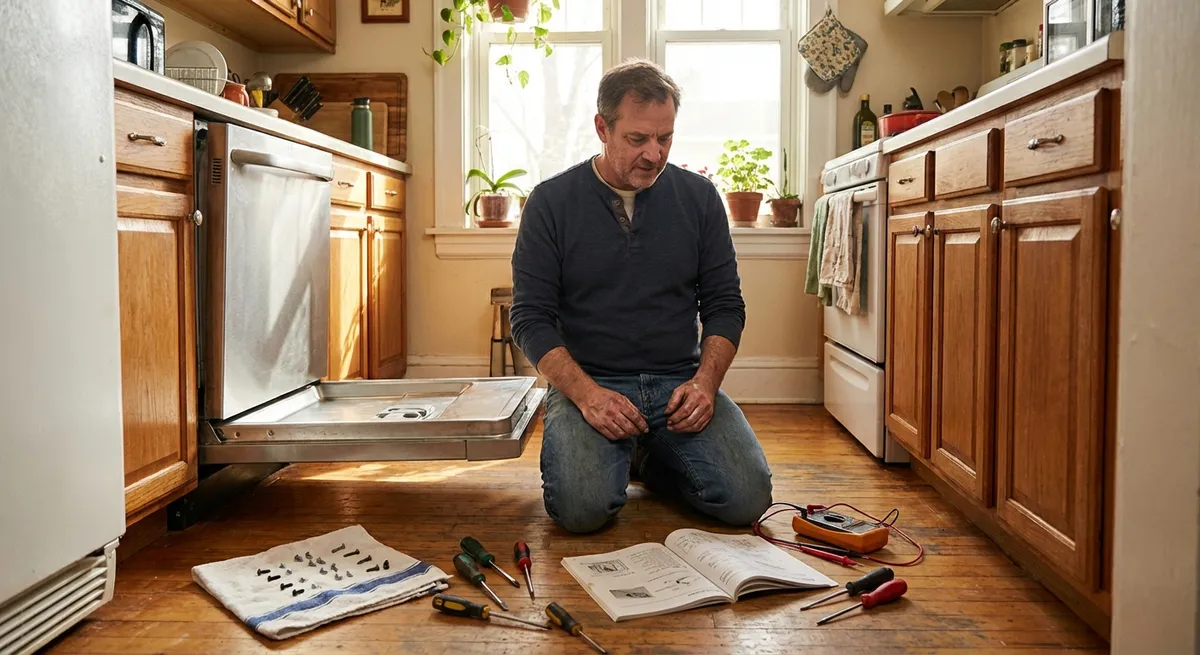
Tip 2: Save Your Dishwasher by Cleaning and Re‑Seating the Filter and Spray Arms
When dishes come out gritty or still dirty, many people assume the pump or control board has failed. More often, the dishwasher is simply trying to work with clogged filters or blocked spray arms that can be cleaned at home.
Tools you’ll need: soft brush or old toothbrush, toothpicks or small wire, mild dish soap, sponge, towel.
Step 1 – Power down and empty.
Turn off the dishwasher at the control panel and open the door. Remove all dishes and racks to expose the bottom of the tub. Unplug the unit or switch off the circuit breaker if you’ll be handling internal parts for a while.
Step 2 – Remove and clean the filter assembly.
At the base of most modern dishwashers is a removable filter system (often a cylindrical or flat mesh screen). Twist or unclip it according to your model’s instructions. Rinse under warm water using a soft brush and soap. Clean off any food sludge, grease, or hard water deposits. Avoid sharp objects that can damage the mesh.
Step 3 – Check the sump for debris.
With the filter removed, look down into the sump area with a flashlight. Carefully remove any broken glass, bones, labels, or foreign objects. Do not force anything; if it’s stuck in the pump area, you may need professional help.
Step 4 – Clean spray arm holes.
Remove the lower and upper spray arms (they usually unsnap, unclip, or twist off). Rinse under running water and use toothpicks or thin wire to clear any clogged spray holes. This restores water pressure where it counts. If the arms feel wobbly or cracked, replacement is usually straightforward and relatively inexpensive.
Step 5 – Reassemble and run a hot cleaning cycle.
Reinstall the spray arms and filter assembly, making sure they’re fully seated and spin freely. Put racks back in. Run a hot cycle with the machine empty—many brands offer a “clean” or “sanitize” cycle. You can place a dishwasher‑safe cup with plain white vinegar on the top rack to help dissolve lingering mineral deposits.
If cleaning doesn’t improve performance and you hear grinding, humming, or no water circulation, the wash pump, inlet valve, or circulation motor may be failing. At that stage, compare repair estimates with the age and energy efficiency of the unit before deciding to proceed.
Tip 3: Quiet a Noisy Refrigerator by Leveling and Securing Panels
A rattling or buzzing fridge is annoying and can make you worry about an impending breakdown. Often, the root cause is vibration from uneven floors, loose panels, or a condenser fan that’s making contact with dust or nearby parts.
Tools you’ll need: adjustable wrench or pliers, level, vacuum with brush attachment, screwdriver, flashlight.
Step 1 – Pull the fridge forward safely.
Unplug the refrigerator. Gently slide it away from the wall, being careful not to damage the floor or kink the water line if it has an ice maker or dispenser.
Step 2 – Check for leveling and door alignment.
Place a level on the top front edge of the fridge and then along the sides. Most refrigerators should be slightly tilted back so the doors close on their own. Adjust the front leveling legs or rollers using an adjustable wrench until the unit is stable and no longer rocks when you gently press on the corners.
Step 3 – Inspect the rear panel and compressor area.
At the back near the bottom is a removable panel that covers the compressor and condenser fan area. If this panel is loose, it can vibrate loudly. Tighten any loose screws and ensure the panel isn’t bent. If it’s missing mounting screws altogether, replace them so the panel is secure.
Step 4 – Clean the condenser coils and fan.
Remove the rear panel and use a vacuum with a brush attachment to clean dust, pet hair, and debris from the condenser coils and fan blades. A dirty coil forces the compressor to work harder and run hotter and louder. Clean gently—don’t bend the delicate fins.
Step 5 – Locate and isolate rattles.
With the back exposed (and still unplugged), check that wiring harnesses, tubing, and lines aren’t pressed tightly against panels or each other. Slightly reposition any that are touching metal surfaces, or use small pieces of foam or rubber (rated for appliances) to prevent vibration contact points. Replace the rear panel securely.
Plug the fridge back in and listen. If the noise persists and seems to come from inside the cabinet or is a loud grinding sound that changes as the doors open or close, the evaporator fan inside the freezer compartment may be failing. That repair is possible for experienced DIYers, but it requires careful disassembly and attention to frost buildup—worth calling a pro if you’re not fully comfortable.
Tip 4: Fix an Electric Oven That Won’t Heat Evenly by Replacing a Bake Element
If your electric oven bakes unevenly or won’t heat at all even though the control panel seems to work, the bake element is a frequent culprit. This part glows red at the bottom of the oven and is designed to be replaced when it fails.
Tools you’ll need: screwdriver (often Phillips), work gloves, flashlight, multimeter (optional but helpful).
Step 1 – Disconnect power.
Turn off the oven at the breaker panel, not just the control knobs. Confirm that the display is off. If your range has a plug, unplug it after carefully moving the unit forward.
Step 2 – Remove racks and inspect the element.
Take out all oven racks. Look at the lower heating element. If you see blisters, burn marks, or breaks in the metal, it’s likely failed. Even if it looks normal, it can still be electrically open.
Step 3 – Detach the element from inside the oven.
Locate the mounting screws or brackets where the element attaches to the back wall (and sometimes sides). Remove those screws while supporting the element so it doesn’t drop. Gently pull the element forward to expose the attached wires.
Step 4 – Disconnect and test (optional).
Carefully pull the wire terminals off the element prongs, gripping the metal connector, not the wire insulation. If you have a multimeter, set it to the continuity or resistance setting and check across the two element terminals. A good element will show continuity (low resistance); an infinite reading indicates it’s burned out.
Step 5 – Install the new element.
Match your replacement element to your oven’s model number—shape and connector type must match. Connect the wires to the new element, securing them firmly. Gently push the element back into place and reinstall the mounting screws. Make sure it’s not touching the oven walls.
Restore power and run the oven on a bake setting, watching through the window. The new element should begin to glow red within several minutes. If the oven still doesn’t heat, the issue may lie with the thermostat, control board, or wiring—components that are more complex and sometimes less cost‑effective to DIY.
Tip 5: Stop a Washing Machine from Walking by Balancing and Securing the Drum
A washing machine that “walks” across the floor, thumps during spin, or vibrates intensely isn’t just annoying—it can damage hoses, flooring, and internal components over time. Often, releveling and stabilizing the machine dramatically improves behavior.
Tools you’ll need: level, adjustable wrench or pliers, flashlight, wood shims or anti‑vibration pads (optional).
Step 1 – Confirm all shipping bolts are removed (front loaders).
If your washer is relatively new and has always vibrated excessively, check the back of the machine for any leftover shipping bolts or brackets that secure the drum during transport. These must be removed according to the manual; leaving them in place can cause severe vibration and damage.
Step 2 – Check the level and footing.
Place a level on the top of the washer side‑to‑side and front‑to‑back. Adjust the front and rear leveling feet by turning them with a wrench until the machine is level and does not rock when you press on the corners. Tighten any lock nuts on the feet so they don’t drift out of adjustment.
Step 3 – Inspect the floor and add support if needed.
If the washer is on a flexible or uneven surface (like an older wood floor), consider adding anti‑vibration pads under each foot or positioning a piece of sturdy plywood beneath the machine to distribute weight and reduce bounce.
Step 4 – Balance loads and check the drum.
Run a test cycle with a balanced load—mix heavy items (like towels) with lighter clothes rather than washing one large item alone. As it spins up, listen for loud banging or scraping. With the machine off and unplugged, open the door/lid and gently move the drum by hand. It should move smoothly without hitting the cabinet. If you hear clunks or feel excessive play, worn suspension rods, dampers, or shocks may be at fault.
Step 5 – Secure hoses and nearby items.
Ensure water hoses and drain lines are not rattling against the back of the washer or wall; use foam sleeves or simple straps to keep them from amplifying vibration noise. Remove items from the washer top that can rattle or fall during spin.
If vibration persists even after careful leveling and load balancing, internal suspension parts may be worn out. These are replaceable, but the process ranges from moderate to advanced difficulty depending on your model—check exploded diagrams and repair videos for your specific washer before deciding if it’s within your comfort zone.
Conclusion
Most household appliances don’t fail overnight—they gradually lose performance, get noisier, or behave inconsistently. Addressing airflow, cleaning filters, securing panels, and replacing obvious wear parts are all practical steps that can stretch the life of your machines and postpone expensive replacements.
By pairing basic safety habits with straightforward troubleshooting, you can often turn “it’s dying” into “it just needed attention.” Keep your tools handy, document what you do, and know your limits. When a fix starts to involve gas lines, sealed systems, or complex electronics, that’s the moment to bring in a professional—and you’ll be better prepared to describe the problem and understand your options.
Sources
- [U.S. Fire Administration – Clothes Dryer Fires](https://www.usfa.fema.gov/downloads/pdf/statistics/v19i1.pdf) - Data and safety recommendations highlighting the importance of dryer vent cleaning
- [U.S. Consumer Product Safety Commission – Safety Education Center](https://www.cpsc.gov/Safety-Education-Center) - General guidance on safe use and maintenance of home appliances
- [Energy.gov – Appliances & Electronics](https://www.energy.gov/energysaver/appliances-and-electronics) - Tips on efficient operation and maintenance of common household appliances
- [Whirlpool Dishwasher Cleaning & Maintenance Guide](https://www.whirlpool.com/blog/kitchen/how-to-clean-a-dishwasher.html) - Manufacturer instructions for proper dishwasher filter and spray arm cleaning
- [The Association of Home Appliance Manufacturers (AHAM)](https://www.aham.org/AHAM/Consumer_Tips/Home_Appliances/Home_Appliances.aspx) - Industry-backed consumer tips on using and caring for major home appliances
Key Takeaway
The most important thing to remember from this article is that this information can change how you think about Appliances.


