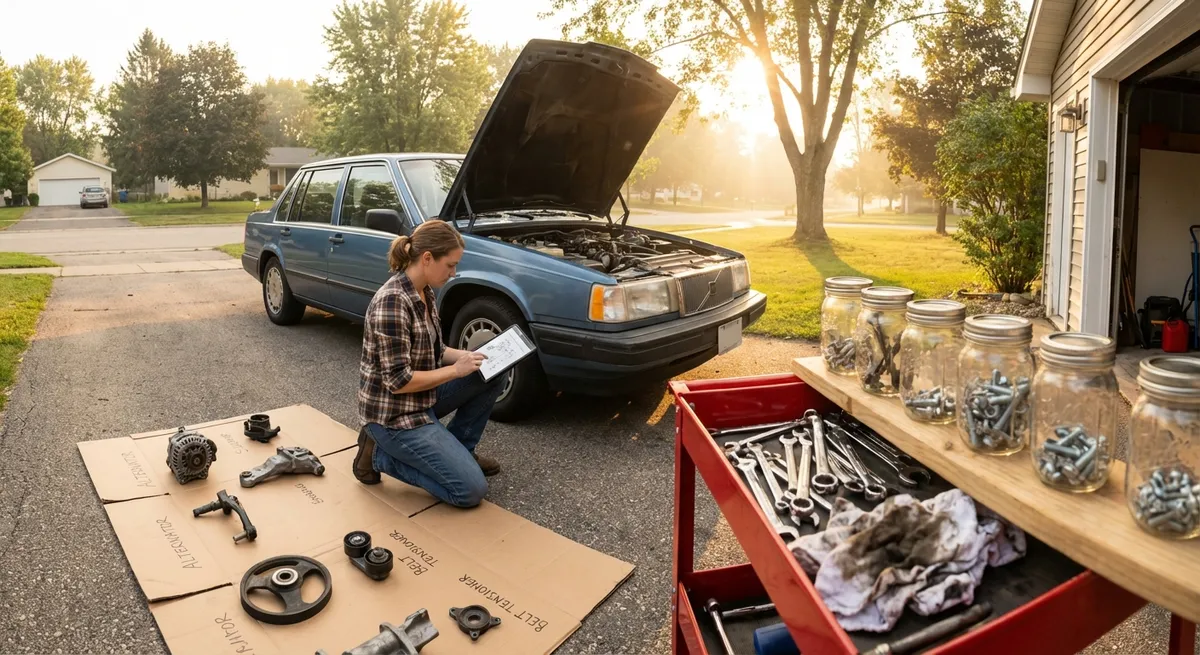
Doing your own auto repair isn’t about turning your driveway into a full-time garage—it’s about knowing which jobs are worth your time, tools, and risk. Some repairs are perfect for DIYers with basic skills, while others should stay with the pros. This guide walks through five step-by-step repairs that offer real savings, build confidence, and don’t require a lift or a thousand-dollar tool chest.
Before You Start: Safety and Smart Boundaries
Before grabbing a wrench, set some ground rules for yourself. Work on a cool car—never on a hot engine, hot brakes, or with a hot exhaust nearby. Park on a flat surface, set the parking brake, and use wheel chocks if you’re lifting the vehicle. If you need to raise the car, always use jack stands under solid points, never trust only a floor jack.
Wear eye protection when working under the car or around fluids, and use gloves when handling chemicals like brake cleaner, coolant, and used oil. Keep a small fire extinguisher rated for electrical and fuel fires nearby if you’re doing anything around fuel or wiring. Finally, be honest about your limits: if a repair involves airbags, structural components, timing systems, or high-pressure fuel lines and you’re unsure, stop and call a professional. The best DIY skill you can have is knowing when not to DIY.
Step-by-Step Fix #1: Swapping Out Worn Brake Pads
Brake pad replacement is one of the most rewarding DIY jobs: you feel the difference immediately, and you can visually confirm your work. This guide covers typical front disc brakes (the most common setup), but always consult your vehicle’s service manual for torque specs and procedure.
Tools & supplies:
- Jack, jack stands, and wheel chocks
- Lug wrench
- Socket set and ratchet
- C-clamp or brake caliper compressor tool
- New brake pads (correct for your model)
- Brake cleaner spray
- Wire brush and shop rags
- Anti-squeal/anti-seize (if recommended by manufacturer)
Steps:
Secure and raise the vehicle
Loosen lug nuts slightly with the car on the ground. Chock the rear wheels, jack up the front at the designated jacking point, then support with jack stands. Remove the wheel fully.
Remove the caliper
Locate the caliper bolts on the back side of the brake assembly. Remove them with the appropriate socket. Slide the caliper off the rotor and support it with a wire or bungee—never let it hang by the brake hose.
Remove old pads and inspect hardware
Slide the old pads out of the bracket. Note their position and any shims or clips. Inspect the rotor for deep grooves, cracks, or heavy rust; severe damage may require rotor replacement or machining.
Compress the caliper piston
Use a C-clamp or caliper tool to slowly press the piston back into the caliper housing, placing an old pad between the clamp and piston for even pressure. Go slowly to avoid damaging seals, and check your brake fluid reservoir—if it’s very full, fluid may rise as the piston retracts.
Clean and prepare the bracket
Use brake cleaner and a wire brush to clean the pad contact points on the caliper bracket. If your pad kit includes new hardware clips, install them now. A tiny amount of high-temp brake grease on the sliding surfaces (not on the pad face or rotor) can help prevent noise.
Install new pads
Slide the new pads into place, making sure the friction surfaces face the rotor. Reinstall the caliper over the pads, ensuring it seats correctly, then torque the caliper bolts to spec.
Reinstall the wheel and test
Reinstall the wheel and snug the lug nuts. Lower the vehicle and torque the lugs in a star pattern to the recommended value. Before driving, pump the brake pedal several times to seat the pads against the rotors; the pedal should feel firm, not spongy.
When to stop and call a pro:
If you see fluid leaks near the caliper, the piston boot is torn, the rotor is cracked, or the pedal stays soft after bleeding and pumping, it’s time for a professional inspection.
Step-by-Step Fix #2: Fixing a Serpentine Belt That’s Cracked or Squealing
The serpentine belt powers critical components like the alternator, power steering pump, and A/C compressor. Replacing it is usually straightforward, and it can prevent a roadside breakdown.
Tools & supplies:
- New serpentine belt (correct size and routing)
- Serpentine belt tool or a long-handled ratchet/breaker bar
- Flashlight
- Gloves
Steps:
Locate the belt and routing diagram
Open the hood and find the serpentine belt and tensioner. Look for a routing diagram sticker on the radiator support or underside of the hood. If there isn’t one, take a clear photo or draw the routing before removal.
Release belt tension
Find the tensioner pulley (usually spring-loaded). Insert your belt tool or ratchet into the designated square hole or bolt head and rotate in the direction that relieves tension. While holding the tensioner, slip the belt off one accessible pulley.
Remove the old belt and inspect pulleys
Remove the belt completely from all pulleys. Spin each pulley by hand—listen for grinding or roughness and feel for wobble. A noisy or loose pulley bearing should be addressed before reinstalling a belt.
Route the new belt
Route the new belt according to the diagram, leaving the easiest-access pulley (usually an idler or alternator) for last. Make sure the belt is seated in all the pulley grooves correctly, with no twists.
Reapply tension and check alignment
Rotate the tensioner again, slip the belt onto the final pulley, then slowly release the tensioner. Visually inspect the belt on each pulley: it should sit squarely in the grooves, not hanging off the edges.
Start the engine and inspect
Start the engine and observe the belt in motion. It should run smoothly with no wobble or squeal. If you hear chirping or see the belt walking off a pulley, shut down and re-check alignment and tensioner condition.
When to stop and call a pro:
If the tensioner is seized, the mounting bolt feels like it might strip, or you discover a failing accessory pulley bearing, professional help is the safer route.
Step-by-Step Fix #3: Tracking Down and Repairing a Slow Tire Leak
A slow leak doesn’t always require a new tire—often it’s a puncture in the tread or a leaking valve stem core. Fixing a simple puncture with a plug kit can keep you rolling safely until a shop can do a proper internal patch.
Tools & supplies:
- Tire plug kit (plug strips, reamer, insertion tool, rubber cement if included)
- Tire pressure gauge
- Spray bottle with soapy water
- Pliers
- Portable air compressor or access to air
Steps:
Locate the leak
Inflate the tire to the recommended pressure (check the driver’s door jamb sticker). Spray soapy water around the tread area, sidewalls, and valve stem. Look for a steady stream of bubbles indicating a leak.
Assess whether it’s safe to repair
Only plug punctures in the tread area, not sidewalls or shoulder. Cuts, bulges, or punctures larger than about 1/4 inch (6 mm) are not safe for plug-only repair—those require professional evaluation or tire replacement.
Remove the object
If you see a nail or screw, note its angle, then use pliers to pull it straight out. Be ready: air will start leaking quickly.
Prepare the hole
Insert the reamer tool from the plug kit into the hole, working it in and out a few times to clean and slightly enlarge the puncture. This helps the plug seat correctly. Follow the kit’s instructions—some specify using rubber cement on the reamer.
Insert the plug
Thread a plug strip through the eye of the insertion tool so it’s centered. Coat with rubber cement if provided. Push the plug into the hole until about 1/2 inch remains outside, then pull the tool out quickly, leaving the plug in place.
Trim and inflate
Trim any excess plug material flush with the tread surface. Reinflate the tire to the proper pressure, then spray soapy water again over the repair to confirm there are no leaks.
Monitor over the next few days
Check tire pressure daily for a few days. If it keeps losing air or the plug loosens, remove the tire and have a professional patch it from the inside or recommend replacement.
When to stop and call a pro:
If the puncture is near the sidewall, the tire has visible internal damage, cords are exposed, or the leak seems to come from bead seating (where tire meets rim), skip the DIY attempt and see a tire shop.
Step-by-Step Fix #4: Restoring Headlights That Have Turned Cloudy
Cloudy headlights aren’t just ugly; they reduce nighttime visibility and can be a safety issue. Restoring them is a low-risk, high-impact DIY job that requires patience more than muscle.
Tools & supplies:
- Headlight restoration kit or:
- Wet/dry sandpaper (e.g., 800, 1000, 1500, 2000 grit)
- Plastic polish or rubbing compound
- UV-resistant clear coat or sealant
- Painter’s tape
- Spray bottle with water
- Microfiber cloths
Steps:
Clean and mask the area
Wash the headlights thoroughly with soap and water, then dry. Use painter’s tape to mask the paint and trim around the headlights to protect from sanding and polish.
Wet sand the oxidized layer
Starting with the lowest grit (e.g., 800), wet the sandpaper and the headlight. Sand in horizontal strokes, keeping the surface wet, until the yellowed or cloudy layer is evenly abraded. Wipe and inspect frequently. Repeat with higher grits (1000, 1500, 2000), changing sanding direction each time (horizontal, then vertical) to remove previous scratches.
Polish to clarity
Dry the headlight and apply a small amount of plastic polish or rubbing compound to a microfiber cloth or drill-mounted polishing pad if you have one. Work in circular motions until the lens turns clear and glossy. Wipe clean and inspect.
Apply UV protection
This is the crucial step many people skip. Apply a UV-resistant clear coat or the sealant included in your kit as directed. This keeps the plastic from re-oxidizing quickly. Work in a clean, dust-free environment if you’re using a spray or wipe-on clear coat.
Cure and maintain
Let the clear coat cure per the product instructions before driving or washing the vehicle. Avoid harsh chemicals and automatic car washes on the headlights for at least a few days. Maintaining a wax or sealant layer on the headlights will help them stay clear longer.
When to stop and call a pro:
If the headlight has internal moisture, cracked lenses, or burned reflectors inside, restoration won’t fix the underlying problem. In those cases, replacement assemblies or professional repair are better options.
Step-by-Step Fix #5: Replacing a Weak 12V Battery Without Losing Settings
Battery replacement is a classic DIY task, but modern vehicles have electronics that don’t always like being fully powered down. With a little planning, you can swap the battery cleanly and safely while preserving most settings.
Tools & supplies:
- Correct replacement battery (matching size, terminals, and capacity)
- Wrench or socket set for battery clamps and hold-down
- Battery terminal brush or small wire brush
- Memory saver device (OBD-II or 12V outlet style), if available
- Gloves and eye protection
Steps:
Confirm the battery is the culprit
If possible, test the battery at a parts store or with a multimeter; low resting voltage and failure under load point to replacement. Also inspect for swollen case, leaking acid, or corroded terminals.
Connect a memory saver (optional but helpful)
If you have a memory saver that plugs into the OBD-II port or a powered 12V outlet, connect it now following the manufacturer’s instructions. This helps preserve radio presets and some module memory during the swap.
Power down safely
Turn off the engine and all accessories, remove the key, and make sure lights are off. Pop the hood and locate the battery and its hold-down bracket.
Disconnect the old battery (negative first)
Loosen and remove the negative (–) terminal clamp first to prevent accidental short circuits, then the positive (+) clamp. Remove any hold-down clamps or brackets and lift the battery straight up, keeping it level to avoid spilling any acid residue.
Clean the terminals and tray
Use a battery terminal brush or wire brush to clean corrosion from the cable clamps. Wipe down the battery tray and surrounding area; neutralize any acid residue with a baking soda and water mix if needed, then dry thoroughly.
Install the new battery (positive first)
Place the new battery in the tray in the same orientation as the old one. Secure the hold-down bracket so the battery can’t move. Connect the positive (+) cable first and tighten, then connect the negative (–) cable. Make sure connections are snug but don’t overtighten and damage the clamps.
Verify operation and reset what’s needed
Start the vehicle and check for warning lights. You may need to reset your clock, one-touch window auto-up/down, or radio presets if no memory saver was used. Some vehicles require a simple “relearn” procedure for idle or power windows—check your owner’s manual.
When to stop and call a pro:
If you see damaged cables, heavily corroded terminals that crumble when touched, or your vehicle has a complex battery management system or secondary battery (common in some luxury and hybrid models), professional service is a better choice.
Conclusion
DIY auto repair doesn’t have to mean tackling engine rebuilds in your garage. Strategic jobs—like brake pad replacement, serpentine belt swaps, tire leak repairs, headlight restoration, and smart battery changes—offer real savings and build skills that carry over to other projects. Start with one repair that matches your comfort level, follow your service manual closely, and work slowly and safely. Every successful fix gives you more confidence to understand your car, speak clearly with mechanics, and decide which future repairs you want to own—and which ones you’re happy to leave to the shop.
Sources
- [National Highway Traffic Safety Administration (NHTSA) – Vehicle Maintenance](https://www.nhtsa.gov/vehicle-safety/vehicle-maintenance) - Official safety guidance on keeping your vehicle roadworthy, including brakes and tires
- [U.S. Department of Energy – Fuel Economy: Keeping Your Car in Shape](https://www.fueleconomy.gov/feg/maintain.jsp) - Explains how proper maintenance (belts, tires, etc.) affects performance and efficiency
- [Bridgestone Tire – Can My Tire Be Repaired?](https://www.bridgestonetire.com/learn/repair/can-my-tire-be-repaired/) - Details on when tire punctures can be safely repaired and when replacement is required
- [AAA – Car Battery Buying and Maintenance Guide](https://aaa.com/autorepair/articles/car-battery-buying-guide) - Practical information on testing, choosing, and maintaining 12V car batteries
- [Philips Automotive – Headlight Restoration Basics](https://www.usa.philips.com/c-e/au/car-lights/headlight-restoration.html) - Manufacturer guidance on why headlights haze and how to restore and protect them
Key Takeaway
The most important thing to remember from this article is that this information can change how you think about Auto Repair.


