Our feeds are full of “obsolete things” right now—old phones, floppy disks, CD players, and tech that felt cutting-edge just a decade ago. A viral roundup of outdated gadgets is reminding people how fast technology moves and how much we throw away instead of fixing. The same story is playing out in our driveways: perfectly good cars sidelined by “obsolete” parts, warning lights, and tech features nobody wants to touch.
But here’s the thing: your car isn’t a disposable gadget. Whether you’re driving a 15-year-old sedan or an aging SUV, you can keep it safely on the road longer with a few practical repair habits—especially as new car prices and repair shop backlogs stay high. Inspired by the current wave of nostalgia for old tech, let’s talk about how to keep your own “outdated” ride running strong with real, doable DIY steps.
Below are five step-by-step repair tips that help bridge the gap between “obsolete” and “reliable,” without needing a full shop in your garage.
1. Stop Ignoring That Check Engine Light: How to Read It Yourself
Modern cars might feel like rolling computers, but there’s one piece of tech you can absolutely take control of: your OBD-II (On-Board Diagnostics) port. Shops use this every day, and you can too.
Step-by-step:
Get a basic OBD-II scanner or Bluetooth dongle
- Pick up a simple scanner online or at an auto parts store. - Bluetooth units pair with your phone and use an app (like Torque, Car Scanner, or the manufacturer’s app).
Locate your OBD-II port
- It’s usually under the dashboard, on the driver’s side, near the steering column. - Look for a trapezoid-shaped connector.
Turn the key to “ON” without starting the engine
- Plug in the scanner. - Many tools power up from the car; follow the on-screen prompts or app instructions.
Read and record the codes
- You’ll see codes like P0300, P0420, P0128, etc. - Write them down or screenshot them before clearing anything.
Look up what the code actually means
- Search the code plus your car’s year, make, and model (e.g., “P0128 2012 Honda Civic”). - Compare multiple sources: owner forums, repair sites, and the scanner’s description.
Decide: DIY now, monitor, or go to a shop
- DIY-friendly examples: - Loose gas cap (P0440–P0457 range) – tighten or replace the cap. - O2 sensor codes – often doable with basic tools and access. - Red-flag examples: - Transmission codes or serious misfire (P0301–P0304 plus shaking) – get a pro opinion quickly.
Only clear codes after you’ve acted
- Clearing without fixing just hides the symptoms. - After a repair, clear the code and see if it returns in a few days of normal driving.
Why it matters now: As cars become more electronic, reading codes yourself turns “computer mystery” into a simple starting point—and can save you from unnecessary parts swaps or panic.
2. Revive “Obsolete” Headlights Instead of Replacing Them
Old cars often get labeled “too old” just because the headlights are cloudy and dim. That’s a repair most people can tackle in an afternoon with good results.
Step-by-step:
Gather what you need
- Headlight restoration kit or: - Wet/dry sandpaper: 600, 1000, 2000 grit - Masking tape - Plastic polish or rubbing compound - UV sealant or clear coat designed for plastic - Microfiber cloths and spray bottle with water
Clean and mask the area
- Wash the headlights with soap and water and dry fully. - Use masking tape to protect the surrounding paint and trim.
Wet-sand the surface in stages
- Start with the lowest grit (e.g., 600): - Soak the sandpaper and lens with water. - Sand in one direction (left-right) with light, steady pressure. - Move to 1000, then 2000 grit: - Change direction with each grit (e.g., up-down) so you can see when old scratches are gone. - Keep everything wet; the milky water you see is oxidized plastic coming off.
Polish to restore clarity
- Apply plastic polish or rubbing compound to a microfiber cloth. - Work in small circles until the lens becomes clearer. - Wipe clean and inspect; repeat if needed.
Seal with a UV-protective layer
- This is critical—without UV protection, the lens will haze again quickly. - Apply a UV sealant from the kit or a plastic-safe clear coat following instructions. - Allow proper drying/curing time before driving, especially in wet or dusty conditions.
Why it matters now: With parts shortages and higher prices, restoring your lenses instead of replacing entire headlight units is a budget-friendly way to upgrade nighttime safety and keep an older car looking current.
3. Bring Dead Power Windows Back Without Replacing the Whole Door
Power windows on older cars fail all the time—another reason people give up on vehicles that are otherwise solid. Many of these issues are fixable with basic troubleshooting.
Step-by-step:
Test from both the driver switch and the door’s own switch
- If one switch works and the other doesn’t, the problem is likely the switch itself. - If neither works on that window, you’re probably dealing with a wiring, fuse, or regulator issue.
Check the fuse and relay first
- Consult your owner’s manual for the fuse box location and window fuse/relay label. - Inspect the fuse; replace if blown with the same amperage. - Swap a similar relay (if possible) to test.
Listen for signs of life
- Press the window switch with the door open: - Motor noise but no movement: likely a failed regulator or broken cable. - No noise at all: could be motor, switch, or wiring.
Remove the door panel carefully
- Disconnect the battery negative terminal (safety first around wiring and airbags). - Remove trim screws around the handle, armrest, and perimeter. - Use a plastic trim tool to gently pop the panel clips free. - Lift the panel up and away, disconnecting any electrical connectors.
Test the motor and verify power
- With the battery reconnected, use a multimeter at the window motor connector: - Press the window switch and check if you get power. - Power present, no movement: motor/regulator assembly is likely bad. - No power: trace back toward the switch, looking for damaged wiring or bad connections.
Replace the regulator/motor (if needed)
- Support the glass with tape or a helper. - Unbolt the glass from the regulator track and carefully secure it in the up position. - Remove bolts holding the regulator and motor; wiggle the assembly out through the access hole. - Install the new unit in reverse order, test operation before reinstalling the door panel.
Reassemble and sound-check
- Reattach the moisture barrier plastic if present (it prevents water leaks and wind noise). - Snap the panel back into place, reinstall screws, and test again.
Why it matters now: In today’s used-car market, a broken window can knock serious value off a vehicle. Fixing it yourself is one of the more impactful DIY repairs you can do to keep an “older” car practical and sellable.
4. Rescue That “Old-School” Cooling System Before It Overheats
Cooling systems look simple but do a lot of heavy lifting. Neglecting them is one of the fastest ways to turn a still-serviceable car into “not worth fixing.” A basic system refresh is doable for most DIYers.
Step-by-step:
Inspect before you spin a wrench
- With the engine cold, pop the hood and check: - Coolant level in the reservoir and radiator (if accessible) - Hoses for cracks, bulges, or dried-out rubber - Signs of dried coolant (white/pink/green crust) around connections and the water pump
Check your coolant’s age and condition
- Coolant that’s brown, rusty, oily, or full of debris needs to go. - If you don’t know when it was last changed and the car is 5+ years old, it’s due.
Plan a safe coolant drain
- Make sure the engine is completely cool. - Raise the car safely with jack stands if access is tight. - Position a drain pan under the radiator drain or the lower hose.
Drain and capture the old coolant
- Open the radiator cap (again—only when cold). - Open the radiator drain plug or remove the lower hose. - Let it fully drain; avoid spills and keep pets/children away (coolant is toxic).
Flush with distilled water (optional but recommended)
- Close the drain, fill with distilled water, run the engine with the heater on until warm. - Let it cool, then drain again. Repeat if the fluid comes out very dirty.
Refill with the correct coolant mix
- Use the type specified in your manual (don’t mix random colors blindly). - Typically a 50/50 mix of concentrate and distilled water, unless you buy pre-mix. - Fill the radiator and reservoir to the indicated levels.
Bleed air from the system
- Some cars have a bleed screw—crack it open until a steady stream of coolant flows. - Otherwise, run the engine with the radiator cap off (if design allows), heater on, and watch for bubbling. - Top off as air purges out, then secure the cap and recheck levels after a short drive.
Why it matters now: With more people hanging onto cars longer, proactive cooling-system maintenance is cheaper than a blown head gasket or warped head—repairs that often send older vehicles straight to the scrapyard.
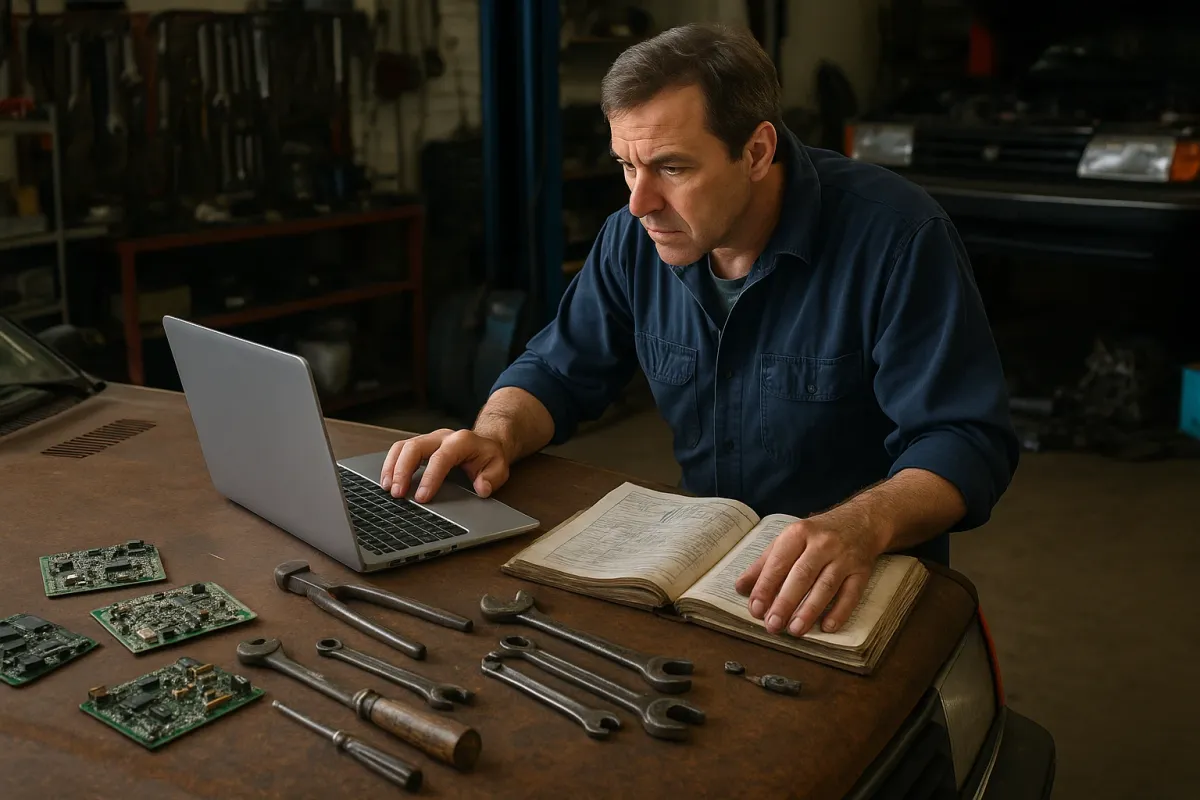
5. Fix “Dead” Interior Electronics Before You Call Your Car Obsolete
The “obsolete things” trend is full of gadgets that died because of tiny faults: bad buttons, broken wires, or failing switches. The same goes for your car’s interior electronics—many are fixable with patience and basic tools.
Step-by-step:
Start with the simplest failure point: fuses
- A non-working radio, 12V outlet, or interior light often traces back here. - Use the fuse diagram in your owner’s manual or on the fuse box cover. - Pull the suspect fuse and inspect the metal strip; replace with the same rating if blown.
Clean dirty or oxidized switch contacts
- Window, lock, and mirror switches can often be revived. - Carefully pry up the switch panel (use a plastic trim tool). - Disconnect the connector and inspect for corrosion or dirt. - Spray electrical contact cleaner into the switch (if serviceable), work it repeatedly, and let it dry before reconnecting.
Check for broken or pinched wiring
- Common trouble spots: - Door jamb harnesses (wires flex every time the door opens). - Under-seat harnesses (for power seats or airbags—disconnect battery and respect airbag rules). - Look for cracked insulation, exposed copper, or wires that look stretched.
Test for power and ground with a multimeter
- At the device (e.g., radio, 12V outlet), verify you have both power and ground. - Power but no ground may mean a loose or corroded ground point. - No power but good fuse: trace the circuit back toward the source.
Repair minor wiring damage with proper techniques
- Strip a small section of wire on each side of the break. - Use solder and heat-shrink tubing, or high-quality crimp connectors with heat-shrink. - Avoid twisting and taping only—that’s a short waiting to happen.
Reassemble thoughtfully
- Route wires so they’re not pinched when panels go back on. - Reinstall trim clips gently to avoid rattles and future broken tabs.
Why it matters now: A car can feel “too old” when electronics start failing, but many of these issues are small, fixable problems. Solving them yourself keeps your vehicle comfortable, usable, and far from “obsolete.”
Conclusion
Right now, timelines are full of side-by-side photos showing how fast our tech becomes “obsolete.” Cars are caught in the same cycle—written off for cloudy headlights, a dead window, or a glowing warning light—while new vehicles are expensive and hard to get.
You don’t need a full shop or professional training to push back against that throwaway mindset. With a basic scanner, simple hand tools, and a careful, step-by-step approach, you can:
- Decode your own check engine light
- Restore failing lights and visibility
- Revive power windows and interior electronics
- Protect your cooling system from catastrophic failures
If you’ve got an “old” car you’re thinking of giving up on, start with one of the steps above this weekend. Take before-and-after photos, share your progress, and show that “obsolete” doesn’t have to mean “done for”—at least not in your driveway.
Key Takeaway
The most important thing to remember from this article is that this information can change how you think about Auto Repair.


