Home repairs don’t have to be intimidating or expensive. With a few core skills and the right mindset, you can prevent small issues from turning into big, budget-busting problems. This guide walks you through five practical, step-by-step repair tasks that DIY enthusiasts can actually do safely at home—no contractor required.
Fix a Dripping Faucet (And Stop Wasting Water)
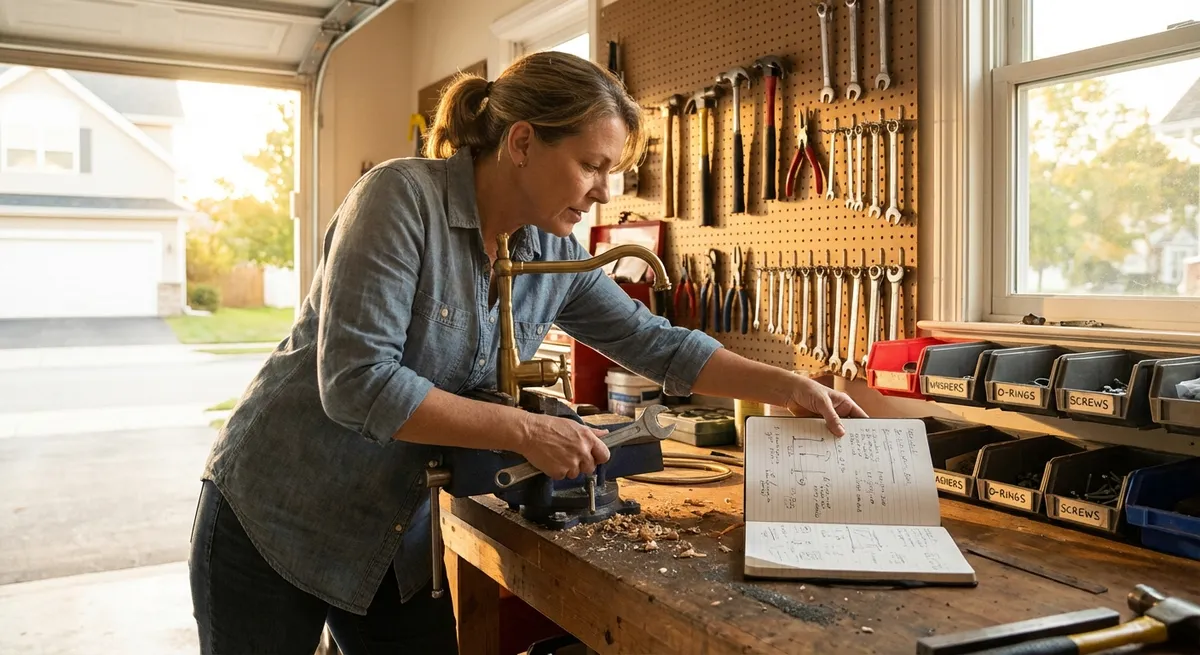
A slow drip can waste gallons of water a day and drive up your bill. The good news: most dripping faucets are caused by worn-out internal parts you can replace in under an hour.
Step-by-step:
Shut off the water
Find the shutoff valves under the sink (one for hot, one for cold) and turn them clockwise. If there are no local valves, shut off the main water supply to the house.
Plug the drain
Use a sink stopper or rag so you don’t lose small screws or parts down the drain.
Identify your faucet type
Common household types: compression (separate hot and cold handles), cartridge, ball, and ceramic-disc. A quick web search with your brand/model often reveals diagrams and part numbers.
Disassemble the handle
- Pry off decorative caps with a small flat screwdriver. - Remove the screw underneath. - Gently pull the handle off. For cartridge/disc types, you’ll usually see a retaining nut or clip next—remove that as well.
Inspect and replace internal parts
- For compression faucets, replace the rubber washer and O-ring at the end of the stem. - For cartridge or disc faucets, replace the cartridge or worn seals as a unit. Bring the old part to a hardware store to match it.
Clean mineral buildup
Use white vinegar and a small brush to clean valve seats or contact surfaces. Rinse and dry thoroughly.
Reassemble and test
Put everything back in reverse order. Turn the water back on slowly and check for leaks. If it still drips, recheck that the new part is seated correctly and the retaining nut is snug (but not overtightened).
Restore Power to a Dead Outlet Safely
When an outlet stops working, the cause is often simple—like a tripped GFCI or breaker. Learning to troubleshoot safely can save you from unnecessary electrician visits.
Step-by-step:
Confirm the outlet is really dead
Plug in a device you know works (like a lamp or phone charger). Don’t rely on a single device in case it’s the problem.
Check nearby GFCI outlets
GFCI (Ground Fault Circuit Interrupter) outlets—often in kitchens, bathrooms, garages, or basements—can protect multiple outlets downstream. - Look for outlets with “Test” and “Reset” buttons. - Press “Reset” firmly until it clicks. Re-test the dead outlet afterward.
Inspect the breaker panel
- Open your electrical panel and look for a breaker that’s in the middle position or slightly off compared to others. - To reset: push fully to OFF, then firmly back to ON. - If it immediately trips again, stop and call a licensed electrician—there may be a wiring fault or overloaded circuit.
Test the outlet with a non-contact tester (optional but recommended)
A non-contact voltage tester lets you confirm whether power is present without touching bare wires. If the tester shows no power but breakers and GFCIs are fine, the issue may be inside the outlet or wiring.
Replace a worn outlet (if comfortable and legal where you live)
- Turn the breaker OFF to that circuit. - Confirm power is off with a tester. - Remove the cover plate and mounting screws. - Note how wires are connected (take a photo). - Move wires one by one to the new outlet: hot (usually black) to brass screw, neutral (white) to silver, ground (bare/green) to green screw. - Tighten everything, reinstall, and restore power.
If you see burned/melted plastic, loose wires, or aluminum wiring, stop and call a professional—those are red flags for more serious issues.
Quiet a Running Toilet and Cut Down Your Water Bill
A toilet that runs every few minutes is usually losing water from the tank into the bowl. You’re paying for all that wasted water. Common culprits: a worn flapper, mis-set float, or bad fill valve.
Step-by-step:
Remove the tank lid and observe
Flush once and watch what happens. Notice: - Does water keep trickling into the bowl? - Does the water level go above the overflow tube?
Check the flapper
- Turn off the water at the shutoff valve behind the toilet. - Drain most of the tank by holding down the flush lever. - Inspect the rubber flapper: is it warped, cracked, or not sealing well? If so, replace it with a matching style. They’re inexpensive and widely available.
Adjust the chain
The chain from the flush handle to the flapper should have a little slack, but not enough to get caught under the flapper. Adjust so it lifts the flapper fully but doesn’t hold it open.
Set the correct water level
- The fill line is often marked on the tank or slightly below the top of the overflow tube. - For float-arm fill valves: bend the metal arm slightly downward to lower the water level. - For vertical “float cup” valves: adjust the screw or clip on the rod.
Replace a noisy or slow fill valve (if needed)
If the valve won’t shut off properly after adjustment: - Turn off water and empty the tank. - Disconnect the water supply line under the tank. - Remove the old fill valve nut and lift it out. - Install the new valve per instructions, adjust height, reconnect line, and test.
Final check
Turn water back on, let the tank refill, and listen for 5–10 minutes. There should be no periodic refilling sounds or trickling.
Repair a Small Drywall Hole for a Clean, Paintable Finish
Door handles, kids, and moving furniture all seem determined to punch holes in drywall. Small to medium holes are very fixable with basic materials and a bit of patience.
Step-by-step:
Assess the damage
- Nail/screw holes and dents: less than ½ inch. - Small holes: about ½–2 inches. - Larger holes: 2–6 inches (often need a patch). The size determines the repair method.
Prepare the area
- Use a utility knife to trim loose paper or crumbling edges. - Lightly sand around the hole to remove bumps or high spots. - Wipe off dust with a dry cloth.
Fill very small holes (nail/screw holes)
- Use pre-mixed lightweight spackle or joint compound. - Apply with a putty knife, pressing into the hole and smoothing flush. - Let dry fully, then sand lightly. - Apply a second thin coat if needed.
Patch small to medium holes with a self-adhesive patch
- For 2–6 inch holes, use a mesh or metal-backed adhesive patch. - Center it over the hole and press firmly. - Apply joint compound over the patch, feathering the edges outward. - Let dry, sand, and apply a second (and possibly third) thinner coat to blend.
Sand and prime before painting
- Sand with fine-grit sandpaper until smooth and level with surrounding wall. - Wipe off dust. - Prime the repaired area to prevent “flashing” (a visible patch through paint). - Once dry, paint with matching wall color.
Blend for a seamless look
When repainting, feather the paint a bit beyond the repair area instead of stopping exactly at the edge. This helps hide the transition.
Re-Seat a Loose Interior Door That Won’t Latch Right
A door that sticks, won’t latch, or drags on the floor is annoying—and very fixable. Seasonal humidity changes often cause doors and frames to swell or shift slightly.
Step-by-step:
Diagnose the problem area
Close the door slowly and look: - Where is it rubbing? Top, side, or bottom? - Does the latch align with the strike plate hole? - Are hinge screws loose?
Tighten hinge screws first
- Use a screwdriver (not just a drill) to snug all hinge screws on both door and frame. - If a screw spins without tightening, the wood may be stripped. Repair by: - Removing the screw. - Inserting wood glue and a few wooden toothpicks or a short wood dowel in the hole. - Breaking them flush, letting glue dry, then reinstalling the screw.
Adjust hinge position slightly (if needed)
- If the latch side is rubbing at the top: slightly deepen (chisel) the top hinge mortise in the frame or use a thinner cardboard shim behind the bottom hinge on the frame to tilt the door. - If rubbing at the bottom: reverse the idea—adjust bottom hinge position.
Fix latch alignment with the strike plate
- If the latch is slightly above or below the strike plate hole, mark where it actually contacts. - Remove the strike plate and carefully chisel the mortise a bit higher or lower. - Reinstall the plate aligned with your mark. - For small misalignments, you can file the opening in the strike plate instead of moving it.
Plane or sand minor sticking areas
- Mark the tight spots with painter’s tape or pencil. - Remove the door from the hinges, lay it on supports, and plane or sand just the marked spots. - Seal any freshly exposed wood with paint or finish to reduce future swelling.
Test the door repeatedly
Rehang and close the door 10–15 times to ensure it latches smoothly and no new rub points appear.
Conclusion
Knowing how to handle practical home repairs—like fixing leaks, restoring power to outlets, stopping a running toilet, patching drywall, and tuning up doors—gives you more control over your space and your budget. Start with one task, follow the steps carefully, and build your skills gradually. The more you do, the more confident you’ll feel tackling the next repair instead of waiting (and paying) for someone else to handle it.
Sources
- [U.S. Environmental Protection Agency – Fix a Leak](https://www.epa.gov/watersense/fix-leak-week) - Explains how household leaks waste water and offers guidance on common plumbing leak fixes
- [Family Handyman – How to Fix a Leaking Faucet](https://www.familyhandyman.com/project/how-to-repair-a-compression-faucet/) - Detailed, illustrated instructions for different faucet types and repairs
- [Electrical Safety Foundation International (ESFI)](https://www.esfi.org/home-electrical-safety/) - Safety best practices for working around home electrical systems and outlets
- [University of Nebraska–Lincoln Extension – Repairing Drywall](https://extensionpublications.unl.edu/assets/pdf/g1920.pdf) - Educational guide on drywall repair methods and finishing techniques
- [This Old House – Fixing a Running Toilet](https://www.thisoldhouse.com/plumbing/21018921/how-to-fix-a-running-toilet) - Step-by-step instructions and diagrams for diagnosing and repairing running toilets
Key Takeaway
The most important thing to remember from this article is that this information can change how you think about Home Repairs.


