Feeling like your home is slowly falling apart around you? You don’t need a full toolbox or contractor budget to turn things around. With a few basic tools and some practical know‑how, you can tackle common issues that make a house feel worn out—safely and without wasting a weekend.
This guide walks through five step‑by‑step repairs that most DIY‑minded homeowners can handle. Each one is chosen because it delivers a big improvement for a small investment of time.
Stop a Dripping Faucet and Silence the Sink
A dripping faucet wastes water, adds to your bill, and can drive you a little bit crazy. Most of the time, the fix is a worn‑out washer, cartridge, or O‑ring—not a full replacement.
Tools and materials
- Adjustable wrench or basin wrench
- Screwdriver set (Phillips and flathead)
- Replacement cartridge or washer/O‑ring kit (matched to your faucet brand/model)
- Plumber’s grease
- Towel or small bucket
Step‑by‑step
Shut off the water supply
Look under the sink for the shutoff valves and turn them clockwise. If there are no local shutoffs, turn off the main water supply to the house.
Plug the drain and prep the area
Use the sink stopper or a rag. This keeps small parts from disappearing. Lay a towel in the sink to protect the finish and catch drips.
Remove the faucet handle
Pop off the decorative cap (if present) with a small flathead screwdriver. Remove the handle screw, then pull the handle off. Keep parts organized in the order you remove them.
Access and remove the cartridge or stem
Depending on your faucet type (cartridge, compression, or ball), you’ll see a retaining nut or clip. Loosen it with your wrench, then gently pull the cartridge or stem straight up.
Inspect and replace worn parts
Look for cracked O‑rings, flattened washers, or mineral buildup. Replace damaged parts with new ones that match your faucet model. Apply a thin layer of plumber’s grease to O‑rings and moving surfaces.
Reassemble and test
Reinstall the cartridge or stem, tighten the retaining nut (snug, not over‑tight), and reassemble the handle. Turn the water back on slowly and check for drips. If it still leaks, make sure the cartridge is fully seated and all parts match the original orientation.
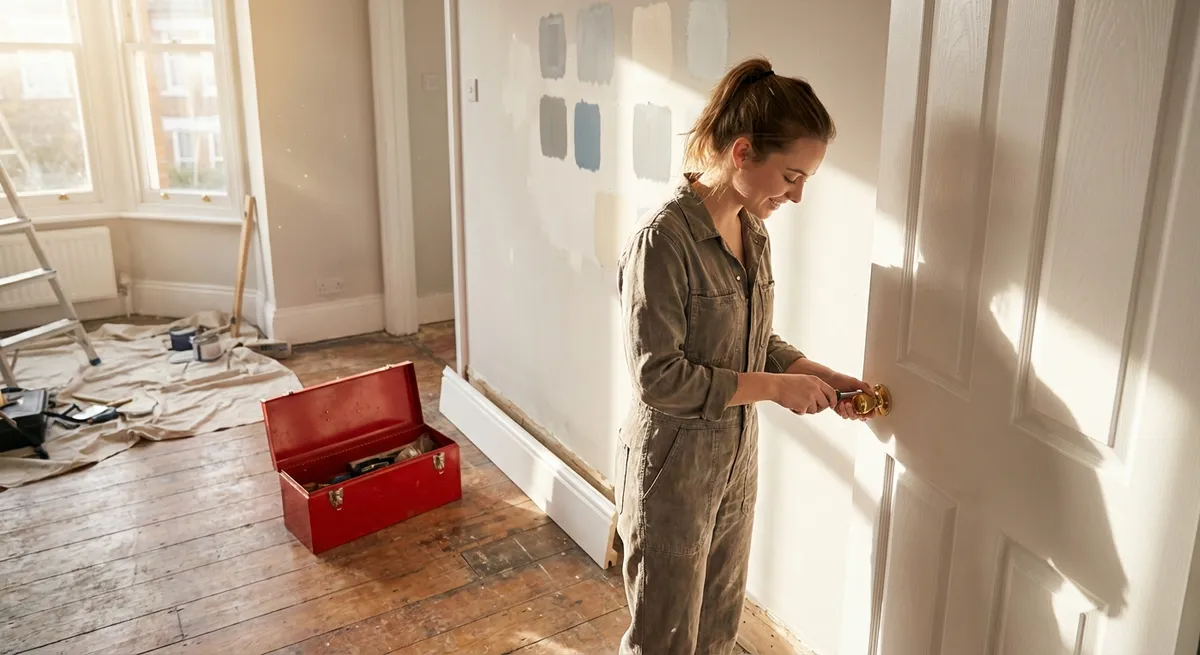
Fix a Door That Won’t Latch or Keeps Swinging Open
A misaligned door can be more than a nuisance—it can waste heating and cooling and stress the hardware over time. In many cases, you can fix it without planing the door or calling a carpenter.
Tools and materials
- Screwdriver
- Shims (wooden paint stirrers or cardstock can work)
- Longer wood screws (2.5"–3")
- Utility knife or chisel (optional)
- Drill (optional but helpful)
Step‑by‑step
Identify the problem area
Close the door slowly and see where it binds or misses the latch. Look at the reveal (gap) around the door. Uneven gaps, rubbing at the top, or a latch that doesn’t meet the strike plate are common signs of hinge sag.
Tighten existing hinge screws
With the door open, tighten all hinge screws on the door and the jamb. Many doors loosen over time just from daily use.
Reinforce with longer screws
If the top hinge is pulling away from the frame, replace at least one short screw in the top hinge (on the jamb side) with a 2.5"–3" screw. This anchors the hinge into the wall framing and pulls the door back into alignment. Drive it in gradually and check the door as you go.
Adjust the strike plate if needed
If the latch still doesn’t catch but the door looks square, mark where the latch hits the strike plate. You may be able to slightly bend the strike plate lip outward with pliers or move the whole plate up, down, or in. Fill old screw holes with toothpicks and wood glue before repositioning.
Shim behind hinges for fine‑tuning
If the door still rubs at one corner, loosen the hinge screws slightly and tuck a thin shim (cardstock or a trimmed paint stirrer) behind the hinge leaf where you need slight adjustment. Retighten screws and test the swing until the latch catches smoothly and the door stays put.
Refresh Cracked or Mildewed Bathroom Caulk
Old, cracked, or mold‑stained caulk around tubs, showers, and sinks doesn’t just look bad—it can also let water sneak behind surfaces and cause hidden damage. Recaulking is a low‑cost upgrade with high impact.
Tools and materials
- Caulk remover tool or utility knife
- Plastic scraper
- Painter’s tape
- Tub/shower silicone or siliconized acrylic caulk (mold‑resistant, bathroom‑rated)
- Caulk gun (for cartridge caulk)
- Rags and rubbing alcohol or mild cleaner
- Latex or nitrile gloves
Step‑by‑step
Remove the old caulk completely
Use a caulk removal tool or a sharp utility knife to cut along both edges of the existing bead. Gently peel and scrape it away. Take your time—new caulk won’t adhere properly to old residue.
Clean and dry the area
Scrub the joint with a bathroom cleaner to remove soap scum and mildew stains. Rinse, let it dry thoroughly, then wipe with rubbing alcohol to remove oils. Caulk adheres best to clean, dry surfaces.
Tape the edges for a clean line
Apply painter’s tape along both sides of the joint, leaving the gap exposed. This helps create a straight, professional‑looking bead, especially if you’re new to caulking.
Cut the caulk tip and apply
Cut the nozzle at a 45‑degree angle with a small opening—about the width of the gap. Puncture the inner seal if needed. Hold the gun at a consistent angle and apply steady pressure, pulling the bead along the joint in one smooth pass when possible.
Tool the bead and remove tape
With a gloved finger or caulk tool, gently press and smooth the bead to push it into the gap and even out the surface. Immediately remove the painter’s tape while the caulk is still wet, pulling it away from the joint. Wipe away any smears with a damp rag.
Let it cure fully
Follow the product label—many bathroom caulks need 24 hours before full water exposure, even if they’re labeled “fast dry.” Avoid showers or splashing until it’s cured to prevent gaps or bubbles.
Secure a Loose Towel Bar or Toilet Paper Holder
That wobbly towel bar or toilet paper holder isn’t just annoying—it can eventually rip out of the wall. The fix usually involves better anchoring, not a brand‑new fixture.
Tools and materials
- Screwdriver
- Stud finder (optional but helpful)
- Drywall anchors (rated for at least 25–50 lbs for towel bars)
- Drill and appropriately sized bits
- Level
- Pencil
Step‑by‑step
Remove the fixture and inspect the wall
Loosen the small set screws under the mounting brackets and slide the bar or holder off. Check the screw holes and surrounding drywall. Crumbled or enlarged holes mean you’ll need new anchors or to shift the bracket slightly.
Locate a stud if possible
Use a stud finder to see if you can hit wood framing for at least one side of the bar. This gives a much stronger hold. Mark stud locations lightly with a pencil.
Decide whether to reuse or move the holes
If the holes are still solid, you may be able to reuse them with better anchors. If not, move the bracket up, down, or sideways by at least an inch to get into solid drywall or over a stud.
Install appropriate anchors
For drywall‑only mounting, use quality expansion anchors or self‑drilling anchors sized for the load. Pre‑drill pilot holes if required and tap the anchors flush. For stud locations, drill a pilot hole and use wood screws instead of anchors.
Reattach the mounting brackets
Hold the brackets level (use a small level over longer runs like towel bars) and secure them with the screws into your anchors or studs. Check that they’re snug but avoid overtightening, which can strip anchors.
Secure the bar or holder and test
Reinstall the bar or holder onto the brackets and tighten the set screws. Give it a firm but controlled tug to confirm it’s solid. If it moves, double‑check that the anchors haven’t spun and the screws are fully seated.
Restore a Sticking Window for Smoother Operation
Windows that stick, grind, or refuse to stay open are both frustrating and potentially unsafe. Many issues come from dirt, paint, or minor alignment problems rather than serious structural damage.
Tools and materials
- Vacuum with brush attachment
- Mild cleaner and rags
- Silicone‑based spray lubricant (non‑petroleum for vinyl)
- Putty knife
- Sandpaper (fine‑grit)
- Hammer and finish nails or small screws (for loose stops or hardware)
Step‑by‑step
Determine what’s causing the sticking
Try opening and closing the window while watching and listening. Is it binding at the sides, bottom, or top? Do you see paint bridging between the sash and frame, or packed dirt in the tracks?
Clean the tracks and contact points
Open the window as far as possible. Vacuum the tracks, then wipe them with a mild cleaner to remove dirt, dust, and dried debris. For sliding windows, focus on the bottom track; for double‑hung, clean the side channels and sill.
Free painted‑shut edges
If the sash is stuck by paint, carefully run a sharp putty knife along all seams where sash meets frame, cutting through the paint line. Work slowly to avoid damaging wood or vinyl. You may need to work from both inside and outside.
Lightly sand rough, swollen, or painted wood contact areas
For wooden windows, identify where surfaces rub. Lightly sand those spots, testing the window periodically. You’re aiming to remove just enough material to allow smooth movement, not to reshape the sash.
Lubricate moving parts appropriately
Use a silicone‑based spray (safe for vinyl and many finishes) on the tracks and contact points. Spray lightly, then operate the window several times to distribute. Avoid oil‑based lubricants like WD‑40 on vinyl or painted surfaces—they can attract more dirt or damage materials over time.
Tighten or adjust hardware and stops
Check that sash locks, guides, and stops are secure. Tighten loose screws; replace missing ones. If a window won’t stay open, the balance mechanisms (in double‑hung windows) may be disconnected or worn and might need reattachment or replacement according to the manufacturer’s instructions.
Conclusion
Small, focused repairs can make your home feel more solid, safer, and easier to live in—without turning into a weeks‑long project. By tackling issues like drips, drafts, loose fixtures, and sticky windows early, you prevent bigger problems and build real DIY confidence.
Start with the repair that bothers you most or feels the least intimidating. Lay out your tools, follow each step carefully, and don’t rush the safety basics like shutting off water or power. Over time, these skills add up, and your home will show the difference.
Sources
- [U.S. Environmental Protection Agency – WaterSense: Fixing Leaks at Home](https://www.epa.gov/watersense/fix-leak-week) – Guidance on why and how to fix common household leaks, including faucets and toilets
- [Family Handyman – How to Fix a Leaking Faucet](https://www.familyhandyman.com/project/how-to-fix-a-leaking-faucet/) – Detailed breakdown of faucet types and repair steps with photos
- [Energy.gov – Air Sealing Your Home](https://www.energy.gov/energysaver/air-sealing-your-home) – Explains how gaps and failed seals (like old caulk) affect comfort and efficiency
- [This Old House – How to Recaulk a Bathtub](https://www.thisoldhouse.com/bathrooms/21015217/how-to-recaulk-a-bathtub) – Step‑by‑step tub and tile recaulking tutorial with practical tips
- [Window & Door Manufacturers Association – Window Operation and Maintenance](https://www.wdma.com/page/WindowCare) – General best practices for window care, operation, and troubleshooting
Key Takeaway
The most important thing to remember from this article is that this information can change how you think about Home Repairs.


