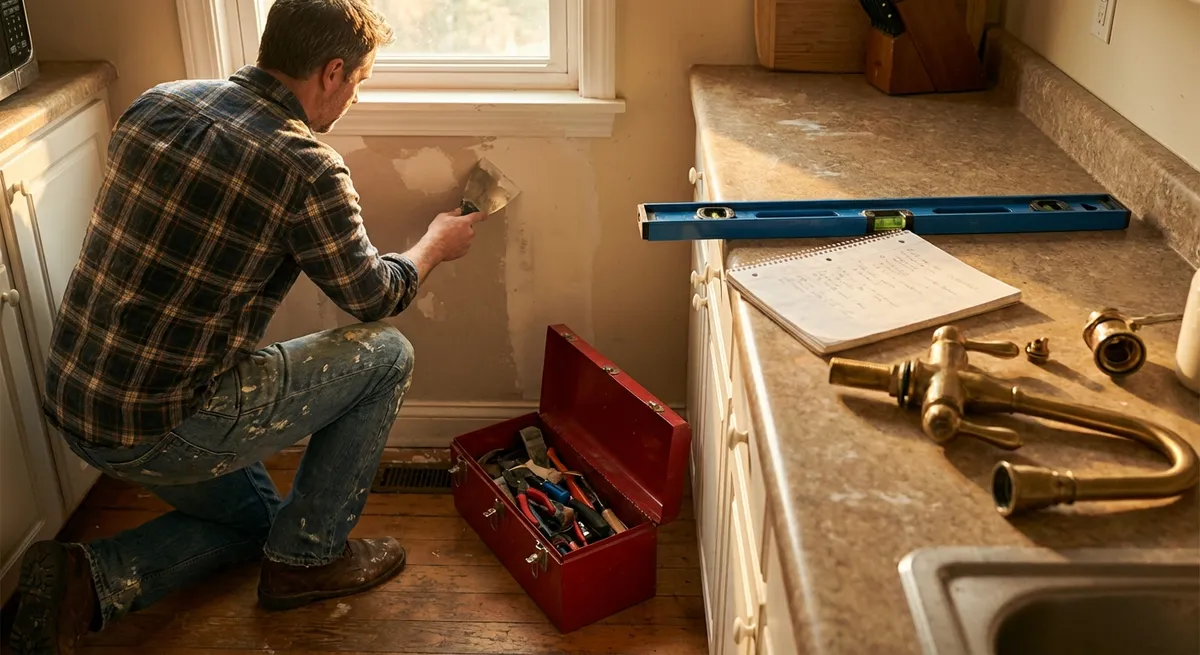
When something breaks at home, it’s easy to jump straight to calling a pro—or worse, ignoring the problem until it turns into a bigger, more expensive headache. With a few tools, some basic know‑how, and clear steps, many everyday repairs are well within reach for a DIY‑minded homeowner. This guide walks through five practical home fixes in simple, safe steps so you can get comfortable doing more yourself, avoid repeat problems, and know when it’s time to stop and call in a professional.
Fixing a Dripping Bathroom Faucet
A slow drip can waste gallons of water over time and drive up your bill. Most modern faucets can be repaired with a simple cartridge or washer replacement, not a complete tear‑out.
Step 1 – Shut off the water and plug the drain
Locate the shutoff valves under the sink and turn them clockwise until they stop. Turn the faucet on to relieve pressure. Plug the sink drain with a stopper or rag so you don’t lose small screws or parts.
Step 2 – Disassemble the handle
Use a small flathead screwdriver or utility knife to gently pry off any decorative cap hiding the handle screw. Remove the screw with a Phillips screwdriver or hex key (depending on your faucet). Lift the handle straight up and off; if it’s stuck, gently wiggle rather than force it.
Step 3 – Identify and remove the cartridge or stem
Under the handle, you’ll see a retaining nut, clip, or bonnet. Use an adjustable wrench or channel‑lock pliers to loosen it. Pull the cartridge (single‑handle) or stem (two‑handle) straight out. Take note of its orientation—snap a photo so you can reinstall it correctly.
Step 4 – Inspect O‑rings and seals, then replace
Look for cracked rubber seals, O‑rings, or mineral buildup. Often, replacing the entire cartridge or stem is easiest. Bring the old part to a hardware store and match it by brand and model or visual comparison. Install the new part in the same orientation, pressing it fully into place.
Step 5 – Reassemble and test for leaks
Reinstall the retaining nut or clip, then the handle and screw. Turn the shutoff valves back on slowly while watching for leaks underneath. Open the faucet to remove air from the lines, then close it and confirm the drip is gone. If you still see a leak, make sure the cartridge is seated correctly and all seals are in place.
Silencing a Squeaky Interior Door
A squeaky door can make your home feel older and more worn than it is. Most squeaks come from friction in the hinge pins, not from the wood itself, and are simple to fix.
Step 1 – Identify the noisy hinge
Open and close the door slowly to listen for where the squeak is loudest. Typically, one hinge is louder than the others. Start with the top hinge and work down if you’re unsure.
Step 2 – Support the door
Place a doorstop or wedge under the latch side of the door to keep it steady when you remove the hinge pin. This prevents stress on the hinges and helps keep the door aligned.
Step 3 – Remove the hinge pin
Using a small flathead screwdriver or nail set and a hammer, gently tap the bottom of the hinge pin upward. Once the head is raised, pull it out with your fingers or pliers. Work carefully to avoid scratching the hinge or surrounding trim.
Step 4 – Clean and lubricate
Wipe the pin with a cloth to remove old grease, dust, or rust. Apply a small amount of lubricant (silicone spray, lithium grease, or a dab of petroleum jelly). Avoid using cooking oils—they can attract dust and gum up over time. Spread the lubricant evenly along the pin.
Step 5 – Reinstall and check alignment
Slide the hinge pin back in, tapping lightly with a hammer if needed. Remove the doorstop and open and close the door several times to work in the lubricant. If the door now rubs the frame or sticks, you may need to slightly tighten or loosen hinge screws to adjust alignment.
Resetting a Tripped Circuit Breaker Safely
When lights go out or an outlet stops working, a tripped breaker is often to blame. Resetting it safely—and understanding why it tripped—helps prevent repeat problems and potential hazards.
Step 1 – Turn off or unplug affected devices
Before heading to the electrical panel, turn off light switches and unplug anything that suddenly lost power. This reduces the immediate load on the circuit and prevents sudden surges when you reset it.
Step 2 – Find the tripped breaker
Open your main breaker panel (usually in a basement, garage, or utility closet). Look for a breaker lever that is not fully in the “ON” position—often it sits between ON and OFF, or has a small orange or red indicator showing it’s tripped.
Step 3 – Fully switch it OFF first
Grip the breaker firmly and push it completely to the OFF position. Then, push it firmly back to ON. Many breakers won’t reset correctly unless you flip them fully off first.
Step 4 – Restore power gradually
Return to the room and plug devices back in one at a time, turning them on gradually. If the breaker trips again immediately, unplug everything on that circuit and try resetting once more. A quick re‑trip suggests a short circuit or overloaded circuit that needs professional attention.
Step 5 – Know when to call an electrician
If a breaker repeatedly trips with minimal load, feels hot, hums, or has visible damage, stop resetting it. Label the problem circuit, keep it off, and contact a licensed electrician. Persistent trips are a safety warning, not just an inconvenience.
Patching a Small Drywall Hole for a Clean Finish
From doorknob dents to picture‑hook scars, drywall damage is almost unavoidable. With simple materials and a bit of patience, you can patch small holes and blends so they disappear after paint.
Step 1 – Clean and prep the damaged area
Brush away loose fragments and dust with a dry cloth or brush. For small nail or screw holes, lightly scrape around the hole with a putty knife to remove raised paper. For holes up to about 1/2 inch, you usually don’t need a backing patch.
Step 2 – Apply joint compound or spackle
Using a putty knife, press lightweight spackle or joint compound into the hole, slightly overfilling it. Hold the knife at a shallow angle and smooth across the area, feathering the edges wider than the hole so the patch tapers into the existing wall.
Step 3 – Let it dry fully
Follow the product’s drying time—often a few hours, but it can be longer in humid conditions. The patch should be firm and dry to the touch before you sand. Rushing this step is the most common cause of visible patches later.
Step 4 – Sand smooth and repeat if needed
Use fine‑grit sandpaper (120–220 grit) to gently sand the patch until smooth and level with the surrounding wall. If you can still see or feel a depression or ridge, add a thin second coat of compound, feather it wider, let dry, and sand again.
Step 5 – Prime and paint to blend
Bare compound can absorb paint differently than the rest of the wall, leading to visible spots. Apply a small amount of primer over the patch and let it dry, then paint the area with the same color and sheen as the existing wall. Blend your brush or roller strokes into the surrounding area for a seamless finish.
Reviving a Running Toilet That Won’t Stop Refilling
A constantly running toilet wastes a surprising amount of water and can often be fixed without specialized tools. Most issues come from the flapper, fill valve, or water level inside the tank.
Step 1 – Remove the tank lid and observe
Lift the tank lid carefully and set it safely aside (it’s heavy and fragile). Flush the toilet while watching inside the tank. Pay attention to how the flapper closes and how high the water rises after the flush.
Step 2 – Check the flapper seal
If water keeps trickling into the bowl, the flapper might not be sealing properly. Turn off the water supply valve behind the toilet, then unhook the flapper from the overflow tube and the chain. Inspect it for warping, mineral buildup, or deterioration. If it’s stiff or misshapen, replace it with a matching style.
Step 3 – Adjust or replace the fill valve
If the water level rises too high and spills into the overflow tube, the fill valve may be set incorrectly or failing. Many modern fill valves have a simple float that can be raised or lowered with a screw or clip. Adjust so the water line stops about an inch below the top of the overflow tube. If adjustment doesn’t help, consider replacing the fill valve assembly following the manufacturer’s instructions.
Step 4 – Set the chain length correctly
Reconnect the chain between the flush handle and the flapper so there’s a slight slack—usually about 1/4 to 1/2 inch. If it’s too tight, the flapper can’t fully close; too loose, and the flapper won’t lift enough during a flush.
Step 5 – Restore water and test
Turn the water supply valve back on slowly. Let the tank fill and watch for leaks or continuous flow into the bowl. Flush several times to confirm that the flapper seals properly and the fill valve shuts off at the correct water level. Once everything is working smoothly, replace the tank lid.
Conclusion
Getting comfortable with basic home repairs is less about being “handy” and more about having a clear process, the right tools, and the patience to work step by step. Fixing a dripping faucet, silencing a squeaky door, resetting a breaker, patching drywall, and stopping a running toilet are all projects that build your skills and confidence without requiring specialized training. As you take on more of these small jobs yourself, you’ll not only save money—you’ll also be better prepared to spot real problems early and make informed decisions about when DIY is enough and when it’s time to bring in a professional.
Sources
- [U.S. Environmental Protection Agency – Fix a Leak](https://www.epa.gov/watersense/fix-leak-week) – Explains how small plumbing leaks waste water and offers basic guidance on finding and fixing leaks
- [Family Handyman – How to Repair a Leaky Single-Handle Cartridge Faucet](https://www.familyhandyman.com/project/how-to-repair-a-leaky-single-handle-cartridge-faucet/) – Step-by-step example of faucet repair with photos and part identification
- [U.S. Department of Energy – Electrical Safety](https://www.energy.gov/ehss/services/environment-health-safety-security-professionals/electrical-safety) – General best practices and warnings related to working around electrical systems
- [Lowe’s – How to Patch and Repair Drywall](https://www.lowes.com/n/how-to/patch-and-repair-drywall) – Visual walkthroughs for patching different sizes of drywall damage
- [City of San Diego Public Utilities – Fixing a Running Toilet](https://www.sandiego.gov/public-utilities/water-efficiency/fixing-running-toilet) – Practical guide to diagnosing and repairing common causes of toilet leaks and running toilets
Key Takeaway
The most important thing to remember from this article is that this information can change how you think about Home Repairs.


