If you own a car long enough, it will eventually drip, grind, squeal, or just refuse to cooperate—usually when you’re busy and broke. Calling a shop for every little problem gets expensive fast, and a lot of common issues are completely fixable at home with basic tools and a calm approach. This guide walks through five practical, step‑by‑step auto repairs that many DIYers can handle safely, along with what to watch out for and when to call in a pro.
Always read your owner’s manual first and work within your comfort level. Your goal isn’t to become a pro mechanic—it’s to be a confident, capable owner who knows when you can fix it yourself and when you shouldn’t.
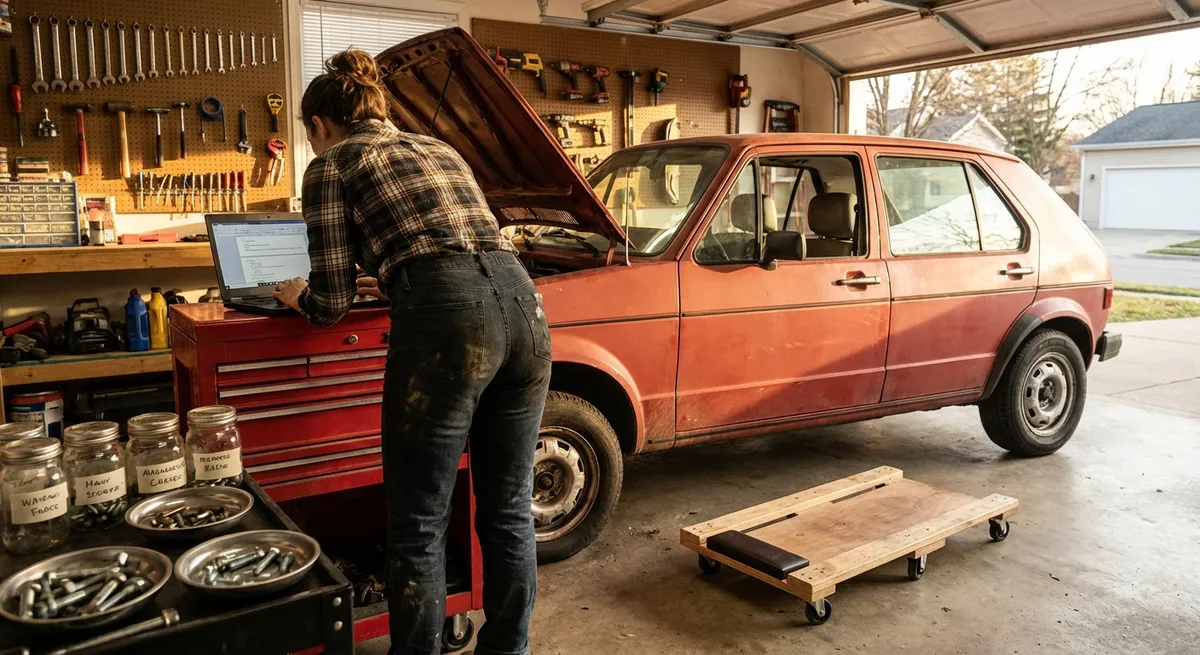
Before You Wrench: Safety and Setup
Good repairs start before you ever touch a bolt.
Stabilize the car properly
- Park on a flat, solid surface. - Engage the parking brake and put the car in Park (automatic) or 1st gear (manual). - Use wheel chocks (or wood blocks in a pinch) behind the wheels that stay on the ground. - If lifting the car, use a proper jack on the manufacturer’s jacking points and always support it with jack stands before going underneath. Never rely on a jack alone.
Gear up with basic tools
A simple starter kit covers most DIY jobs: - Metric socket set and ratchet - Combination wrenches - Screwdriver set (flat and Phillips) - Pliers (needle‑nose, adjustable) - Torque wrench (for wheel lugs and critical bolts) - Funnel, drain pan, shop towels, nitrile gloves, safety glasses Build slowly as you tackle more jobs; you don’t need a full shop on day one.
Work clean and organized
- Take photos of every area before disassembly (and as you go). - Lay parts out in order of removal or use small labeled containers for bolts. - Keep fluids contained and dispose of them properly—most parts stores accept used oil, coolant, and batteries for recycling.
Know your limits
If you run into: heavy rust, fuel leaks near hot surfaces, major structural damage, flashing check‑engine lights, or airbag wiring, that’s usually time to stop and get professional help.
Step‑by‑Step: Replace Your Brake Pads Without Panic
Brake pad replacement is one of the most common DIY repair wins. If your brakes squeal, feel weak, or a shop says your pads are low, this is a job many owners can handle if they’re methodical and careful.
Tools & supplies: Jack, jack stands, lug wrench, socket set, C‑clamp or brake caliper tool, new brake pads, brake cleaner, wire brush, bungee cord or wire, torque wrench.
1. Prep and lift
- Loosen (do not remove) the lug nuts on the wheel with the car on the ground.
- Jack up the car at the recommended lifting point and secure it with jack stands.
- Remove the wheel fully and set it aside.
2. Access the caliper and pads
- Locate the brake caliper (the part clamped over the rotor).
- Find the caliper bolts on the back side; remove them with the correct socket or wrench.
- Gently slide the caliper off the rotor.
- Use a bungee cord or wire to hang the caliper from the suspension—never let it hang by the brake hose.
3. Remove old pads and inspect
- Slide the old pads out of the caliper bracket.
- Check pad wear: both pads should be worn somewhat evenly. One pad much thinner than the other can indicate sticking hardware or caliper issues.
- Inspect the rotor: deep grooves, heavy rust, or a lip on the edge can mean it needs resurfacing or replacement.
4. Compress the caliper piston
- Place an old pad against the piston face inside the caliper.
- Use a C‑clamp or brake tool to slowly press the piston back into the caliper.
- Watch your brake fluid reservoir under the hood—if it’s very full, fluid may rise; be ready to remove a small amount with a turkey baster if needed.
5. Install new pads and reassemble
- Lightly clean the caliper bracket contact points with a wire brush and brake cleaner.
- Install any new anti‑rattle clips provided with the pad set.
- Slide the new pads into place, making sure they sit fully seated and in the correct orientation.
- Reinstall the caliper over the pads and rotor; hand‑thread caliper bolts and then tighten to manufacturer torque spec.
- Reinstall the wheel, hand‑tighten lug nuts.
- Lower the car, then torque lug nuts in a star pattern to spec.
6. Test before driving
- Pump the brake pedal several times until it feels firm—this seats the pads.
- Test brakes at low speed in a safe area before driving normally.
If at any point the caliper won’t slide freely, bolts are severely corroded, or you see leaks at brake hoses or calipers, stop and get professional help—brakes are not a place to guess.
Fix a Rough Idle: Clean Your Throttle Body the Right Way
A dirty throttle body can cause rough idle, hesitation, and poor fuel economy. Many modern cars build up carbon and oily residue around the throttle plate over time.
Tools & supplies: Screwdrivers, socket set, throttle body or intake cleaner (not carb cleaner unless specified), clean rags, safety glasses, gloves.
1. Identify the throttle body
- With the engine cool and off, open the hood.
- Follow the big air intake hose from the air filter box toward the engine.
- The throttle body is usually where that hose meets the metal intake manifold, often with an electrical connector attached.
2. Safely access it
- Disconnect the negative battery terminal (especially on drive‑by‑wire systems) to avoid triggering throttle faults.
- Loosen the clamps on the air intake hose and gently remove it from the throttle body.
- Move any connected sensors or hoses carefully, noting their locations or taking photos.
3. Clean without causing damage
- Inspect inside: you’ll likely see black carbon buildup around the throttle plate and bore.
- Spray throttle body cleaner on a rag (not directly into the housing at first) and gently wipe the bore and both sides of the plate.
- On cable‑operated throttles, you can gently open the plate by hand; on electronic throttles, follow the service manual—forcing the plate open can damage the motor.
- Avoid soaking electrical components or sensors; keep cleaner off external connectors as much as possible.
4. Reassemble and reset
- Reinstall the intake hose and any sensors or hoses you moved. Tighten all clamps securely.
- Reconnect the battery.
- Start the engine and let it idle for a few minutes. Idle may be a bit high or unstable at first while the computer re‑learns the throttle position.
If a check‑engine light appears and doesn’t clear after a couple of drive cycles, scan for codes. Some vehicles require a throttle relearn procedure after cleaning—often in the service manual or online for your specific model.
Stop That Puddle: Track Down and Fix a Simple Coolant Leak
Coolant leaks are common and can be minor if caught early—but ignored, they can destroy an engine. You won’t fix every cooling system issue in your driveway, but you can handle basic hose or clamp problems.
Tools & supplies: Flashlight, shop towels, gloves, hose clamp pliers or regular pliers, replacement hose and clamps (if needed), premixed coolant compatible with your vehicle, drain pan.
1. Identify what’s leaking
- Look at the fluid: coolant is usually green, orange, pink, or yellow and slightly sweet‑smelling.
- Never open a hot radiator cap—wait until the engine is completely cool.
- Use a flashlight under the hood and beneath the car to see where the drip is coming from: radiator, hoses, coolant reservoir, or water pump area.
2. Check hoses and clamps first
- Squeeze upper and lower radiator hoses with the engine cool. They should be firm but not rock‑hard or mushy.
- Look for wet spots, white or colored crusty residue, or cracks.
- Inspect the clamps: loose, rusty, or broken clamps are frequent culprits.
3. Replace a suspect hose
- Place a drain pan under the area you’re working.
- Use pliers or a clamp tool to move spring clamps back away from the hose end (or loosen screw‑type clamps).
- Twist the hose gently to break the seal, then pull it off. Expect some coolant to drain.
- Match the new hose length and shape to the old one.
- Slide clamps onto the new hose, then install the hose onto the fittings fully and position clamps behind the raised bead on the fitting. Tighten screw clamps firmly, but don’t over‑crush the hose.
4. Refill and bleed the system
- Top off the radiator and/or reservoir with the correct coolant mix.
- Many cars have a specific bleeding procedure to remove air pockets—check your owner’s manual or a reliable repair guide for your model.
- Start the engine and let it warm up with the heater on hot. Watch for leaks and monitor temperature; shut down immediately if it overheats.
If you see coolant dripping from the engine block, behind the timing cover, or from the water pump weep hole, that’s usually beyond a basic DIY and better handled by a shop.
Bring Back Your Headlights: Restore Cloudy Lenses at Home
Cloudy, yellow headlights are more than ugly—they’re a real safety issue at night. Lens restoration is one of the most satisfying quick wins you can do in a driveway.
Tools & supplies: Headlight restoration kit (with sandpaper and polish) or: various wet/dry sandpapers (e.g., 800/1500/2000 grit), plastic polish, masking tape, spray bottle of water, microfiber cloths, UV‑protective clear coat (often included in kits).
1. Prep the area
- Wash the headlights and surrounding area with soap and water; dry completely.
- Use masking tape to protect the paint and trim around the headlights.
- Park in the shade; direct sun can dry products too fast and make the job harder.
2. Sand off the oxidation
- Wet the headlight and the sandpaper with clean water.
- Start with the lowest grit recommended (often around 800 or 1000).
- Sand in one direction with light, even pressure until the lens looks evenly hazy (you’re removing the old damaged layer).
- Move to finer grits (1500, then 2000 or higher), changing direction with each grit (horizontal, then vertical) to remove the previous scratches.
3. Polish and protect
- Dry the lens and apply plastic polish according to the product instructions.
- Use a microfiber cloth or drill‑mounted foam pad to polish until the lens clears.
- Wipe clean and apply the UV‑protective coating if provided—this step is critical to keep the lenses from clouding again quickly.
Avoid shortcuts like household abrasives or toothpaste as your primary method—they can work in a pinch but usually don’t last and may scratch modern plastics more than you expect.
Electrical Gremlins: Track and Fix a Blown Fuse Without Guessing
Interior lights out, radio dead, power windows suddenly lifeless—many of these issues trace back to a simple blown fuse. Learning to read a fuse panel saves time, money, and a lot of frustration.
Tools & supplies: Owner’s manual, fuse puller or needle‑nose pliers, replacement fuses (correct amps), flashlight.
1. Find the correct fuse box
- Most cars have at least two: one under the dash and one under the hood.
- Check the owner’s manual or the fuse box cover diagram to identify which box controls the dead circuit.
- Use a flashlight; access is often awkward.
2. Identify the right fuse
- Use the diagram on the cover or in your manual to find the fuse assigned to the dead component (e.g., “RADIO,” “PWR OUTLET,” “INT LAMP”).
- Note the fuse’s amperage rating (e.g., 10A, 15A, 20A) and location.
3. Inspect and replace
- Use a fuse puller or needle‑nose pliers to remove the suspected fuse.
- Hold it up to the light: if the metal strip inside is broken or burned, the fuse is blown.
- Replace it with a new fuse of the same amperage rating—never “upgrade” to a higher amp.
- Re‑test the affected component.
4. If it blows again, don’t keep replacing it
- A fuse that blows immediately or repeatedly usually indicates a short circuit or deeper electrical issue.
- At that point, stop replacing fuses and consult a professional—continuous blowing can point to wiring damage that can become a fire hazard.
Keep a small assortment of common fuses in your glove box; they’re cheap, and the first time you restore power on the road, you’ll be glad you did.
Conclusion
You don’t need a professional lift, a rolling toolbox, or years of experience to solve a surprising number of car problems on your own. With a few basic tools, some patience, and clear step‑by‑step guidance, jobs like brake pad replacement, throttle body cleaning, simple coolant leak fixes, headlight restoration, and fuse troubleshooting are all within reach for a careful DIYer.
Work slowly, take photos as you go, and respect your limits—especially when safety systems or major structural components are involved. The payoff is more than saving money: you’ll understand your vehicle better, feel more confident on the road, and know when a shop quote makes sense versus when you can handle it in your own garage.
Sources
- [NHTSA – Vehicle Maintenance: Brakes](https://www.nhtsa.gov/equipment/brakes) - U.S. safety guidance on brake systems and why proper brake maintenance matters
- [AAA – Essential Car Maintenance and Repair Tips](https://www.aaa.com/autorepair/articles/essential-car-maintenance-and-repair-tips) - General overview of owner‑doable maintenance and when to see a professional
- [University of Illinois Extension – Vehicle Maintenance & Safety](https://web.extension.illinois.edu/auto/maintenance.cfm) - Educational resource on basic car systems, fluids, and safety considerations
- [U.S. Department of Energy – Keeping Your Car in Shape](https://www.energy.gov/energysaver/keeping-your-car-shape) - Explains how proper maintenance affects efficiency and reliability
- [YourMechanic – How to Replace Brake Pads](https://www.yourmechanic.com/article/how-to-replace-brake-pads-by-mia-bevacqua) - Professional, illustrated guide to DIY brake pad replacement steps
Key Takeaway
The most important thing to remember from this article is that this information can change how you think about Auto Repair.


