Keeping your car running smoothly doesn’t always require a shop visit or expensive tools. Many common issues are fixable in your own driveway with some patience, basic gear, and clear steps. This guide walks through five practical, step-by-step repairs that DIY enthusiasts can handle safely, while also helping you recognize where the line is between smart DIY and “time to call a pro.”
Before You Start: Safety and Setup
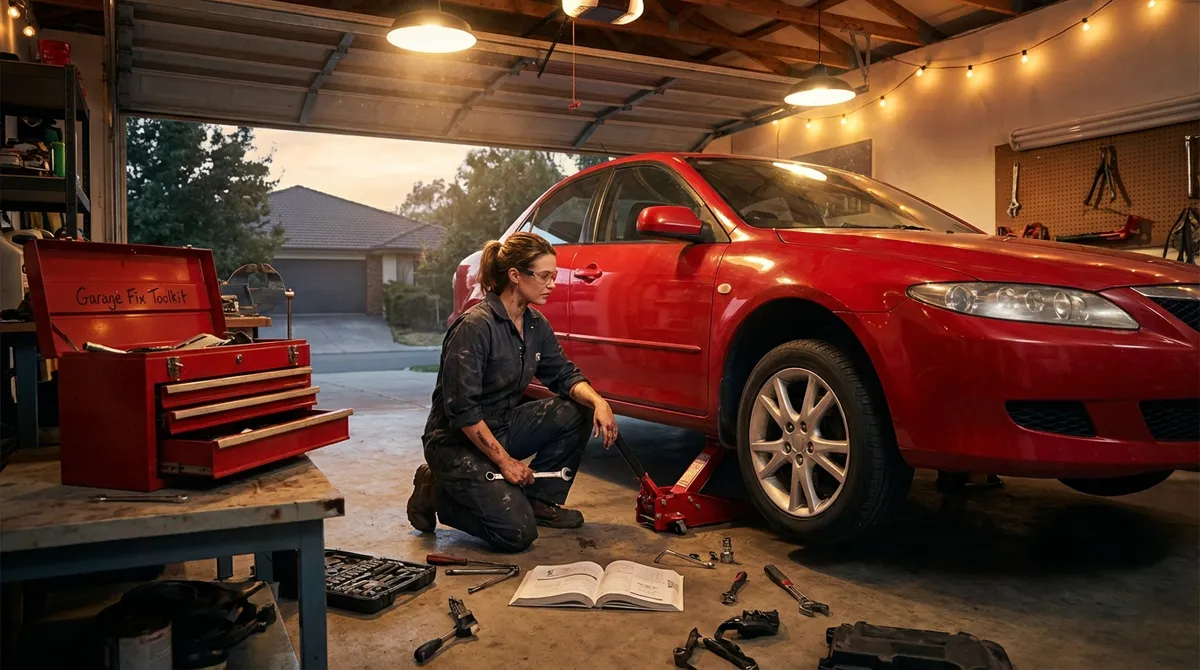
Before touching a wrench, set yourself up to work safely and effectively. Park on a flat, stable surface and engage the parking brake. If you’ll be working under or around the wheels, use wheel chocks and always support the car with jack stands—never rely only on a jack. Wear safety glasses and gloves when dealing with fluids, batteries, or anything under pressure.
Get familiar with your owner’s manual; it’s your first reference for fluid specs, torque values, fuse locations, and warning symbols. Assemble a basic toolkit: a metric socket set, combination wrenches, screwdrivers, pliers, a torque wrench, a multimeter, funnel, shop rags, and a good LED work light. Take photos before disconnecting hoses, lines, or connectors so you can reverse the process confidently. Finally, know your limits: if a job involves airbags, high-voltage hybrid systems, structural components, or anything that makes you feel out of your depth, it’s safer and often cheaper in the long run to involve a professional.
Tip 1: Stop the Squeal – Replacing Worn Brake Pads
Squealing or grinding when you brake is more than annoying—it’s a warning. Replacing worn pads early protects your rotors and keeps stopping distances short. The exact steps vary by vehicle, but the process is similar for many disc brake setups on cars and small SUVs.
Step 1: Prepare and lift the vehicle
Loosen the lug nuts on the wheel slightly while the car is still on the ground. Then jack up the vehicle at the correct jacking point and support it securely with jack stands. Remove the wheel to expose the brake caliper and rotor. Turn the steering wheel to angle the caliper toward you if that gives better access.
Step 2: Inspect pads, rotors, and hardware
Look through the caliper to see the brake pads. If the friction material is about 3 mm (⅛ inch) or less, they’re due for replacement. Check the rotor surface: light grooves are normal, but deep scoring, cracks, or a blue/purple tint indicate heat damage and may require rotor replacement or machining. Note how the existing pads and any metal clips are oriented; a reference photo helps.
Step 3: Remove the caliper and old pads
Locate the caliper slide bolts on the back side of the caliper and remove them with the appropriate socket or hex key. Carefully pivot or lift the caliper away from the rotor and support it with a hook or bungee cord—don’t let it dangle by the rubber brake hose. Slide the old pads out of the bracket and remove any anti-rattle clips or shims, keeping track of their positions.
Step 4: Compress the caliper piston
To make room for the thicker new pads, the caliper piston must be gently pushed back into its bore. Use a C-clamp or a dedicated piston tool and an old pad as a buffer against the piston surface. Open the brake fluid reservoir cap slightly to relieve pressure as you compress. Go slowly and evenly—if the piston doesn’t move smoothly, you may have a sticking caliper that needs professional attention.
Step 5: Install new pads and reassemble
Clean the pad bracket and hardware contact points with a small wire brush and brake cleaner, then install new clips if included. Apply a thin layer of high-temperature brake grease to the metal-to-metal contact areas (not on the friction surface). Slide the new pads into place, then reposition the caliper over them. Reinstall and snug the caliper bolts to the manufacturer’s torque spec. Put the wheel back on, hand-tighten lug nuts, lower the car, then torque the lugs in a star pattern to spec. Before driving, pump the brake pedal several times to seat the pads and restore a firm pedal.
Tip 2: Kill the Click – Diagnosing and Replacing a Weak Battery
A slow crank, repeated clicking when you turn the key, or dim headlights at idle often point to a weak or failing battery. Replacing it is usually straightforward and can prevent a no-start situation at the worst possible time.
Step 1: Confirm it’s really the battery
Turn the key or push the start button and pay attention. A single click and total power loss can point to a bad connection; rapid clicking often suggests low battery voltage. Use a digital multimeter across the battery terminals: a healthy, fully charged battery typically reads about 12.6 V with the engine off. Around 12.0 V or less means it’s significantly discharged. If you can start the engine, check charging voltage: with the engine idling, you should see roughly 13.7–14.7 V; much less might indicate an alternator or charging system issue rather than just the battery.
Step 2: Prepare for safe removal
Turn the engine and all accessories off, remove the key, and keep metal jewelry away from the battery terminals. Locate the battery—under the hood, in the trunk, or under a seat—and make sure you can access the tie-downs. Take a photo of how the cables are connected, then identify the positive (+, often red) and negative (−, often black) terminals.
Step 3: Disconnect and remove the old battery
Always disconnect the negative (−) terminal first to reduce the risk of shorting tools to ground. Loosen the clamp and move the cable aside so it cannot spring back. Then disconnect the positive (+) terminal. Remove any battery hold-down bracket or strap and carefully lift the battery straight up—it’s heavy, so lift with your legs and keep it level to avoid spilling any residual acid.
Step 4: Clean connections and prepare the new battery
Use a battery terminal brush or sandpaper to clean corrosion from the inside of the cable clamps and any metal contact surfaces. If you see white or greenish buildup, you can neutralize it with a baking soda and water solution, then dry thoroughly. Verify the new battery matches the old one in group size, terminal layout, and cold cranking amps (CCA) rating recommended in your owner’s manual.
Step 5: Install and test
Place the new battery into the tray, ensuring it’s oriented correctly so cables reach comfortably. Reinstall the hold-down and tighten it so the battery can’t move, but don’t overtighten and crack the case. Connect the positive (+) cable first, then the negative (−). Tighten clamps snugly; loose connections can mimic a bad battery. Start the vehicle and verify a strong crank and normal dash lights. Finally, check charging voltage with the engine running to confirm the alternator is doing its job.
Tip 3: Clear the Confusion – Using an OBD-II Scanner for Basic Troubleshooting
Modern vehicles store trouble codes whenever something goes out of range. A basic OBD-II scanner gives you insight into what’s wrong before you head to a shop—or helps you fix some issues yourself, like sensor problems or loose gas caps.
Step 1: Locate the diagnostic port
The OBD-II port is usually under the dashboard, near the steering column, sometimes behind a small cover. It’s a trapezoid-shaped connector. With the ignition off, plug in your scanner or Bluetooth adapter. Download the recommended app if it’s a wireless device and pair it with your phone following the manufacturer’s instructions.
Step 2: Read stored codes
Turn the ignition to the “ON” position without starting the engine (or follow your scanner’s prompts). Use the scanner to “Read Codes” or “Scan.” Note both current and pending codes—current codes typically indicate an active problem, while pending codes can reflect intermittent issues that may become more serious if they persist.
Step 3: Interpret what the codes mean
Write down the alphanumeric codes (e.g., P0301, P0420, P0171) and look them up in your scanner’s built-in library, your vehicle service information, or a reputable online database. Be careful not to assume that a code directly identifies the bad part; it often points to the system experiencing a problem, not necessarily the exact component that failed. For example, a lean condition code might be caused by a vacuum leak, a dirty mass airflow sensor, or low fuel pressure.
Step 4: Check simple causes first
For EVAP system codes and a check engine light that came on shortly after refueling, inspect the gas cap—it may be loose or the seal may be worn. For oxygen sensor or MAF sensor codes, check connectors for corrosion or looseness and inspect wiring for damage. Misfire codes for a specific cylinder might justify checking that cylinder’s ignition coil or spark plug. Use your eyes and nose: look for obvious leaks, cracked hoses, or burnt smells that support what the codes suggest.
Step 5: Clear codes and verify
After addressing the suspected cause, use the scanner to “Clear Codes.” Drive normally for several trips, as some monitors require a full drive cycle to reset. If the light stays off and no new codes appear, your fix likely worked. If the same codes return quickly, a deeper diagnosis is needed—and that can be the point where involving a professional with advanced tools makes sense.
Tip 4: Keep It Cool – Flushing and Refilling Engine Coolant
Fresh coolant does more than prevent freezing; it also resists overheating and protects internal passages from corrosion. Over time, coolant degrades and loses additives, especially in harsh climates. A careful drain-and-fill or flush is manageable for many DIYers.
Step 1: Confirm service interval and coolant type
Check your owner’s manual or under-hood labels for the manufacturer’s recommended coolant change interval and the specific coolant type (color alone is not reliable). Using the wrong type can cause gelling, corrosion, or reduced effectiveness. If in doubt, use the OEM-branded coolant or a clearly labeled compatible formula.
Step 2: Let the engine cool completely
Never open a radiator cap or pressurized reservoir on a hot engine. Allow the vehicle to sit until the upper radiator hose is cool to the touch—this can take an hour or more. Set up a drain pan under the radiator drain cock (petcock) or lower radiator hose connection. Wear safety glasses and gloves to protect against splashes.
Step 3: Drain the old coolant
Open the radiator cap or reservoir cap slowly to relieve any residual pressure. Open the drain cock or loosen the lower radiator hose clamp and carefully detach the hose to let coolant flow into the pan. Some engines also have engine block drain plugs; consult your manual if you want a more complete drain. Once flow slows to a drip, close the drain or reattach the hose securely.
Step 4: Flush (optional but recommended)
For a simple flush, fill the system with distilled water via the radiator or reservoir, then run the engine with the heater on full hot until it reaches operating temperature and the thermostat opens. Shut the engine off, let it cool fully, then drain again. Repeat if the drained water still looks rusty or dirty. Do not leave plain water in the system for long-term use; it lacks corrosion inhibitors and has a higher freezing point.
Step 5: Refill and bleed air
Mix coolant at the proper ratio (often 50/50 with distilled water, unless you’ve bought a pre-mix) and fill the radiator and reservoir slowly. Some vehicles have bleeder screws on the thermostat housing or coolant pipes—open these gently until coolant (not air) comes out, then close them. Start the engine with the heater on, monitor the temperature gauge, and watch for air bubbles in the reservoir. As the engine warms and the thermostat opens, the level may drop; top off as needed. Once no more bubbles appear and the engine reaches and holds normal operating temperature, shut it off, let it cool, and recheck the level. Dispose of old coolant at a recycling facility or parts store—never pour it down drains or onto the ground.
Tip 5: Smooth the Shift – Servicing Automatic Transmission Fluid (ATF) the Right Way
Automatic transmissions rely heavily on clean, correctly spec’d fluid for smooth shifting and long life. While full flushes on high-mileage units can be controversial, a moderate-mileage vehicle often benefits from a partial drain-and-fill if recommended by the manufacturer.
Step 1: Understand your transmission’s needs
Consult the manual or manufacturer website for the exact fluid specification, service interval, and whether your model has a dipstick or a sealed system. Many modern “lifetime fill” transmissions still have service recommendations under severe driving conditions. Do not guess with ATF; different formulations have very specific friction characteristics.
Step 2: Gain safe access
Warm the vehicle with a short drive to thin the fluid slightly, then park on a level surface. Engage the parking brake and, if needed, raise the vehicle and support it with jack stands to access the transmission pan and drain plug. Lay out your tools, a large drain pan, and plenty of rags.
Step 3: Drain the old fluid
If your transmission has a drain plug, position the pan and slowly loosen the plug to control flow. If it doesn’t, you may need to remove the entire pan: loosen bolts in a crisscross pattern, leaving two opposite corners threaded in partially so the pan tilts and drains in a controlled way. Expect a messy job; ATF can splash if the pan drops suddenly. Once drained, measure the amount of fluid removed so you know how much to put back in.
Step 4: Inspect and clean
Check the fluid color and smell: healthy ATF is often red or light amber and not burnt-smelling. Very dark or burnt fluid can signal internal wear, in which case aggressive DIY servicing may not be wise. Clean the pan thoroughly, paying attention to magnets that trap metal particles. A fine gray paste is generally normal wear; large metal chunks are not. Replace the pan gasket and filter if your transmission uses one; many kits come with both.
Step 5: Refill and verify level
Reinstall the pan and torque bolts evenly to avoid warping the flange. Add new ATF through the dipstick tube (if equipped) or the specified fill port using a pump. Initially add slightly less than the amount drained. Start the engine with your foot on the brake and shift slowly through all gears, pausing briefly in each to circulate the fluid. With the engine idling and the vehicle level, follow the manual’s procedure for checking fluid level—some require the engine at a specific temperature or gear position. Add fluid in small increments until it’s within the correct range. Overfilling can cause foaming and shifting issues, so aim carefully.
Conclusion
Tackling your own auto repairs doesn’t mean doing everything—just doing the right things safely and correctly. By focusing on practical jobs like brake pad replacement, battery swaps, basic code reading, coolant service, and careful ATF changes, you can stretch your maintenance budget, learn how your car works, and spot bigger problems earlier. Use your owner’s manual as a roadmap, lean on reliable technical resources, and don’t hesitate to hand off jobs that exceed your tools, time, or comfort. Repairing smart keeps you safer on the road and makes every mile a little more satisfying.
Sources
- [NHTSA – Vehicle Maintenance and Safety](https://www.nhtsa.gov/vehicle-safety/vehicle-maintenance) - U.S. government guidance on basic maintenance and why it matters for safety
- [AAA – How to Know When Your Car Needs Brake Work](https://newsroom.aaa.com/2019/07/how-to-know-when-your-car-needs-brake-work/) - Explains brake wear symptoms and when service is needed
- [Consumer Reports – Car Battery Buying Guide](https://www.consumerreports.org/cars/car-batteries/buying-guide/) - Provides background on battery types, lifespan, and replacement considerations
- [YourMechanic – How to Use an OBD-II Scanner](https://www.yourmechanic.com/article/how-to-use-an-obd-ii-scanner) - Step-by-step explanation of reading and understanding diagnostic codes
- [EPA – Used Antifreeze and Waste Management](https://www.epa.gov/hw/household-hazardous-waste-hhw) - Covers environmental and safety considerations for disposing of used automotive fluids
Key Takeaway
The most important thing to remember from this article is that this information can change how you think about Auto Repair.


