When something breaks at home, the first reaction is often stress: “How much will this cost?” or “Do I need to call someone right now?” In reality, a lot of common issues can be handled safely with basic tools, a calm approach, and a bit of guidance. This guide walks through five practical, step‑by‑step repair jobs that most DIY‑minded homeowners can tackle—no advanced skills required, just some patience and the right process.
Before You Start: Safety, Tools, and When to Stop
Even simple home repairs deserve a quick safety check and plan. Spending a few minutes on setup can save hours of frustration (and help you avoid injuries or damage).
Key safety habits:
- Turn off power at the breaker for any electrical work (not just the wall switch).
- Shut off water at the fixture valve (or main shutoff) before plumbing jobs.
- Use safety glasses and gloves when cutting, drilling, or working under sinks.
- Work in good lighting so you can really see what you’re doing.
Basic toolkit that covers most of this article:
- Phillips and flathead screwdrivers
- Adjustable wrench and pliers
- Utility knife
- Stud finder (for wall repairs and securing fixtures)
- Cordless drill (optional, but very helpful)
- Plumber’s tape (PTFE), bucket, and rags
- Replacement parts: toilet flapper, faucet cartridge, light switches/outlets, etc.
Know when to call a pro:
- If wiring looks burned or melted
- If a fixture or pipe is severely corroded or cracked
- If a breaker keeps tripping after a basic repair
- If you smell gas at any point—leave and call your gas provider or emergency services
Use these steps as a guide, not as a reason to ignore your instincts. If something feels wrong or confusing, stopping is often the smartest move.
Stop the Running: Fixing a Toilet That Won’t Shut Off
A constantly running toilet wastes water and money, but the fix is usually simple and inexpensive. Most of the time, the problem is inside the tank—not in the bowl.
Step 1: Remove the tank lid and observe
Flush the toilet while the tank lid is off. Watch how the water fills and where it flows. Common culprits:
- Flapper not sealing properly
- Chain too long/short and catching under the flapper
- Water level too high and going into the overflow tube
Step 2: Check and adjust the chain
If the chain is too tight, the flapper can’t close fully. If it’s too loose, it can get trapped under the flapper.
- Turn off the water supply to the toilet (valve behind it).
- Flush to empty most of the water from the tank.
- Unclip the chain and adjust so there’s a slight slack when the flapper is closed (about half an inch).
Step 3: Replace a worn or warped flapper
If the flapper looks cracked, warped, or covered in mineral buildup, replace it.
- Turn off water, flush, and sponge out remaining water so you can see clearly.
- Unhook the old flapper from the overflow tube and chain.
- Take it to the hardware store and match the type/size.
- Install the new flapper per the package instructions.
Step 4: Adjust the fill level
If water is running into the overflow tube:
- Locate the float (ball float or cup-style float on the fill valve).
- For a screw-adjust float, turn the screw a little clockwise to lower the water level.
- For a sliding float, pinch the clip and slide the float down the rod.
Step 5: Test and fine-tune
Turn water back on, let the tank fill, and listen. The toilet should fill, stop, and stay quiet. If you still hear water, add a bit more slack to the chain or lower the float slightly more.
Quiet the Drip: Repairing a Leaking Faucet
A dripping faucet is annoying, but it’s more than that—it wastes a surprising amount of water over time. The fix usually involves replacing a washer, O‑ring, or cartridge, depending on the faucet type.
Step 1: Identify your faucet type
Look at the handle setup:
- Single handle (lever) = likely cartridge or ball-type
- Two handles (hot and cold) = likely compression or ceramic disc
Knowing this helps you buy the right replacement parts.
Step 2: Shut off the water and plug the drain
- Turn off hot and cold shutoff valves under the sink (turn clockwise).
- If there are no shutoffs, turn off the main water valve.
- Put a sink stopper or rag in the drain so small parts don’t fall in.
Step 3: Remove the handle and access the guts
- Pop off decorative caps (if present) with a small flathead screwdriver.
- Remove handle screws and lift the handle off.
- Depending on type, you’ll see a cartridge, stem, or ball mechanism beneath.
Take clear photos at each stage so you know how to reassemble later.
Step 4: Inspect and replace worn parts
- For cartridge faucets: Pull out the cartridge and replace it with an identical one.
- For compression faucets: Replace the rubber washer and O-ring on the stem.
- For ceramic disc faucets: Replace seals and O-rings at the bottom of the cartridge.
Lightly coat new O-rings with plumber’s grease if recommended.
Step 5: Reassemble and test
- Rebuild the faucet in the reverse order, referencing your photos.
- Slowly turn water back on and open the faucet to release trapped air.
- Check for leaks at the handle and spout. If dripping persists, ensure all parts match the original and are seated fully.
Bring Back the Light: Safely Replacing a Faulty Light Switch
A switch that feels loose, crackles, or occasionally fails to turn the light on might need replacing. This is a straightforward job if you’re methodical and cautious with electrical safety.
Step 1: Turn off power—and verify
- Switch off the correct breaker in your electrical panel.
- At the switch, flip it on/off to confirm the light no longer works.
- Use a non-contact voltage tester at the switch terminals to confirm power is truly off.
Step 2: Remove the cover and inspect
- Unscrew the cover plate and set it aside.
- Unscrew the switch from the electrical box and gently pull it forward.
- Look for any signs of burning, melted plastic, or brittle insulation. If you see severe damage, stop and call an electrician.
Step 3: Document wiring before disconnecting
- Take close-up photos of how each wire connects.
- Typical single-pole switch:
- One hot wire (usually black) to each side of the switch
- Ground wire (bare or green) to the green screw
Step 4: Install the new switch
- Loosen terminal screws and remove wires from the old switch.
- Attach wires to the new switch in the same positions:
- Hot wires to brass screws
- Ground to green screw
- Tighten screws securely; avoid leaving bare wire exposed beyond the terminal.
Step 5: Reinstall and test
- Carefully push wires back into the box—don’t crush them.
- Screw the switch into the box, reattach cover plate.
- Turn breaker back on and test the switch. It should operate smoothly with no flicker or crackling.
If you have a three-way switch (two switches controlling one light), wiring is more complex; it’s often wise to label each wire carefully as you remove them and match them exactly on the new device—or call a pro if you’re not confident.
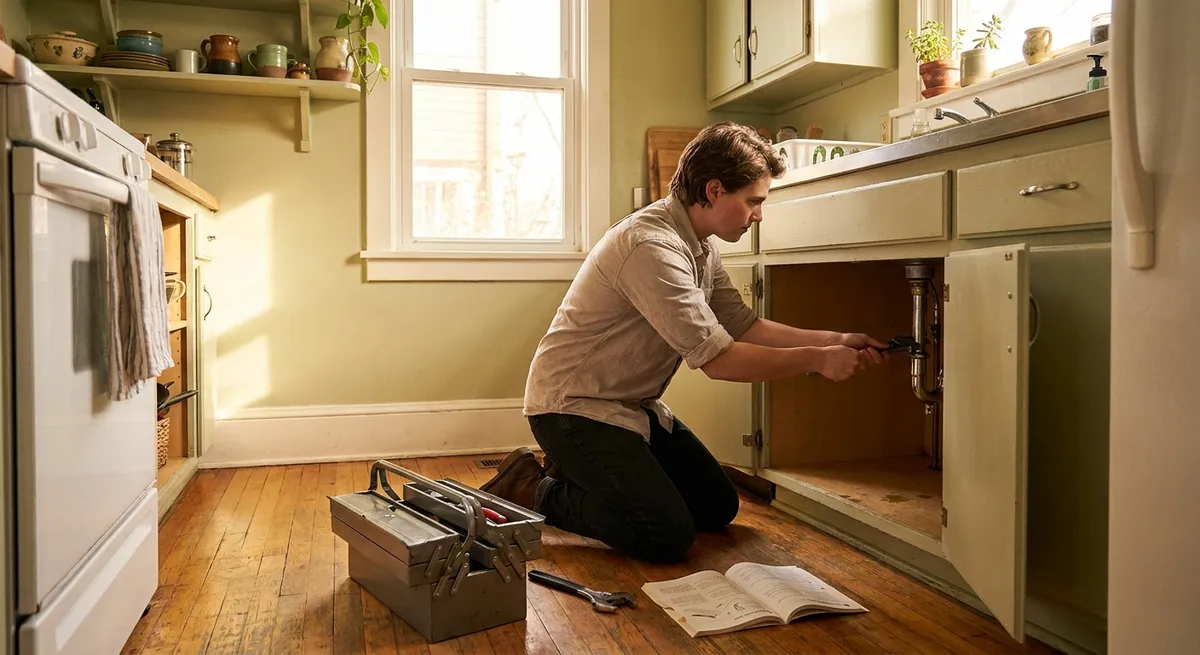
Stop the Under‑Sink Surprise: Fixing a Leaking P‑Trap
That curved pipe under your sink (the P‑trap) is there to block sewer gas and catch small debris, but it’s also a common place for leaks. Most leaks here can be stopped without cutting pipe.
Step 1: Locate the leak and prepare
- Run water briefly, then look and feel around the P‑trap joints and bottom.
- Place a bucket under the trap and keep some rags handy.
Step 2: Disassemble the P‑trap
- Loosen the slip nuts by hand; if stuck, use adjustable pliers with gentle pressure.
- Remove the curved section and empty it into the bucket.
- Check for clogs, cracks, or corrosion. If the trap is metal and badly corroded, replace it entirely with a new kit.
Step 3: Clean and inspect sealing surfaces
- Wipe threads and mating surfaces clean of old debris and buildup.
- Check plastic washers (compression rings) inside slip joints—if they’re misshapen or brittle, replace them.
Step 4: Reassemble with snug—not over-tight—connections
- Reinstall the P‑trap pieces in the correct orientation: beveled edge of the washer facing the joint.
- Hand-tighten slip nuts firmly, then use pliers to give them just a slight additional turn if needed. Over-tightening can distort washers and cause leaks.
Step 5: Test for leaks
- Run water at a steady flow and watch each joint.
- If you see a slow drip, gently tighten that slip nut a quarter-turn and recheck.
- Persistent leaks after replacing washers and correctly tightening usually indicate a cracked pipe or misalignment—then a full trap kit replacement is the next step.
Patch the Eyesore: Repairing a Small Hole in Drywall
Whether it’s from a door handle, a misplaced anchor, or a failed wall mount, small drywall damage is common and fixable with basic materials.
Step 1: Assess the hole size
- Nail/screw holes up to about 1/4" = simple spackle repair.
- Holes up to about 2–3" = use a patch or mesh tape plus joint compound.
- Bigger than that often needs a cut‑out and replacement piece of drywall.
This section focuses on small to medium holes.
Step 2: Prepare the area
- Lightly scrape around the hole with a putty knife to remove loose paper or flaking paint.
- For glossy paint, lightly sand around the area to help new material bond.
- Wipe away dust.
Step 3: Apply patch or compound
For tiny holes:
- Use ready-mixed spackle and a putty knife.
- Press spackle into the hole and scrape flat, leaving it slightly proud of the surface.
For slightly larger holes:
- Apply self-adhesive mesh patch or tape over the hole.
- Spread joint compound over the mesh with a 4–6" putty knife, feathering edges out beyond the patch.
Step 4: Sand and repeat as needed
- Let the compound fully dry (follow product directions).
- Lightly sand with fine-grit sandpaper until smooth.
- For deeper repairs, apply a second thin coat, feathering it wider, and sand again once dry. Thin layers crack less and blend better.
Step 5: Prime and paint
- Apply a stain-blocking primer to the patched area to prevent flashing (where patched spots show through paint).
- Once primer is dry, paint to match the wall.
- If you have leftover wall paint, use that. Otherwise, try brushing on a small amount and let it dry fully before deciding if you need a wider repaint for blending.
Conclusion
Most household problems start small: a faint drip, a barely noticeable hum, a little stain on the ceiling. Tackling issues early with simple, structured repairs like these can prevent bigger, more expensive failures later. When you approach each job with safety first, the right tools, and a clear step-by-step plan, DIY repairs become less about guessing and more about following a repeatable process.
Keep notes and photos of each repair you complete. Over time you’ll build your own “mental manual” for your home, and what once felt intimidating will start to feel routine. And when a problem is clearly beyond your comfort zone, you’ll also be better equipped to understand what the pros are doing—and whether the job is being done right.
Sources
- [U.S. Environmental Protection Agency – Fix a Leak Week](https://www.epa.gov/watersense/fix-leak-week) – Statistics and guidance on household water leaks and why fixing them matters
- [Energy.gov – Electrical Safety in the Home](https://www.energy.gov/energysaver/electrical-safety) – Official safety recommendations for working around home electrical systems
- [Family Handyman – How to Fix a Leaky Toilet](https://www.familyhandyman.com/project/how-to-fix-a-toilet-leaking-at-the-base/) – Detailed visual reference for common toilet repairs and parts identification
- [Lowe’s – How to Replace a Bathroom Faucet Cartridge](https://www.lowes.com/n/how-to/replace-bathroom-faucet-cartridge) – Step-by-step guide to understanding and replacing faucet cartridges
- [Home Depot – How to Patch and Repair Drywall](https://www.homedepot.com/c/ah/how-to-patch-and-repair-drywall/9ba683603be9fa5395fab9016b9f4fe) – Covers tools, materials, and techniques for drywall patching and finishing
Key Takeaway
The most important thing to remember from this article is that this information can change how you think about Home Repairs.


