A lot of “DIY advice” skips straight to big renovations, but most of what really improves daily life happens in the small, unglamorous fixes: the door that slams, the outlet that feels loose, the faucet that never quite stops dripping. This guide walks through five practical, step‑by‑step repairs that real people face all the time—and that you can handle with basic tools and a bit of patience. Each section is designed so you can read it, do it, and share it.
1. Stopping a Dripping Faucet (Without Replacing the Whole Thing)
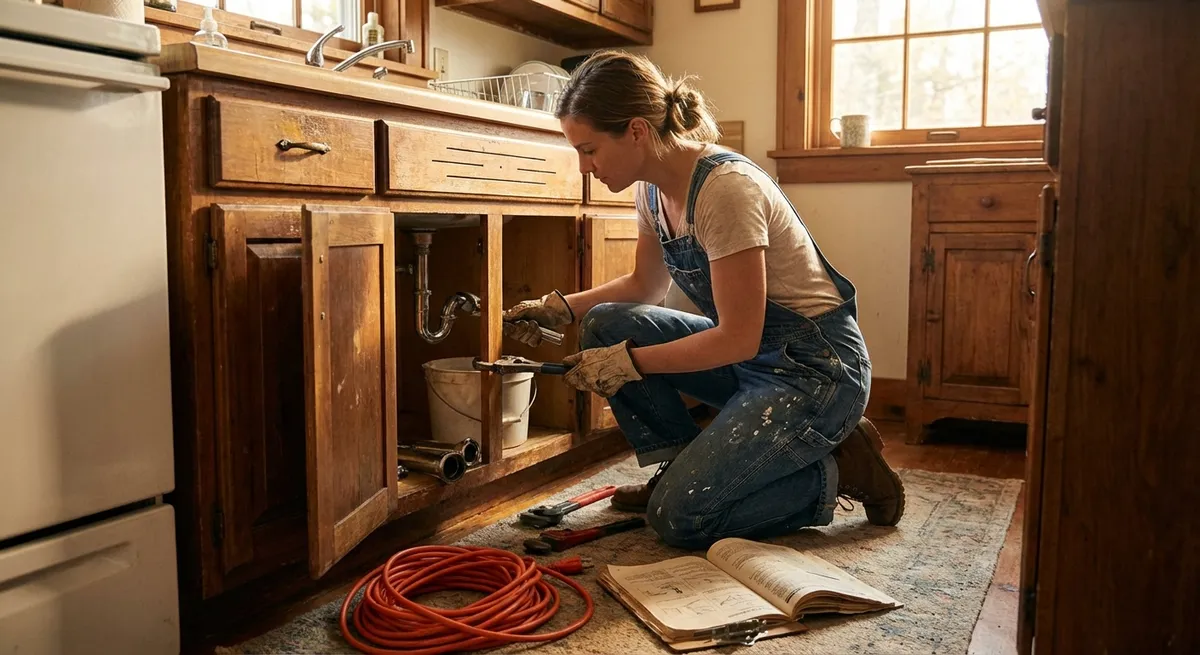
A dripping faucet wastes water, raises your bill, and is surprisingly noisy at 2 a.m. In many cases, the culprit is a worn‑out cartridge or washer inside the faucet body. You don’t need to be a plumber, but you must be methodical and careful not to lose tiny parts.
Step-by-step:
Shut off the water supply
Look under the sink for two shutoff valves (hot and cold). Turn both clockwise until they stop. Open the faucet to relieve pressure and confirm water is off.
Plug the drain and prep your workspace
Use a sink stopper or even a rag so small screws or clips don’t disappear down the drain. Lay a towel in the sink to protect parts and your fixture from scratches.
Remove the handle
Most handles have a small cap (often with hot/cold markings). Pry it off with a flathead screwdriver or utility knife. Use an appropriate screwdriver or Allen wrench to remove the handle screw, then gently pull the handle off.
Identify and remove the cartridge/valve
You’ll usually see a decorative cover and a retaining nut holding the cartridge. Unscrew the nut with an adjustable wrench. Pull the cartridge straight up—if it’s stuck, wiggle gently; don’t twist aggressively or you can break it.
Match and replace the internal parts
Take the old cartridge (or washer/O‑rings, depending on design) to a hardware store and match it exactly. Ask staff for help if you’re unsure; brand and model matter here. Install the new part in the same orientation as the original.
Reassemble and test
Reinstall the retaining nut (snug, but don’t overtighten), decorative cover, handle, and screw. Turn the shutoff valves back on slowly and test the faucet. Check for leaks at the base and spout.
When to call a pro
If your shutoff valves don’t work, the faucet body is cracked, or you have very old or specialty fixtures, a plumber might be more cost‑effective than trial‑and‑error with rare parts.
2. Fixing a Loose Electrical Outlet (Safer and More Solid)
A wobbly outlet isn’t just annoying when you plug something in—it can be a safety issue if wires are stressed or connections are loose. The good news: tightening and properly supporting an outlet is straightforward if you respect basic electrical safety.
Step-by-step (for standard outlets only):
Cut the power at the breaker
Find your electrical panel and switch off the breaker labeled for that room. If labels are missing or wrong, turn off the main power. Use a plug‑in tester or lamp to confirm power is off at the outlet.
Remove the cover plate
Use a flathead or Phillips screwdriver to remove the center screw and gently pull off the cover. Keep the screw where you won’t lose it.
Check box type and outlet condition
Gently try to move the receptacle. If the metal or plastic box behind it is firmly mounted but the outlet itself rocks, usually the mounting screws are loose or the box sits too deep behind the wall surface.
Tighten the mounting screws
On the top and bottom of the receptacle, you’ll see one screw each securing it to the electrical box. Tighten them until the outlet sits snugly, but don’t overtighten or you can crack the plastic ears.
Use outlet spacers if the box is recessed
If the outlet still sits too far back, use outlet spacers (plastic shims) or even cut‑to‑size sections of non‑conductive plastic to bring the outlet flush to the wall. Stack them over the mounting screws between the outlet and the box until it no longer wobbles.
Reinstall the cover plate and test
Replace the cover plate and screw. Turn the breaker back on and test the outlet with a plug‑in tester to confirm proper wiring and grounding.
Stop and call an electrician if…
You see damaged insulation, charring, aluminum wiring, or if the outlet is warm or smells burnt. Those are not DIY fixes—they’re safety hazards.
3. Quieting a Squeaky Interior Door (Without Replacing Hinges)
A squeaky door makes every midnight snack sound like a heist. Often, the hinge pins just need cleaning and fresh lubrication. Done right, this repair can keep the door quiet for years.
Step-by-step:
Support the door
Place a door wedge or folded cardboard under the door to relieve pressure on the hinges. This makes removing hinge pins easier and protects the hinge screws.
Remove one hinge pin at a time
Starting with the top hinge, tap the bottom end of the hinge pin upward using a small nail or punch and a hammer. Once it rises a bit, pull it out with your fingers or pliers. Leave the door mostly supported by the remaining hinges.
Clean the hinge pin and barrel
Wipe off old, dark grease and dust with a rag or paper towel. For stubborn grime, use a bit of degreaser or rubbing alcohol and dry thoroughly.
Lubricate wisely
Apply a small amount of silicone‑based lubricant, white lithium grease, or a product specifically for hinges. Avoid cooking oils—they turn sticky and attract dirt. A light coat over the pin and a dab inside the barrel is enough.
Reinstall the hinge pin
Slide the pin back into the hinge from the top and tap gently with a hammer until fully seated. Remove the door wedge briefly to ensure the door swings freely, then repeat the process for the remaining hinges if needed.
Adjust hinge screws if the door rubs or sticks
If the door is rubbing at the top or side, tighten the hinge screws on the frame side first. If screws spin without tightening, use longer wood screws of the same gauge to bite deeper into the framing.
Check for frame issues
If squeaks return quickly or the door keeps shifting, you may have framing movement or humidity‑related warping. At that point, more advanced adjustments or light planing may be required.
4. Patching a Small Drywall Hole (So It Actually Disappears)
From door handle dings to old anchor holes, dinged drywall is almost inevitable. The trick to a pro‑looking repair is building up thin, smooth layers and sanding carefully, not globbing on a thick patch and hoping paint hides it.
Step-by-step (for holes up to about 2 inches):
Clean and prepare the area
Use a utility knife to remove loose paper and crumbling gypsum around the hole. Lightly bevel the edges so the compound will feather out cleanly. Wipe away dust with a dry cloth.
Choose the right patch method
- Nail/screw pops or small anchor holes: joint compound alone is usually enough. - Holes up to 2": a self‑adhesive mesh patch works well. For anything larger, you’ll need a backing piece and a cut drywall patch (a more advanced fix).
Apply mesh tape or a patch (if needed)
For cracks or grouped holes, cover the area with drywall mesh tape. For individual small holes, stick on a self‑adhesive mesh patch centered over the damage.
First coat of joint compound
Using a 4–6 inch putty knife, apply a thin layer of joint compound over the tape or patch, pressing firmly to embed the mesh. Feather the edges outward so there’s no sharp ridge. Let it dry fully (often overnight).
Sand lightly and apply a second coat
Use fine‑grit sandpaper (120–220) to knock down high spots and ridges, wearing a dust mask. Wipe off the dust. Apply a second, slightly wider coat, again feathering the edges so the patch blends into surrounding wall. Let dry.
Final sand and touch-up
Sand once more, focusing on smoothing transitions rather than flattening the whole area. Run your fingers over it—if you can feel a step, it will show through paint. Spot‑sand as needed until it’s smooth.
Prime and paint
Prime the patched area (joint compound is porous and can flash through paint). Once dry, paint to match the wall. If you have older paint, expect some color fade; painting corner‑to‑corner on the whole wall often looks better than touching up a small patch.
5. Recaulking a Moldy or Cracked Bathtub Joint
Old, cracked, or moldy caulk around your tub or shower doesn’t just look bad—it allows water to sneak behind surfaces, which can lead to rot and bigger repairs. Recaulking is messy but very doable with a few steady steps.
Step-by-step:
Choose the right caulk
For tubs and showers, use a 100% silicone or a “kitchen and bath” caulk labeled mold/mildew resistant. Pick the correct color (usually white, clear, or almond). Avoid paintable latex caulk in constantly wet areas.
Remove old caulk completely
Use a caulk removal tool or a sharp utility knife to cut along both edges of the old bead, then pull it out in strips. Scrape away any remaining residue, being careful not to gouge the tub or tile.
Clean and dry the area thoroughly
Scrub the joint with a bathroom cleaner to remove soap scum, then wipe with rubbing alcohol to degrease. Let the area dry fully—ideally a few hours. Caulk won’t adhere properly to damp surfaces.
Mask for a neat line (optional but recommended)
Apply painter’s tape above and below the joint where you want the caulk line to end. This helps achieve clean, straight edges, especially if you’re new to caulking.
Cut the caulk tube tip and apply a steady bead
Cut the tip at a 45‑degree angle for better control, starting with a small opening. Puncture the seal (if needed) with a long nail. Hold the gun at 45 degrees and apply consistent pressure, moving steadily so the bead is even and continuous.
Tool the caulk for smooth finish
Immediately after applying a small section, smooth the bead with a caulk tool or a dampened finger, pressing gently to ensure good contact with both sides of the joint. Wipe excess on a rag. Remove painter’s tape while the caulk is still wet.
Allow full cure time before use
Follow the manufacturer’s instructions for drying and curing times—often 24 hours or more before exposing to water. Rushing this step is a common reason fresh caulk fails.
Conclusion
Most home “mysteries” come down to a handful of repeat problems: worn internal parts, loose hardware, moisture getting where it shouldn’t, and cosmetic damage that’s easier to ignore than fix. By learning to stop a drip, secure an outlet, quiet a door, patch a wall, and renew caulk, you’re building a practical toolkit that pays off for years. Work slowly, respect your safety limits, and don’t be afraid to stop and research (or call a pro) when something doesn’t look right. The more of these repairs you do, the more your home will feel like something you truly own—not just something you live in.
Sources
- [U.S. Environmental Protection Agency – WaterSense: Fix a Leak](https://www.epa.gov/watersense/fix-leak-week) - Guidance on household water leaks and why repairing dripping fixtures matters
- [Family Handyman – How to Fix a Dripping Faucet](https://www.familyhandyman.com/project/how-to-fix-a-leaky-faucet/) - Detailed walkthroughs for different faucet types and internal parts
- [U.S. Consumer Product Safety Commission – Electrical Outlet Safety](https://www.cpsc.gov/safety-education/safety-guides/electrical-outlet-safety) - Safety considerations around outlets and when to involve a licensed electrician
- [University of Missouri Extension – Repairing Drywall in Your Home](https://extension.missouri.edu/publications/gp18) - Step-by-step instructions and diagrams for drywall repair techniques
- [Centers for Disease Control and Prevention – Mold After a Disaster](https://www.cdc.gov/disasters/mold/index.html) - Background on mold growth in damp areas and why maintaining sealed, dry surfaces (like caulked joints) is important
Key Takeaway
The most important thing to remember from this article is that this information can change how you think about Home Repairs.


