If you own or rent a home long enough, something will break, leak, or fall off at the worst possible time. Calling a pro for every small issue gets expensive fast—and often, you don’t need to. With a little guidance and a bit of patience, you can safely handle more than you think.
This guide walks you through five common repair situations with clear, step-by-step instructions. Each one is chosen to be realistic for a DIYer, doesn’t require special tools, and helps you avoid bigger damage (and bills) down the road.
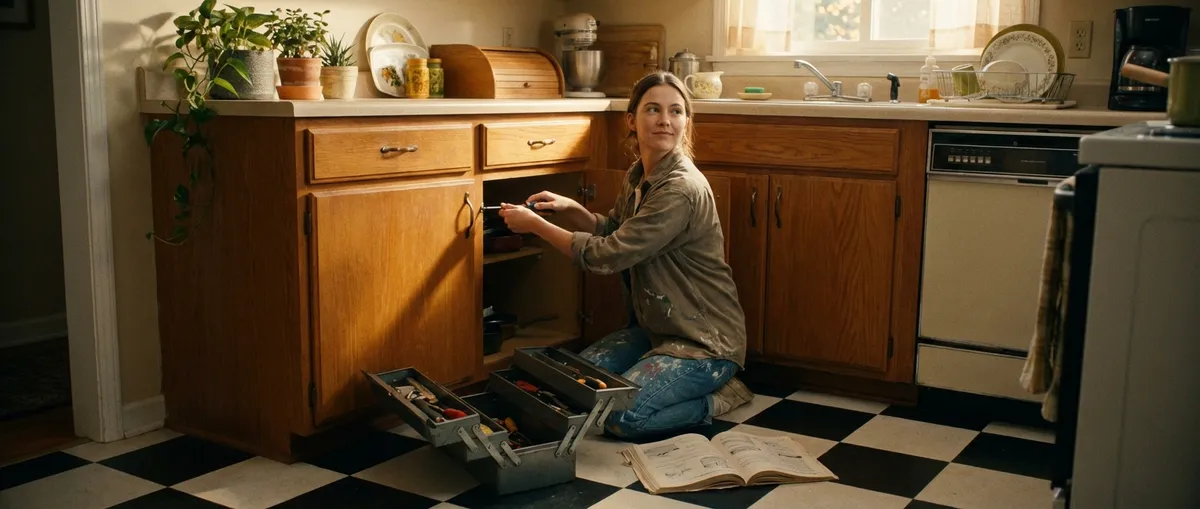
1. Stopping a Dripping Faucet Before It Wrecks Your Sink Cabinet
A slow drip wastes water and can stain your sink, but if it’s leaking under the counter, it can also rot wood and invite mold. Most modern faucets can be fixed with a simple cartridge or washer swap.
Tools & supplies
- Adjustable wrench or basin wrench
- Screwdriver (Phillips and flathead)
- Replacement cartridge or washers (matched to your faucet brand/model)
- Plumber’s grease (non-petroleum)
- Towel or rag, small bucket
Step-by-step
Shut off the water
Look under the sink for the hot/cold shutoff valves. Turn them clockwise until snug. Open the faucet to confirm water is off and to relieve pressure.
Plug the drain
Use the sink stopper or a rag so you don’t lose tiny screws or parts down the drain.
Disassemble the handle
- Most single-handle faucets: pry off the decorative cap with a flathead screwdriver, unscrew the handle screw, then lift the handle off. - Two-handle faucets: usually a visible screw under a cap on each handle.
Remove the cartridge or stem
Under the handle is a retaining nut or clip. Remove it carefully with your wrench or screwdriver. Gently pull the cartridge or stem straight up—wiggle, don’t twist hard. Note orientation (a quick phone photo helps).
Inspect and replace parts
- For cartridge faucets: replace the whole cartridge with a matching one. - For older compression faucets: replace the rubber washer and possibly the O-ring. Apply a light coat of plumber’s grease to O-rings and seals on the new part.
Reassemble in reverse order
Seat the new cartridge/stem in the same orientation, reinstall the retaining clip/nut (snug, not over-tight), reattach the handle and decorative cap.
Turn water back on and test
Slowly open the shutoff valves. Turn the faucet on and off a few times. Check under the sink for any leaks at connections.
When to call a pro: If the shutoff valves won’t turn or start leaking, if the faucet body is cracked or corroded, or if you can’t identify your faucet style.
2. Silencing a Running Toilet That Wastes Water
A constantly running toilet can waste hundreds of gallons per month and inflate your water bill. The good news: fixes are usually straightforward and don’t require removing the toilet.
Tools & supplies
- Adjustable wrench or pliers
- Replacement flapper and/or fill valve (universal kits work for many models)
- Sponge or towel
Step-by-step
Remove the tank lid and diagnose
Flush the toilet and watch what happens inside the tank. Two common issues: - Water keeps trickling into the bowl = bad flapper or poor seal. - Water rises too high and spills into the overflow tube = fill valve set too high or failing.
Check and clean the flapper
Turn off the water valve behind the toilet (clockwise). Flush to empty most of the tank. Lift the flapper and inspect it: if it’s warped, slimy, cracked, or doesn’t land flat, it needs replacement. Wipe the flapper seat (the round opening) to remove mineral buildup.
Replace the flapper if needed
Unhook the old flapper from the overflow tube and chain. Clip the new one in place and connect the chain so there’s a little slack when the flapper is closed (not too tight, not dragging).
Adjust or replace the fill valve
Turn the water back on briefly and see where the water level stops. It should be about 1 inch below the top of the overflow tube. - For adjustable fill valves, there’s often a screw or clip to raise/lower the float. - If the valve doesn’t shut off or is heavily corroded, replace it with a universal fill valve: - With water off and tank mostly drained, disconnect the water supply line under the tank. - Unscrew the big plastic nut holding the fill valve. - Lift the old valve out, drop the new one in, adjust its height, tighten the nut, reconnect the supply line.
Test for leaks and proper shut-off
Turn water on slowly, let the tank fill, and confirm: - Water stops at correct level. - No water is entering the overflow tube. - No drips at the bottom of the tank inlet or supply line.
When to call a pro: Cracked tank, persistent leaks at the tank-to-bowl bolts, or if you see water on the floor around the base of the toilet.
3. Patching a Small Drywall Hole So It Disappears
Whether it’s a doorknob dent or a misplaced TV mount, small drywall damage is almost inevitable. Fixing it cleanly makes painting easier and keeps walls from crumbling at the edges.
Tools & supplies
- Utility knife
- Sanding sponge or fine-grit sandpaper (120–220 grit)
- Putty knife (2"–4")
- Premixed joint compound or lightweight spackle
- Self-adhesive mesh patch (for larger holes, ~1"–4")
- Damp cloth
Step-by-step
Assess the size of the damage
- Nail holes and tiny dings: spackle alone is fine. - Holes up to about 4 inches: use a mesh patch plus joint compound.
Clean and prep the area
Use a utility knife to lightly trim loose paper or crumbling edges. Wipe dust away with a damp cloth. A clean edge helps the patch bond better.
Apply the patch (for larger holes)
Peel the backing off the self-adhesive mesh patch and center it over the hole. Press firmly so it sticks flat without bubbles or folds.
First coat of compound
Using the putty knife, spread a thin layer of joint compound over the patch or hole, feathering the edges out 1–2 inches beyond the damage. Keep it thin; thick piles take longer to dry and are harder to sand.
Dry and sand lightly
Let the compound dry as directed (often several hours). Sand lightly to smooth high spots, but don’t sand so hard you rip the patch or expose the mesh.
Second (and possibly third) coat
Apply another thin coat, extending it slightly wider each time to blend the patch. Sand between coats as needed until the surface is flush with the surrounding wall and edges are invisible to the touch.
Dust off and paint
Wipe the area with a damp cloth to remove dust, then prime if needed and paint to match. For touch-ups, use the original wall paint if you have it; otherwise, paint from corner to corner for less noticeable differences.
When to call a pro: Large holes with structural damage, sagging ceilings, evidence of moisture or mold, or if you suspect load-bearing framing is involved.
4. Reviving a Stuck Sliding Window or Door
A stiff sliding window or patio door isn’t just annoying—it encourages people to force it, which can crack glass or bend tracks. Often, friction and dirt are the real problem, not the hardware itself.
Tools & supplies
- Vacuum with crevice attachment
- Old toothbrush or small nylon brush
- Mild dish soap, bucket, rag
- Silicone-based spray lubricant (not oil-based)
- Screwdriver (if your rollers are adjustable)
Step-by-step
Inspect the track
Open the window/door as far as you can. Look for dirt, pebbles, pet hair, and old grease in the track and along the rollers.
Clean the track thoroughly
Vacuum the loose debris first. Then scrub the track with warm soapy water and a small brush, wiping clean with a rag. Avoid saturating wood frames; use a damp, not dripping, cloth.
Check and clean rollers
If accessible, wipe the rollers to remove grime. Some doors have a panel you can lift out to access rollers more easily; check your manufacturer’s manual if unsure.
Adjust roller height (if possible)
Many sliding doors have small adjustment screws at the bottom corners. Turning them raises or lowers the door in the track: - If the door drags, raise the rollers slightly. - Adjust both sides so the door is level and slides smoothly without touching the track lip.
Apply silicone lubricant
Once everything is dry, lightly spray a silicone-based lubricant into the track and on rollers. Wipe any excess with a cloth. Avoid oil-based sprays which can attract dust and gum up again.
Test the motion
Slide the window/door back and forth several times. It should move with consistent resistance, not jerky or grinding. If it still catches, look again for bent metal or damaged rollers.
When to call a pro: Cracked or fogged glass, warped frame, severely bent track, or if the door is so heavy and misaligned that removal feels risky.
5. Securing a Loose Electrical Outlet (Without Rewiring)
A wobbly electrical outlet is more than a nuisance—it can stress the wiring behind it and eventually cause arcing or a short. Tightening it properly is a simple, high-impact safety upgrade.
> Safety first: If you’re not fully comfortable working around electricity, skip this and hire a licensed electrician. Never work on an outlet with the power on.
Tools & supplies
- Flathead and Phillips screwdrivers
- Voltage tester (non-contact preferred)
- Outlet spacers or small washers (plastic preferred)
- Needle-nose pliers (optional)
Step-by-step
Turn off power at the breaker
Find the correct circuit breaker and switch it off. Don’t rely on just turning off lamps or devices.
Verify power is off
Remove the outlet cover plate with a screwdriver. Use a non-contact voltage tester near the outlet slots and side screws. It should indicate no power before you touch anything.
Inspect the box and outlet
Gently pull the outlet out a couple of inches. If the plastic or metal electrical box is cracked, or wires look burnt or loose, stop and call a pro.
Tighten mounting screws
The outlet is held to the box with two screws (top and bottom). If they’re loose, tightening them may be enough. Don’t overtighten; you’re aiming for snug and flush with the wall.
Use spacers if the outlet sits too far back
If the outlet still moves because the box is set too deep in the wall, add outlet spacers or small plastic washers between the outlet “ears” and the box. This brings the outlet forward so it’s supported by the wall surface.
Recheck for movement and reassemble
Press gently on the outlet; it should feel solid with minimal wobble. Tuck wires back neatly, reinstall the cover plate, then turn the breaker back on. Test with a lamp or outlet tester.
When to call a pro: Burnt smell, discolored outlets, aluminum wiring, loose wires you’re not comfortable tightening, or any buzzing/humming from the outlet.
Conclusion
Most home repairs don’t demand a full toolbox or a contractor—just some know-how, patience, and basic safety habits. Stopping leaks, tightening fixtures, smoothing walls, and making doors and windows glide again are all very achievable DIY wins.
Start with one repair that feels manageable, follow the steps carefully, and don’t rush. Over time, you’ll build a mental toolkit that makes the next problem less intimidating—and you’ll keep more money in your pocket while taking better care of your home.
Sources
- [U.S. Environmental Protection Agency – Fix a Leak](https://www.epa.gov/watersense/fix-leak-week) – Details on how household leaks (including faucets and toilets) waste water and basic methods to address them
- [Family Handyman – How to Repair a Leaky Single-Handle Cartridge Faucet](https://www.familyhandyman.com/project/how-to-repair-a-cartridge-type-faucet/) – Step-by-step faucet cartridge repair with photos for reference
- [The Spruce – How to Repair a Running Toilet](https://www.thespruce.com/how-to-fix-a-running-toilet-2718755) – Clear walkthroughs for diagnosing and fixing common toilet tank problems
- [Lowe’s – How to Patch and Repair Drywall](https://www.lowes.com/n/how-to/patch-and-repair-drywall) – Visual guide to patching holes of different sizes, from nail pops to larger damage
- [U.S. Consumer Product Safety Commission – Electrical Safety in the Home](https://www.cpsc.gov/safety-education/safety-guides/home/electrical-safety-in-the-home) – Official guidance on staying safe when dealing with outlets, wiring, and household electrical systems
Key Takeaway
The most important thing to remember from this article is that this information can change how you think about Home Repairs.


