If you own or rent a home long enough, a few problems always show up: loose fixtures, small leaks, mystery wall damage, and doors that suddenly refuse to close right. Calling a pro for every one of these gets expensive fast—and often isn’t necessary. This guide walks you through five foundational repairs, step by step, that most DIYers can handle with basic tools. Each fix is practical, repeatable, and designed to build your confidence for the next project.
Before You Start: Safety, Tools, and When to Stop
Even simple repairs go smoother when you prepare. A small toolkit can handle a surprising number of jobs:
- Basic screwdriver set (Phillips and flathead)
- Adjustable wrench and pliers
- Hammer and small pry bar
- Utility knife and tape measure
- Stud finder and level
- Spackle/patching compound and a putty knife
- Painter’s tape and sandpaper (120–220 grit)
- Drill with assorted bits and anchors
Safety should be your first step, not an afterthought. Turn off power at the breaker before working near outlets or switches. Shut off water at the fixture (or main supply if needed) before touching plumbing. Wear safety glasses when drilling, prying, or sanding, and a dust mask while sanding drywall or old paint. If you see signs of mold, asbestos-containing materials (common in older homes), or damaged electrical panels/wiring, stop and call a professional. DIY is about solving problems— not creating bigger, more dangerous ones.
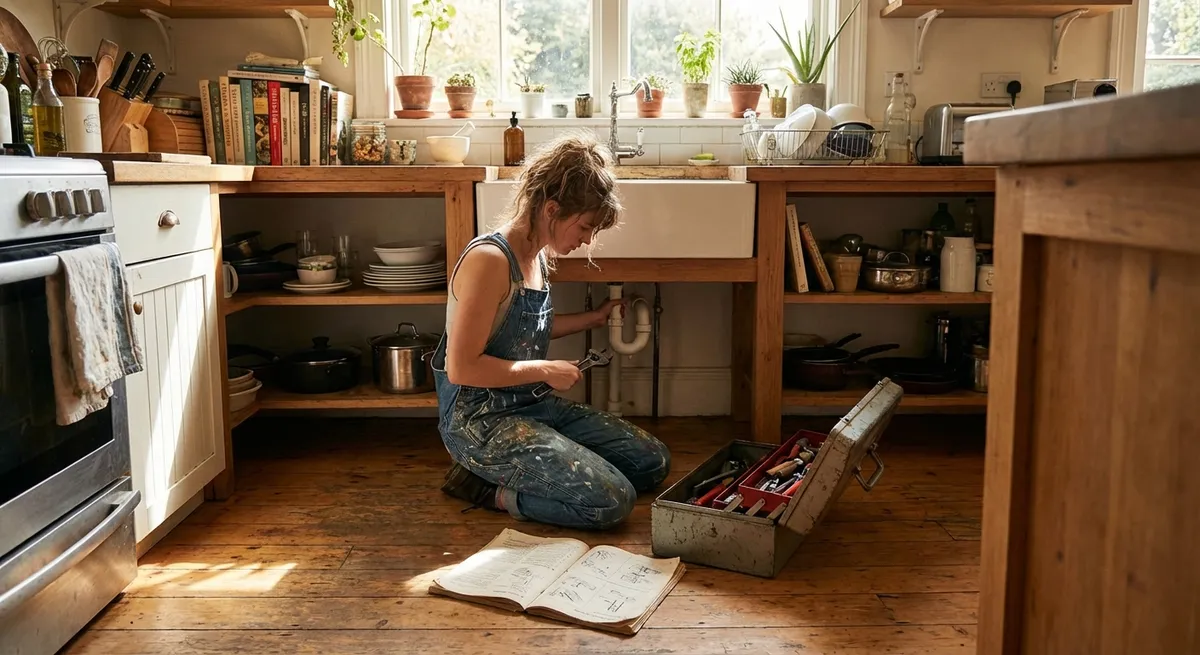
Repair 1: Silencing a Dripping Faucet
A dripping faucet wastes water, adds to your bill, and can stain sinks over time. In many cases, the culprit is a worn washer or cartridge inside the faucet body.
You’ll need: Adjustable wrench, screwdriver, replacement washer or cartridge (matched to your faucet brand/model), plumber’s grease (optional), towel or rag.
Step-by-step:
Shut off the water supply
Look under the sink for two small shutoff valves (hot and cold). Turn them clockwise until they stop. Open the faucet to release remaining pressure and confirm the water is off.
Plug the drain
Use the sink stopper or a rag so you don’t lose small screws or parts down the drain.
Remove the handle
Pop off any decorative cap with a flat screwdriver to access the screw. Unscrew and gently pull the handle off. On some single-handle faucets, there may be a set screw under or behind the handle—use an Allen wrench if needed.
Access the cartridge or valve
Remove any decorative trim or retaining nuts using your wrench or pliers. Take a photo with your phone at each step so you can reassemble exactly.
Identify and remove the worn part
In a compression faucet (separate hot/cold knobs that turn many times), you’ll see a stem with a rubber washer at the end—this washer usually needs replacing. In a cartridge faucet (lever that moves up/down and side-to-side), you’ll lift out the cartridge. Bring the old part to a hardware store to match it.
Install the new component
Lightly coat O-rings or moving parts with plumber’s grease if recommended. Reinsert the stem or cartridge, ensuring it aligns with any tabs or slots. Tighten the retaining nut snugly, but don’t overtighten and crack anything.
Reassemble and test
Replace trim, handle, and caps. Turn valves back on slowly. Open the faucet and check for leaks around the handle and spout. If it still drips, recheck that the new part is seated correctly and that you replaced the correct side (hot vs. cold).
If you have an unusual or very old faucet, consider looking up your exact model on the manufacturer’s site for an exploded diagram before you start.
Repair 2: Patching Small Holes and Dings in Drywall
Nail holes, dents, and small gouges make walls look tired—but they’re easy to fix with the right approach. Done right, your patch will disappear after painting.
You’ll need: Lightweight spackle or joint compound, putty knife (2–4"), sanding sponge or fine sandpaper, damp rag, primer and touch-up paint, painter’s tape (optional).
Step-by-step:
Clean and prep the area
Wipe away dust, loose paint, and debris with a damp rag. For small holes from nails or screws, scrape the edges lightly with the putty knife to remove loose crumbs.
Fill the hole or dent
Scoop a small amount of spackle onto your putty knife. Press firmly into the hole, then draw the knife across the surface at a slight angle. For tiny nail holes, one pass is often enough. For deeper dents, make sure the compound fully fills the depression.
Feather the edges
While the spackle is still wet, gently scrape the area around the patch so that the edges blend into the surrounding wall. The goal is a thin, smooth transition, not a big lump.
Let it dry completely
Dry time varies (check the container), but most lightweight spackles dry in 30 minutes to a few hours. Don’t rush this; sanding too soon will tear the patch.
Sand smooth
Use a fine sanding sponge or 220-grit sandpaper. Lightly sand in a circular motion until the patched area feels level with the wall. Wipe away dust with a damp rag.
Prime the patch
New compound absorbs paint differently than the surrounding wall. A small amount of primer over the patch helps prevent “flashing” (a noticeable difference in sheen or color). For tiny pinholes, some paints-with-primer may be enough, but priming is safer for a seamless finish.
Paint and blend
Use the same paint and sheen as your existing wall (e.g., eggshell, satin). Feather the new paint slightly beyond the patch area to blend. If you’re not sure of the original color, test a small spot first in a low-visibility area.
For holes larger than about 1/2" but smaller than your hand, using a self-adhesive mesh patch and joint compound instead of spackle can give a stronger repair.
Repair 3: Re-Hanging a Loose Cabinet Door
Kitchen and bathroom cabinet doors get heavy use. Over time, hinges loosen, doors sag, and suddenly they won’t close right or line up with neighboring doors.
You’ll need: Screwdriver, wood glue (optional), toothpicks or wooden matchsticks, drill with small bit (optional), level.
Step-by-step:
Inspect the hinge screws
Open the cabinet door and check screws both on the door side and the cabinet frame. If screws are visibly loose, that’s usually your problem.
Tighten existing screws
Use a screwdriver (not a drill at first) to snug all hinge screws. Don’t overtighten to the point of stripping. Close the door and see if alignment improves.
Fix stripped screw holes
If a screw spins without tightening, the hole in the cabinet or door is stripped. Remove the screw. Dip a wooden toothpick or matchstick (with tip removed) in wood glue, insert several into the hole, and snap them flush. Let the glue dry according to instructions.
Reinstall the screw
Once dry, reinsert the screw into the repaired hole and tighten. The added wood gives the screw something solid to bite into again.
Adjust hinge position (for European-style hinges)
Many modern cabinets use concealed “Euro” hinges with adjustment screws. Typically: - One screw moves the door left/right - Another moves it in/out (depth) - Sometimes a third adjusts up/down
Make small adjustments and check frequently, using a level to keep the door straight and aligned with neighbors.
Check door clearance and closing
Open and close the door several times. Ensure it doesn’t rub against adjacent doors or the cabinet frame, and that it latches or stays closed properly.
If your hinges are very corroded or bent, replacing them with the same style and size is often easier than trying to salvage them.
Repair 4: Fixing a Door That Sticks or Won’t Latch
Seasonal humidity, settling, or loose hardware can make doors rub, bind, or refuse to latch. Many fixes don’t require cutting the door at all.
You’ll need: Screwdriver, pencil, utility knife or chisel, sandpaper or sanding block, wood shims (optional).
Step-by-step:
Identify the problem area
Close the door slowly and watch where it sticks—at the top, side, or near the latch. Check if the latch bolt lines up with the strike plate on the jamb.
Tighten hinge screws
With the door open, tighten all hinge screws on both the door and the jamb. Loose top hinges often cause the door to sag and rub at the bottom or latch side.
Shift the hinge slightly (if needed)
If tightening doesn’t solve it and the door still contacts the frame at the top latch side, you can slightly recess the top hinge deeper into the jamb: - Loosen the screws just enough to move the hinge. - Use a utility knife or chisel to shave a small amount of wood from the mortise (hinge recess). - Push the hinge deeper, retighten screws, and test again.
Adjust the strike plate for latch issues
If the latch bolt hits above or below the strike plate hole: - Close the door until the latch touches the strike plate. - Mark the bolt’s position on the plate with a pencil. - Remove the strike plate and enlarge or shift the hole slightly using a file or chisel. - Reinstall the plate so the bolt enters cleanly.
Lightly sand rubbing areas
If a small portion of the door edge rubs but hinges and strike plate are solid: - Mark the tight spot with a pencil. - Remove the door from the hinges (tap hinge pins out if applicable). - Sand the marked area lightly, staying straight along the edge. - Test fit the door before taking off more material.
Seal any freshly sanded wood
Raw wood absorbs moisture and can swell again. Touch up with paint, stain, or a clear sealer to keep the problem from returning as fast.
If the door is badly warped or the frame severely out of square, consider consulting a pro—especially on exterior doors that need proper weather sealing and security.
Repair 5: Stabilizing a Wobbly Towel Bar or Wall-Mounted Hook
Towel bars, hooks, and TP holders often loosen because they weren’t anchored properly to begin with. Securing them correctly helps prevent ripped-out drywall later.
You’ll need: Screwdriver, drill, drywall anchors (if no stud), level, stud finder (optional), pencil, possibly a new mounting kit if hardware is damaged.
Step-by-step:
Remove the fixture
Many towel bars and hooks have a small set screw underneath the bracket. Loosen it to slide the bar or hook off, exposing the mounting plate.
Inspect the mounting points
Check whether screws are anchored into a stud or just drywall. A stud finder can help, or you can probe the holes with a small nail—solid wood behind drywall feels firm, not crumbly.
Decide on your anchor method
- If there’s a stud: standard wood screws are best. - If there’s no stud: use appropriate drywall anchors (toggle, molly, or self-drilling anchors rated for the weight).
Repair or relocate holes if necessary
If old drywall holes are large or damaged, fill them with compound and let dry, or shift the mounting plate slightly up/down to hit fresh drywall or a stud. Mark new hole positions with a pencil using a level to keep things straight.
Install anchors or screws
For drywall anchors, drill pilot holes if required, insert anchors until flush, then drive screws into anchors—leaving screw heads slightly proud if the mounting plate sits over them. For studs, drive wood screws directly through the plate into the stud.
Reattach the fixture
Place the fixture back onto the mounting plate and tighten set screws. Gently pull to test. It should feel solid with no wobble.
Prevent future loosening
Avoid using towel bars as grab bars (install actual grab bars with proper blocking for that). Wipe away moisture occasionally so corrosion doesn’t weaken hardware over time.
Conclusion
Home repairs don’t have to be intimidating or expensive. With a modest set of tools and a clear, methodical approach, you can handle leaky faucets, wall blemishes, sagging cabinet doors, sticky room doors, and loose bathroom hardware yourself. Each fix in this guide not only solves a common problem but also teaches techniques—tightening and reinforcing fasteners, patching surfaces, adjusting doors—that carry over to countless other projects. Start with one repair, take your time, and you’ll quickly find that a more solid, comfortable home is well within your reach.
Sources
- [U.S. Environmental Protection Agency – WaterSense: Fix a Leak](https://www.epa.gov/watersense/fix-leak-week) - Explains how common household leaks (like dripping faucets) waste water and basic steps to address them
- [Family Handyman – How to Fix a Leaky Cartridge Faucet](https://www.familyhandyman.com/project/how-to-repair-a-cartridge-faucet/) - Detailed visuals and instructions for diagnosing and repairing cartridge-style faucets
- [This Old House – How to Patch Holes in Drywall](https://www.thisoldhouse.com/walls/21015107/how-to-patch-holes-in-drywall) - Step-by-step guidance on repairing different sizes of drywall holes
- [Lowe’s – How to Fix Common Door Problems](https://www.lowes.com/n/how-to/fix-common-door-problems) - Covers diagnosing and repairing sticking doors, misaligned latches, and hinge issues
- [Yale School of the Environment – Home Maintenance and Safety Tips](https://seas.yale.edu/office-facilities/home-maintenance-safety-tips) - General guidance on safe home maintenance practices and when to consider professional help
Key Takeaway
The most important thing to remember from this article is that this information can change how you think about Home Repairs.


