When an appliance stops working, most people jump straight to panic—or to pricing a replacement. In reality, many “dead” or “broken” appliances are suffering from simple, fixable issues you can tackle with basic tools and a bit of patience. This guide walks you through five practical, step-by-step checks you can try on common household appliances before you spend money on a service call.
Each section focuses on a different symptom, not a single appliance, so you can apply the same repair mindset across your home.
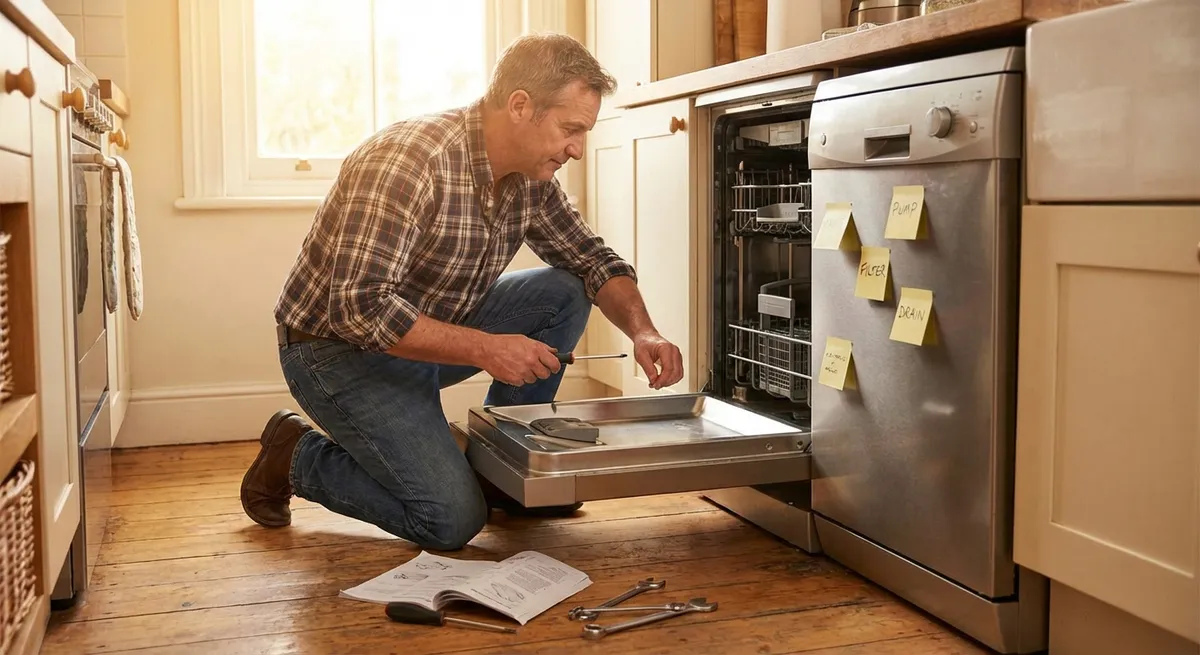
1. When an Appliance Won’t Turn On at All
A completely unresponsive appliance often looks like a major failure, but power issues are frequently caused by small, fixable faults between the wall outlet and the internal wiring.
Step-by-step:
Verify the outlet is live
Unplug the appliance and plug in a known-working device (like a lamp or phone charger). - If the test device doesn’t power on, you may have a tripped breaker, GFCI trip, or a bad outlet, not a bad appliance.
Reset breakers and GFCI outlets
Go to your electrical panel and look for breakers that are between ON and OFF, or visibly tripped. - Flip them fully OFF, then back ON. - In kitchens, bathrooms, garages, and basements, press the RESET button on GFCI outlets that may be feeding the appliance’s receptacle.
Inspect the power cord and plug
With the appliance unplugged, check the cord along its entire length: - Look for cuts, burn marks, crushed spots, or melted insulation. - Gently flex the cord near the plug—if you see sparking or smell burning when it’s plugged back in (do this only briefly and safely), stop and replace the cord or have it professionally repaired.
Check accessible fuses or reset buttons
Some appliances (especially microwaves, dryers, and certain dishwashers) have internal fuses or resettable thermal cutoffs. - Look in the user manual for “fuse,” “thermal protector,” or “reset switch.” - Many electric dryers have a resettable high-limit thermostat accessible by removing a rear panel (always unplug first). If it’s tripped, pressing the small button can restore operation, but you should still investigate why it overheated.
Test the door or lid switch
Many appliances won’t run if they think the door is still open. - On washers, dryers, and microwaves, gently press and release the door switch with your finger while the door is open; you should hear a distinct click. - If it doesn’t click, is physically broken, or the appliance only runs when you press it hard, replacing the switch is usually a straightforward, low-cost repair.
If all these checks pass and there’s still no life, the problem may be with an internal control board or wiring harness—usually the point where a professional diagnosis is worth the cost.
2. When an Appliance Runs but Performs Poorly
Sometimes your machine turns on, spins, lights up, or makes noise, but doesn’t do its actual job very well. That’s often a sign of clogged filters, restricted airflow or water flow, or worn wear-and-tear parts.
Step-by-step:
Clean or replace filters
Many performance issues trace back to neglected filters: - Refrigerators: check the water filter if ice or water flow is weak. - Dishwashers: clean the bottom filter basket and screens. - Range hoods: degrease metal filters or replace charcoal filters. - Dryers: clean the lint screen before every load, and wash it occasionally with water and a mild soap to remove fabric softener residue.
Restore proper airflow and circulation
Restricted airflow can cause overheating, longer run times, or weak performance. - Refrigerator: vacuum coils (rear or beneath) and ensure at least a few inches of clearance around the sides and back. - Dryer: check and clean the entire vent run from the back of the dryer to the outside hood. - Room A/C: clean or replace the intake filter and clear debris from outdoor coils.
Remove mineral buildup and debris
Hard water and debris can choke water-related appliances: - Dishwashers: remove spray arms and poke out clogged holes with a toothpick; soak in vinegar if there’s clear mineral buildup. - Washing machines: run a cleaning cycle with a washing machine cleaner or hot water plus white vinegar (check your manual first to confirm it’s safe). - Ice makers: run a manufacturer-recommended cleaning cycle to flush scale from the lines.
Check for partial clogs and obstructions
Low performance can be caused by things stuck where they shouldn’t be: - Dishwasher: check the sump area for glass, food chunks, or labels; ensure the float assembly moves freely up and down. - Washer: look in the door seal (front-loaders) for small items; inspect the drain pump trap if your model has one. - Vacuum/central vac: confirm hoses and nozzles are free of blockages and the bag/canister isn’t overly full.
Inspect belts and basic moving parts
If an appliance moves weakly, slips, or makes a burning rubber smell, the belt might be worn or broken. - Washers and dryers: unplug, remove the access panel, visually check the belt for cracks, glazing (shiny, hardened surface), or slack. - Some belts are simple to replace with basic tools; check a model-specific video or repair guide before starting.
By restoring airflow, water flow, and basic mechanical integrity, you can often bring a “tired” appliance back to nearly new performance for the cost of filters and some cleaning supplies.
3. When You Hear New Noises or Vibrations
A sudden rattle, screech, or heavy vibration typically means something has come loose, worn out, or gone out of balance. Addressing it early can prevent bigger, more expensive failures.
Step-by-step:
Locate the general source area
Run the appliance while you’re nearby (staying clear of moving parts). - Try to identify whether the sound is coming from the front, back, bottom, or one side. - Note when it happens: at startup, during high speed, during water fill, or at shutoff.
Check for loose or foreign objects
Many alarming noises come from simple intruders: - Washer: coins, bra wires, or buttons can get trapped between the drum and tub or lodged in the pump. Check the drum thoroughly and clean out any accessible pump filter or trap. - Dryer: look for zipper pulls, buttons, or small metal pieces trapped in the drum fins or lint filter housing. - Dishwashers: inspect the bottom for broken glass or utensils hitting the spray arms.
Verify level and balance
Excess vibration is often a leveling issue: - Use a bubble level on top of the appliance—front to back and side to side. - Adjust the leveling feet until the appliance is stable with minimal rocking. - For washers, avoid mixed heavy/light loads; distribute clothes evenly and avoid overloading or underloading.
Tighten accessible hardware
Over time, screws and bolts can loosen from normal vibration. - With power off and appliance unplugged, remove panels where accessible and gently tighten visible screws on brackets, mounts, and motor supports (do not overtighten plastic). - Check that adjustable feet locknuts, if present, are snug.
Inspect wear parts: rollers, glides, and fans
Certain parts are designed to wear and will get noisy as they fail: - Dryers: worn drum rollers, idler pulleys, or drum glides can squeak or thump. Inspect for flat spots, wobble, or missing pieces. - Refrigerators and A/C units: a rattling or buzzing fan may indicate a loose fan blade, debris caught in the fan, or worn bearings. - Range hoods/microwave vent fans: look for loose or bent fan blades and mounting brackets.
If the noise changes to a burning smell, grinding metal, or loud banging, shut the appliance off immediately. That’s a red flag that you may be on the edge of a major mechanical failure and should pause for further research or professional help.
4. When You Smell Something Burning or Unusual
Strange odors should never be ignored. Some are harmless and temporary (like new appliance smell or a little dust burning off), but others signal electrical or overheating problems you need to act on quickly.
Step-by-step:
Stop and unplug first
If you smell melting plastic, electrical burning, or strong, unusual heat: - Turn the appliance off and unplug it immediately. - If you see smoke or flames, leave the area and call emergency services.
Identify the type of smell
Different smells point to different causes: - Dust burning: common the first time you run a heater or oven after a long break; usually fades quickly. - Electrical burning (acrid, sharp): may indicate overheating wires, connectors, or motor windings. - Rubber burning: often from slipping belts or jammed moving parts. - Chemical/plastic: could be from overheated insulation, plastic parts, or something foreign melted inside.
Look for obvious obstructions or foreign items
With the unit unplugged and cool: - Oven/range: check for melted plastic, forgotten packaging, or spilled food burning on an element. - Dryer: look for items that shouldn’t be heated (plastic toys, foam, rubber-backed rugs) or lint built up around the heating element area. - Dishwashers: inspect for plastic items that fell onto the heating element.
Inspect cords, plugs, and visible wiring
Examine the power cord and plug first: - Look for discoloration, bubbling, melting, or charring near the plug blades or cord entry. - If you find damage, replace the cord or plug before using the appliance again. - If accessible panels can be removed safely, look for browned connectors or scorched areas on wiring and terminals.
Check for overheating from poor ventilation
Some appliances can overheat and produce odors if they can’t shed heat properly: - Refrigerators and freezers: ensure vents and coils aren’t blocked with dust, pet hair, or stored items. - Dryers: confirm that the exhaust is not kinked or blocked; significant lint buildup can cause hot spots and fires. - Electronics-heavy appliances (wall ovens, microwave/oven combos): ensure vents are clear and not obstructed by cabinets or insulation.
If the burning smell returns quickly after cleaning and basic checks, avoid repeated testing. That’s usually a sign of an internal electrical issue or failing motor that’s safer for a qualified technician to evaluate.
5. When Appliances Leak, Drip, or Leave Puddles
Water on the floor can look serious, but many leaks come from loose connections, clogged drains, or simple maintenance issues rather than cracked tanks or major structural damage.
Step-by-step:
Confirm the source of the leak
Before removing panels, determine: - Is the water clean, soapy, greasy, or rusty? - Does it appear during fill, during operation, or only after shutdown/defrost? - Place a dry paper towel under suspect areas (front, sides, back) and see where it gets wet first.
Check hoses and connections
For washers, dishwashers, and refrigerators with ice/water: - Inspect supply hoses at both ends. Tighten loose connections by hand, then slightly with a wrench—don’t overtighten. - Look for cracks, bulges, or corrosion on the hose itself. Replace any suspect hoses, preferably with braided stainless if compatible.
Clean drains and catch pans
Many leaks are actually overflows from clogged drains: - Refrigerators: clear the defrost drain (often at the back of the freezer compartment) and ensure the rear drain pan isn’t cracked or overflowing with dirt. - Dishwashers: clear debris from the bottom and ensure the drain filter and drain hose aren’t clogged or kinked. - Washers: check the standpipe or laundry sink for overflows, not just the washer itself.
Inspect door seals and gaskets
Worn or dirty seals can let water run down the front or sides: - Washers and dishwashers: clean door gaskets with warm, soapy water; look for tears, warping, or hardened sections. - Refrigerators: a bad seal can lead to excess condensation and puddles inside or under the unit. Check that a sheet of paper tug-test meets moderate resistance when the door is closed.
Level and load correctly
Improper leveling or overloading can cause splashing or poor drainage: - Washers: ensure they’re level and not excessively shaking; avoid very full loads that can force water near the top of the tub. - Dishwashers: don’t block spray arms with oversized items; ensure racks slide in fully so the door can seal correctly.
If water is coming from inside the cabinet (like a cracked tub, internal hose, or pump housing) and is not just a loose clamp or visible hose, you’ll need to weigh repair part cost and complexity versus replacement, especially with older units.
Conclusion
Most appliance problems don’t start as catastrophic failures—they begin as small issues: clogged filters, loose connections, minor imbalances, or neglected cleaning. By working through these five symptom-based checklists—no power, poor performance, new noises, strange smells, and leaks—you can often restore normal operation with simple tools and low-cost parts.
Just as important, these steps help you draw a line between what’s realistically DIY-friendly and what should be handed off to a professional. Document what you observe, keep model numbers handy, and don’t ignore early warning signs. A methodical, safety-first approach usually means more years of reliable service from the appliances you already own—and less money spent on rushed replacements.
Sources
- [Consumer Product Safety Commission – Home Electrical Safety Checklist (CPSC.gov)](https://www.cpsc.gov/s3fs-public/513.pdf) - Covers safe practices for checking cords, outlets, and breakers when appliances won’t power on
- [U.S. Fire Administration – Clothes Dryer Fire Safety Outreach Materials (USFA/FEMA)](https://www.usfa.fema.gov/prevention/outreach/clothes-dryers.html) - Explains the importance of dryer vent cleaning and lint removal to prevent overheating and fires
- [Energy.gov – Keep Your Refrigerator Running Efficiently](https://www.energy.gov/energysaver/maintaining-your-refrigerator) - Discusses coil cleaning, airflow, and maintenance that directly impact performance and overheating risk
- [Mayo Clinic – Mold and Mildew in Washing Machines](https://www.mayoclinic.org/diseases-conditions/respiratory-tract-infection/in-depth/mold-and-mildew/art-20541653) - Provides context on cleaning and maintenance of washers to prevent odors and moisture issues
- [University of California ANR – Household Water Leaks and Moisture Problems](https://anrcatalog.ucanr.edu/pdf/8517.pdf) - Offers guidance on locating and understanding leaks and moisture sources around the home
Key Takeaway
The most important thing to remember from this article is that this information can change how you think about Appliances.


