When something breaks at home, you usually have two choices: call someone and wait, or roll up your sleeves and handle it. The good news? Many “call a pro” issues actually start with simple, safe steps you can do yourself. This guide walks through five practical, step-by-step repair tips that give you real wins without specialized tools or years of experience.
Each repair here is designed for DIYers who want to be capable, not careless—so you’ll see clear steps, when to pause, and when to call in a professional.
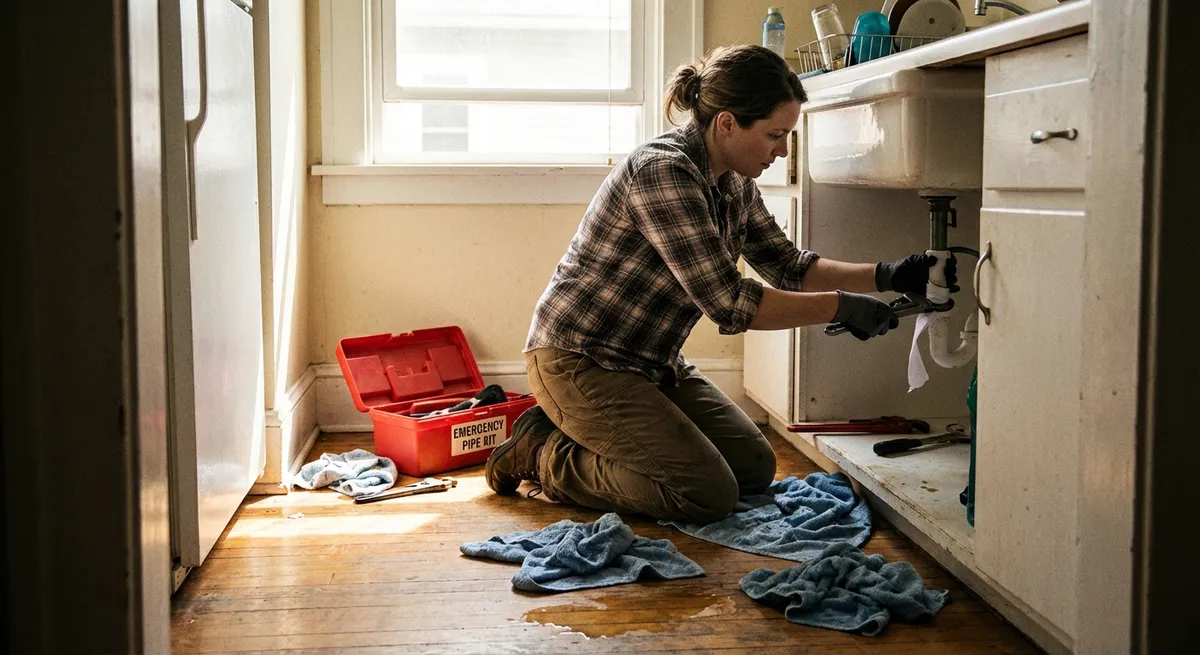
Stop a Running Toilet Before It Wrecks Your Water Bill
A constantly running toilet can waste hundreds of gallons of water a day—literally money down the drain. Most of the time, the culprit is inside the tank and can be fixed with a few adjustments or a cheap replacement part.
Step-by-step:
Turn off the water and remove the tank lid
Locate the shutoff valve behind or beside the toilet and turn it clockwise. Flush to empty most of the water from the tank. Remove the lid carefully and set it somewhere safe.
Check the flapper for a proper seal
At the bottom of the tank you’ll see a rubber flapper. If it’s warped, brittle, or not sitting flat, water will leak into the bowl and keep the toilet running. Press it down by hand—if the running sound stops, you’ve found the issue.
Inspect the chain and handle connection
Make sure the chain between the flapper and handle arm is neither too tight nor tangled. The flapper should close fully when you release the handle. Adjust by moving the hook to a different link if needed.
Adjust the float level
If water rises too high and spills into the overflow tube, the toilet will run. Depending on your fill valve, adjust the float screw or slide the float down the rod so the water level sits about 1 inch below the top of the overflow tube.
Replace worn parts if needed
If the flapper is cracked or doesn’t seal even after cleaning, replace it with a matching model (take the old one to the hardware store to compare). Many modern fill valves also swap out with just a few basic tools and the instructions on the package.
Turn water back on and test
Slowly reopen the shutoff valve, let the tank refill, and flush a few times. Listen for continuous running and watch the water level. A silent, stable tank means your fix worked.
Quiet a Loose, Squeaky Floorboard Without Ripping Up Flooring
That one squeaky spot on the floor can make a whole room annoying. Often, squeaks come from boards rubbing against each other or loose nails moving in the subfloor. You can usually tighten things up from above with minimal disruption.
Step-by-step:
Find the exact squeak point
Walk slowly over the area and mark the loudest spots with painter’s tape or a pencil. Have someone else walk while you listen and press on boards to pinpoint where it’s worst.
Locate floor joists (for wood floors)
Use a stud finder set to “joist” mode along the squeaky area. Floorboards fixed to joists are easier to tighten securely. Mark joist lines lightly so you don’t lose your place.
For carpeted floors: use a breakaway screw kit
Squeak repair kits for carpet include special screws and a tripod-like guide. Place the guide on a joist line over the squeak, drive the screw through the carpet and subfloor into the joist, then snap off the screw head below the carpet’s surface. The carpet fibers hide the repair.
For exposed hardwood: use trim or flooring screws
Pre-drill small pilot holes at a slight angle directly into the joist lines, then drive in trim-head or flooring screws just below the wood surface. Work slowly and use a hand screwdriver to avoid stripping. Fill the tiny holes with color-matched wood filler.
Try a lubricant for minor friction squeaks
If boards creak where they meet, sprinkle a small amount of powdered graphite or talcum powder in the seam and work it in with a soft brush. Wipe away excess so it doesn’t track.
Test and adjust
Walk the area again. If you still hear noise, repeat on neighboring spots—squeaks often travel a bit from their source.
Fix a Door That Won’t Latch or Keeps Swinging Open
A door that won’t stay closed or drifts open by itself is more than a small annoyance—it can indicate misaligned hinges or a shifted frame. Many of these problems are solved with careful adjustment, not replacement.
Step-by-step:
Identify the symptom
- Door won’t latch unless you slam it - Door rubs against the frame - Door swings open or closed by itself
Noting which one applies will guide where you look first.
Tighten hinge screws
Open the door and check all hinge screws on both the door and the frame. Loose screws can cause sagging. Tighten each screw firmly. If a screw spins without tightening, remove it and use a slightly longer screw of the same gauge, or fill the hole with wooden toothpicks and wood glue, then reinsert the screw once dry.
Adjust the hinge position (for rubbing or misalignment)
If the door rubs at the top on the latch side, shimming the bottom hinge can help. Loosen the screws on the bottom hinge (on the frame side), slip in a thin piece of cardboard or a hinge shim, then retighten. For rubbing at the bottom, do the same with the top hinge.
Inspect and adjust the strike plate
Close the door slowly and watch how the latch bolt meets the strike plate. If it hits too high or low, you may need to move the strike plate slightly. Loosen its screws and nudge it up, down, or out so the latch lines up with the hole, then retighten.
Fine-tune a self-swinging door
A door that swings on its own often has out-of-plumb hinges. Remove one hinge pin at a time and gently bend it slightly in the middle with a hammer (place it on a hard surface). Reinsert the pin—the added friction often keeps the door in place. Do this gradually to avoid over-tightening.
File or chisel only as a last resort
If the latch still doesn’t engage and everything is tight and aligned, very light filing of the strike plate opening or a tiny amount of wood from the sticking spot on the door edge can help. Work slowly, checking the fit often.
Restore Power to a Dead Outlet Safely
A “dead” outlet doesn’t automatically mean bad wiring. Many outlets are controlled by breakers, GFCI devices, or wall switches. A systematic check can fix the problem—or tell you clearly that it’s time to call an electrician.
Step-by-step:
Confirm the outlet is actually dead
Plug in a device you know works (like a lamp or phone charger). Better yet, use a non-contact voltage tester or outlet tester if you have one to check for power.
Check nearby GFCI outlets
Kitchens, bathrooms, garages, and outdoor circuits often connect through a GFCI outlet (the ones with “test” and “reset” buttons). If one nearby has a tripped indicator or no power, press “reset” firmly. Then retest the dead outlet.
Inspect the breaker panel
Find your electrical panel and look for any breakers that are in the middle or “tripped” position. Flip them fully off, then back on. Some panels have labels (kitchen, bedroom, etc.)—check these for clues, but don’t rely on them 100%.
Check for switched outlets
Some rooms have outlets controlled by a wall switch—half-hot outlets. Flip all switches in the room, especially those near doors. If the outlet suddenly works, you’ve found the switch that controls it.
Inspect the outlet cover (power off first)
If you’re comfortable and only after switching off the correct breaker, remove the outlet cover and gently check for loose wires on the terminals (but don’t touch bare copper with your hands). If you see burnt marks, melted plastic, or frayed wires, stop and call an electrician.
Know when to call a pro
If the outlet is still dead after these checks, or if multiple outlets are dead on one wall or in several rooms, there could be a more serious wiring or circuit issue. That’s the line where DIY ends—document what you’ve tried and contact a licensed electrician.
Seal a Drafty Window to Cut Energy Loss
Drafty windows don’t just make a room uncomfortable—they force your heating or cooling system to work harder. Sealing air leaks is one of the simplest ways to improve comfort and lower bills, especially in older homes.
Step-by-step:
Find the leak points
On a windy day, hold the back of your hand, a lit incense stick, or a thin piece of tissue near window edges and watch for movement. Focus on where the sash meets the frame, around the trim, and at the bottom rail.
Clean the surfaces first
Wipe down the window frame and sash where you’ll apply any sealer. Dust and residue can prevent proper adhesion and shorten the life of your repair.
Replace or add weatherstripping
For operable windows, peel-and-stick foam weatherstripping works for small gaps. Measure and cut strips to fit along the sides and bottom where the sash meets the frame. Press firmly so the adhesive bonds well.
Use caulk for permanent gaps around the frame
For cracks between the window frame and the wall, apply exterior-grade caulk (outside) and paintable interior caulk (inside). Cut the tube tip at a 45-degree angle, run a steady bead along the gap, and smooth it with a damp finger or a caulk tool.
Try removable draft stoppers for seasonal fixes
If you rent or want a non-permanent solution, use removable caulk or rope caulk along drafty seams for the winter, or place a simple draft snake (a weighted fabric tube) along the sill on especially windy days.
Check your work and monitor comfort
Once the caulk or weatherstripping has cured, repeat your draft test. You should feel far less air movement. Over the next few weeks, pay attention to how often your heat or AC cycles—less frequent cycling usually means your sealing effort is paying off.
Conclusion
Basic home repairs don’t have to be mysterious or risky. When you approach them with a step-by-step process and a clear sense of when to stop, you can solve a surprising number of issues yourself: toilets that run nonstop, floors that squeak, doors that won’t behave, outlets that seem dead, and windows that leak air.
Start with one problem that annoys you most, follow the steps carefully, and pay attention to what you learn in the process. Each successful repair makes the next one easier—and gives you more control over the comfort, safety, and cost of running your home.
Sources
- [U.S. Environmental Protection Agency – WaterSense: Fix a Leak Week](https://www.epa.gov/watersense/fix-leak-week) - Explains how toilet leaks waste water and outlines basic diagnostic steps
- [Energy.gov – Air Sealing Your Home](https://www.energy.gov/energysaver/air-sealing-your-home) - Detailed guidance on locating and sealing drafts around windows and doors
- [U.S. Consumer Product Safety Commission – Electrical Outlet Safety](https://www.cpsc.gov/safety-education/safety-guides/electrical-outlet-safety) - Safety information on outlets, wiring, and when to involve a professional
- [Family Handyman – How to Fix Squeaky Floors](https://www.familyhandyman.com/project/how-to-fix-squeaky-floors/) - Practical methods and visuals for diagnosing and repairing squeaky flooring
- [This Old House – How to Fix a Door That Won’t Latch](https://www.thisoldhouse.com/doors/21015239/how-to-fix-a-door-that-won-t-latch) - Step-by-step strategies for adjusting hinges, strike plates, and door alignment
Key Takeaway
The most important thing to remember from this article is that this information can change how you think about Home Repairs.


