When an appliance starts acting up, it’s tempting to jump straight to “I need a new one.” But many common issues have simple, safe fixes you can try first—often with tools you already own. This guide walks through five practical, step‑by‑step repair tips that DIY‑minded homeowners can use to rescue appliances, stretch their lifespan, and avoid unnecessary service calls.
Always put safety first: unplug or switch off power at the breaker before you open, disassemble, or work on any appliance.
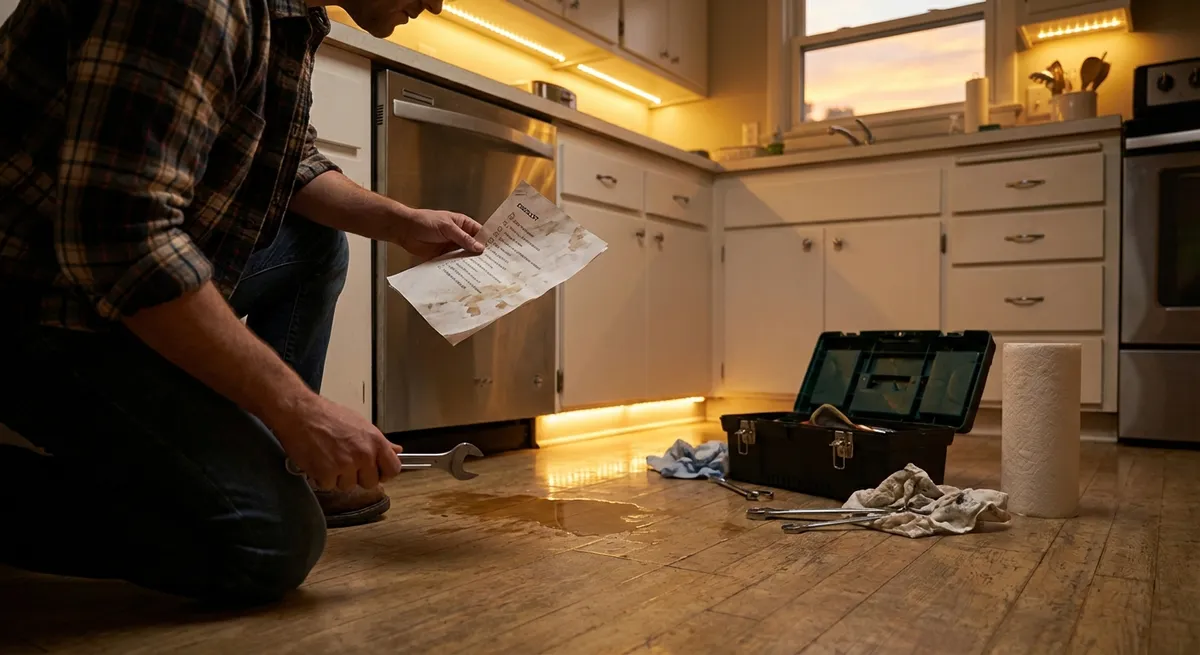
1. Revive a “Dead” Dishwasher That Won’t Start
A silent dishwasher doesn’t always mean a bad control board. In many cases, the problem is something minor you can handle in minutes.
Step 1 – Confirm power and basic settings
- Make sure the dishwasher is firmly plugged in (for plug‑in models) or that the kitchen breaker hasn’t tripped.
- Check that the door is closing fully and the latch “clicks.” Many machines won’t start if they don’t sense the door is latched.
- Verify that Child Lock or Control Lock isn’t enabled—usually indicated by a small lock icon on the display.
Step 2 – Reset the control system
- Turn the dishwasher off using the control panel.
- Flip the breaker for the dishwasher off for 60 seconds, then back on.
- On many models, pressing and holding the Start/Reset or Cancel button for 3–5 seconds performs a soft reset (check your user manual).
- Try a short cycle to see if it responds.
Step 3 – Inspect and clean the door latch
- Unplug the dishwasher or turn off the breaker.
- Open the door and inspect the latch area for built‑up soap, hardened food, or plastic buildup.
- Gently clean around the latch with a soft brush and a damp cloth.
- If the latch is loose, carefully tighten visible mounting screws. Do not over‑tighten; you just want it secure.
Step 4 – Check the float switch for “stuck full”
- Inside the tub, locate the float (usually a small dome or cylinder near the front corner).
- Gently lift and lower it; it should move freely and click when raised.
- If it’s stuck in the raised position due to debris, clean around it with a cloth and warm, soapy water.
- Make sure nothing (like a utensil) was blocking it during the last wash.
Step 5 – Test again before calling a pro
- Restore power and run a quick rinse cycle.
- If the machine now powers, fills, and sprays, you’ve likely fixed the issue.
- If it still won’t start—but you hear relays clicking—there may be a faulty door switch, control board, or wiring that requires a technician.
2. Stop a Warm Refrigerator from Ruining Your Groceries
If your fridge feels warm but the freezer seems okay, or the motor runs constantly, the fix is often airflow and cleaning—rather than a full replacement.
Step 1 – Verify temperature and loading habits
- Check that the temperature is set to about 37–40°F (3–4°C) for the fridge, 0°F (-18°C) for the freezer.
- Avoid over‑packing shelves; blocked vents can prevent cold air from circulating.
- Make sure nothing is pushed directly against interior vents.
Step 2 – Clean the condenser coils
- Unplug the refrigerator.
- Pull it away from the wall carefully to access the back or bottom front (depending on model).
- Locate the condenser coils—either on the back or behind a lower front grille.
- Use a vacuum with a brush attachment to remove dust, pet hair, and debris. Then use a soft coil cleaning brush to reach tight spaces.
- Cleaning coils can dramatically improve cooling efficiency and reduce run time.
Step 3 – Inspect the door gaskets
- Close a sheet of paper or a dollar bill in the door; gently pull. If it slides out easily, the gasket may not be sealing properly.
- Visually inspect for cracks, gaps, or hardened sections in the rubber.
- Clean the gasket with warm, soapy water and dry thoroughly to improve flexibility and sealing.
- For minor warping, gently warm the gasket with a hair dryer (low setting) and reshape it by hand; don’t overheat it.
Step 4 – Check for frost buildup in the freezer
- Heavy ice or frost on the back wall of a frost‑free freezer can indicate airflow or defrost issues.
- Remove food (store in a cooler) and unplug the unit. Leave the doors open to fully defrost; place towels to catch water.
- After defrosting, restart the fridge and monitor. If the frost quickly returns, a faulty defrost heater, thermostat, or timer may require professional repair.
Step 5 – Listen for the evaporator fan
- With the fridge running, open the door briefly and listen for a fan sound from inside the freezer.
- Many models shut the fan off when the door is open; press the door switch with your finger to see if the fan comes on.
- No fan sound could mean a failed fan motor or a frost blockage around the blades—both situations typically need more advanced diagnosis, but you can sometimes see and clear visible ice buildup.
3. Fix an Electric Dryer That Spins but Won’t Heat
If your clothes are tumbling but coming out cold and damp, the problem is often power, airflow, or a basic safety device doing its job.
Step 1 – Confirm power supply and settings
- For 240V electric dryers, one half of the breaker can trip while the other stays on—giving you power but no heat.
- Turn the dryer breaker fully off, then back on.
- Make sure you didn’t accidentally select an “Air Fluff” or “No Heat” setting. Double‑check the cycle options.
Step 2 – Clean the lint trap and internal housing
- Remove the lint filter and clean it thoroughly.
- Shine a flashlight into the lint housing; use a narrow vacuum attachment to pull out hidden lint.
- Built‑up lint reduces airflow and can trigger safety cutoffs.
Step 3 – Inspect and clean the exhaust vent
- Unplug the dryer.
- Carefully pull it away from the wall and disconnect the vent duct.
- Check the duct and the wall vent for lint clogs, crushed sections, or kinks.
- Vacuum the duct and the vent outlet; straighten any bends.
- If the exterior vent hood has a flap, make sure it opens freely and isn’t blocked by nests, leaves, or debris.
Step 4 – Reset a tripped high‑limit thermostat (if accessible)
- Many dryers have a resettable thermal cutout near the heating element housing.
- Remove the back panel (with power disconnected), and look for a small thermostat with a reset button (not all models have one—consult your manual).
- If present, press the button until it clicks.
- Reassemble, reconnect the vent, and test.
- If it trips again soon, stop and investigate airflow or call a technician—repeatedly resetting without fixing the cause is unsafe.
Step 5 – Test performance with a small load
- Run the dryer on a normal heat cycle with a small load of damp towels.
- Check the exhaust outside after 5–10 minutes—it should be warm with a steady airflow.
- If there’s still no heat (and settings, power, and vents are correct), the issue may be a failed heating element or non‑resettable thermostat, which usually requires part replacement.
4. Restore a Smelly, Slow-Draining Washing Machine
A washer that smells bad or drains slowly is usually suffering from buildup, minor clogs, or neglected filters—issues you can often handle yourself.
Step 1 – Run a hot cleaning cycle
- Remove clothes and run the hottest, longest cycle with an empty drum.
- Add a washing machine cleaner or 1–2 cups of white vinegar to the drum; avoid mixing vinegar with bleach.
- Leave the door open afterward to help it dry out and reduce odor.
Step 2 – Clean the drain pump filter (front‑loaders and some top‑loaders)
- Unplug the washer.
- Access the small panel near the bottom front (check your manual for location).
- Place a shallow pan and towels under the panel.
- Slowly unscrew the pump filter—water will drain out; control the flow by turning it gradually.
- Remove lint, coins, hair, and debris from the filter and the housing.
- Reinstall the filter securely before running another cycle.
Step 3 – Clear the standpipe and drain hose
- Pull the washer slightly away from the wall (without straining hoses).
- Inspect the drain hose for sharp kinks or crushing. Straighten if needed.
- Remove the hose from the standpipe (drain in the wall) and check for blockages at the end; flush with water if needed.
- If you suspect the standpipe itself is clogged, use a drain snake carefully—avoid chemicals that may damage pipes or hoses.
Step 4 – Inspect and clean the inlet screens
- Turn off the hot and cold water supply valves.
- Unscrew the hoses from the washer back.
- Look inside the hose connections on the machine; you’ll usually see small mesh screens.
- Gently remove them (if they’re removable) and rinse away sediment.
- Reinstall screens and hoses, ensuring connections are snug but not overtightened.
Step 5 – Change your usage habits to prevent repeat issues
- Use the correct detergent type and amount (HE detergent for HE machines) to reduce residue.
- Leave the door or lid slightly open between loads to help the drum dry.
- Run a maintenance wash (hot cycle with cleaner or vinegar) monthly if you wash frequently or live in a hard‑water area.
5. Quiet a Noisy Range Hood or Over-the-Range Microwave Fan
A loud, rattling, or barely-sucking range hood or microwave vent fan is often more about filters and mounting than major motor failure.
Step 1 – Identify the noise source
- Turn the fan on at its lowest speed.
- Listen for where the noise is coming from:
- A rattle near the top or back can indicate loose ductwork.
- A buzzing or scraping right above the filters often means fan or filter issues.
- Switch between speeds to see if the sound changes.
Step 2 – Remove and clean or replace grease filters
- Turn off power (unplug or switch off the breaker for microwaves, if possible).
- Remove the metal mesh or baffle filters from the hood or microwave underside.
- Soak them in hot, soapy water; gently scrub with a soft brush to remove grease.
- If filters are damaged, heavily corroded, or charcoal odor filters are saturated, replace them with compatible parts.
Step 3 – Inspect the fan blades and housing
- With filters removed, shine a flashlight up into the fan area.
- Look for loose screws, bent blades, or built‑up grease on the fan wheel.
- If the blades are accessible, carefully wipe away grease with a degreaser on a cloth (never spray directly into the motor).
- Gently tighten visible screws holding the fan or housing in place.
Step 4 – Check the duct connections
- If your hood is ducted outside, access the ductwork above the hood (inside cabinetry or in the attic, if safe and practical).
- Inspect joints for loose tape or movement when the fan is running.
- With power off, tighten any loose clamps and re‑seal joints with proper metal foil tape (not regular cloth duct tape).
Step 5 – Test airflow and noise
- Reinstall clean filters and restore power.
- Turn the fan on and hold a paper towel up to the filter area; it should be firmly pulled toward the hood.
- If the noise is reduced and airflow improved, your cleaning and tightening were successful.
- If noise persists and sounds like grinding or squealing, the fan motor or wheel may be worn and could need replacement by a professional.
Conclusion
You don’t have to be an expert to solve many everyday appliance problems. By tackling straightforward checks—power, airflow, cleaning, and basic mechanical parts—you can often get a “dead,” smelly, noisy, or underperforming appliance back into working shape in under an hour. Always work safely, know your limits, and keep your user manual handy. When basic steps don’t fix the issue—or you’re dealing with gas lines, sealed systems, or complex electronics—that’s the time to call in a pro, not to push your luck.
Sources
- [U.S. Department of Energy – Appliances and Equipment](https://www.energy.gov/energysaver/appliances-and-electronics) – General guidance on appliance efficiency, maintenance, and operating tips
- [Consumer Product Safety Commission – Household Appliance Safety](https://www.cpsc.gov/Safety-Education/Safety-Guides/home) – Safety best practices for working around common household appliances
- [GE Appliances Support](https://www.geappliances.com/ge/service-and-support/support.htm) – Official troubleshooting guides and manuals for dishwashers, refrigerators, washers, dryers, and more
- [Whirlpool Product Help](https://producthelp.whirlpool.com/) – Brand-specific maintenance and troubleshooting information for major appliances
- [U.S. Environmental Protection Agency – Energy-Efficient Products](https://www.epa.gov/energy/energy-efficient-products) – Background on energy-efficient appliance operation and why maintenance matters
Key Takeaway
The most important thing to remember from this article is that this information can change how you think about Appliances.


