Owning appliances shouldn’t mean living in fear of the next repair bill. Many “something’s wrong” moments come down to simple issues you can safely check and fix yourself—no advanced tools, no electrician’s license, and no all-day YouTube marathon required. This guide walks through five practical, step‑by‑step fixes that tackle the most common annoyances DIY‑minded homeowners face.
You’ll learn exactly what to look for, what to clean, tighten, or reset, and when it’s time to put the screwdriver down and call a pro.
1. When the Fridge Stops Cooling but the Light Still Works
If your refrigerator is running but not staying cold, don’t assume it’s dying. Airflow problems and blocked coils are more common than compressor failures.
Step‑by‑step: Restore Airflow and Cooling
- Check temperature settings.
Make sure no one accidentally bumped the controls. Aim for 37–40°F (3–4°C) in the fridge and 0°F (‑18°C) in the freezer.
- Clear vents inside the fridge and freezer.
Move food away from interior vents—especially large boxes, trays, and freezer bags. Blocked vents stop cold air circulation.
- Inspect door gaskets with the paper test.
Close a sheet of paper in the door and gently tug. If it slides out easily all the way around, the seal may be dirty, warped, or failing.
- Clean gaskets with warm, soapy water and a soft cloth.
- Dry thoroughly and check again.
- Clean the condenser coils.
- Unplug the fridge.
- Pull it out carefully; protect your floor.
- Locate the coils (often on the back or underneath behind a toe‑kick panel).
- Use a coil brush or vacuum with a brush attachment to remove dust and pet hair.
Dirty coils make the fridge run longer and cool worse.
- Make sure the condenser fan is spinning.
- While it’s still unplugged, locate the fan near the compressor.
- Remove any visible debris.
- Plug in briefly and listen/peek to ensure the fan starts. If it hums but doesn’t spin, the fan motor may be failing—this is a good point to call a technician.
When to stop DIY
- You hear loud clicking or buzzing near the compressor.
- The compressor is extremely hot to the touch.
- There’s visible refrigerant oil or you suspect a refrigerant leak.
At that stage, professional service is safer and usually more cost‑effective than guessing.
2. Dishwasher Not Cleaning Well? Fix Cloudy Glasses and Gritty Dishes
A poorly cleaning dishwasher is usually dirty itself or getting the wrong water/soap combination, not “worn out.” A bit of targeted cleaning and inspection can restore performance.
Step‑by‑step: Get Dishes Coming Out Clean Again
- Clean the filter system.
- Remove the bottom rack.
- Twist or pull up the filter assembly (consult your manual if it’s not obvious).
- Rinse filters under warm water and scrub with a soft brush.
- Remove any food sludge from the sump area underneath.
- Unclog spray arms.
- Pop off the spray arms if they’re designed to be removable.
- Use a toothpick or small wire to clear mineral deposits from each hole.
- Rinse thoroughly and reattach.
- Check for “dish crowding.”
- Avoid nesting bowls and stacking utensils tightly together.
- Make sure large items don’t block the spray arms from spinning.
- Use the right detergent and rinse aid.
- If you have hard water, use detergent labeled for hard water and always use rinse aid.
- Don’t mix pods and powder; pick one system and stick with it.
- Run a cleaning cycle.
- Place a dishwasher‑safe cup of white vinegar on the top rack and run a hot cycle with no dishes.
- For heavier buildup, many manufacturers recommend a branded dishwasher cleaner—follow the package instructions.
When to stop DIY
- The dishwasher fills but never sprays water (could be a circulation pump or motor).
- You see standing water that won’t drain, even after cleaning filters and checking the drain hose for kinks.
- There are error codes flashing—look these up in the manual or on the manufacturer’s website before guessing.
3. Dryer Taking Forever? Restore Heat and Cut Fire Risk
A dryer that runs but doesn’t dry well often has a simple problem: it can’t breathe. Lint buildup wastes energy, wears out clothes, and increases fire risk. Start with airflow before assuming a bad heating element.
Step‑by‑step: Improve Drying and Safety
- Clean the lint screen thoroughly.
- Remove the lint screen and clean it before every load.
- Once in a while, wash it with warm water and a soft brush—dryer sheets can create a film that restricts airflow.
- Inspect the vent hose.
- Unplug the dryer.
- Gently pull it away from the wall.
- Check the flexible vent hose for kinks, crushing, or tears.
- Replace thin, crinkled foil ducts with rigid or semi‑rigid metal ducting; it’s safer and flows better.
- Clear the vent line to the outside.
- Disconnect the vent hose at both ends.
- Use a vent cleaning brush or vacuum attachment to remove lint.
- Go outside and verify the exterior vent flap opens freely when the dryer runs.
- Check load size and settings.
- Overloading traps moisture. Dry bulky items (like comforters) in smaller loads.
- Use the right cycle: heavy cottons often need “heavy duty” or “high heat,” while synthetics need lower heat.
- Clean inside the dryer cabinet (advanced, but doable).
If you’re comfortable with screws and panels:
When to stop DIY
- The dryer drum doesn’t spin, or you smell burning rubber (belt or motor issue).
- The dryer never heats but the drum spins: this could be a heating element, gas valve, or thermal fuse—often still DIY‑able, but follow a reliable model‑specific guide.
- You smell gas with a gas dryer—shut it off and call a pro immediately.
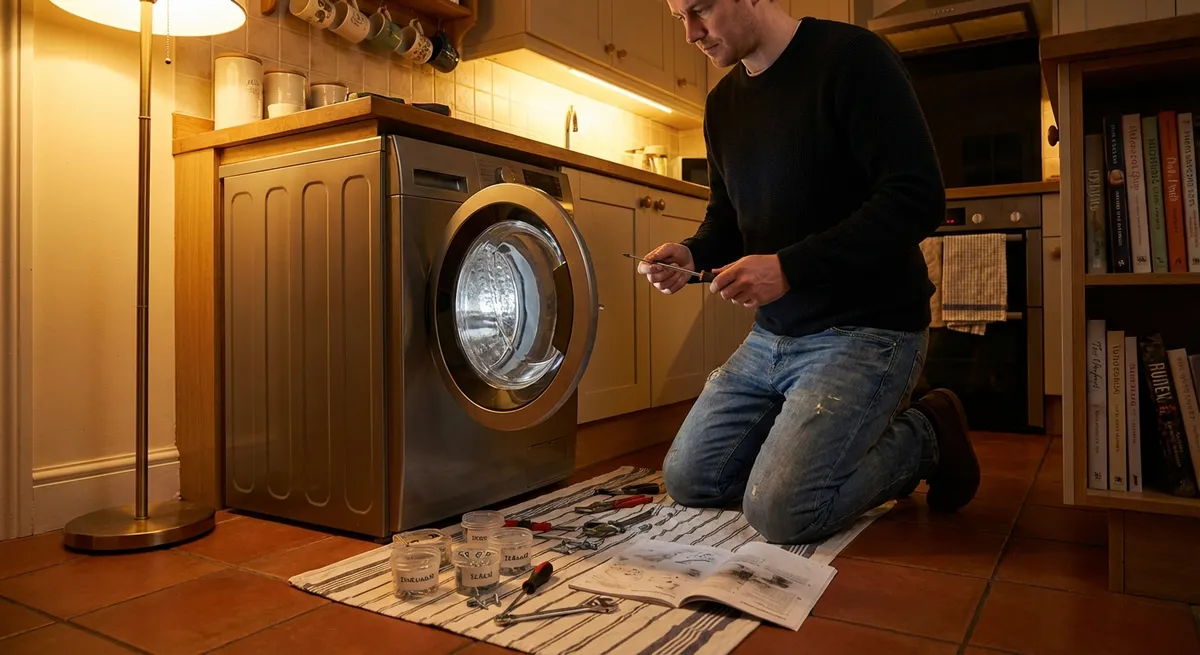
4. Washing Machine That Won’t Drain or Spins Off-Balance
Drainage and balance problems are everyday washing machine complaints. Often, the “fix” is clearing clogs, leveling the machine, or dealing with debris at the pump—not replacing the washer.
Step‑by‑step: Clear Drains and Calm the Spin Cycle
- Stop overloading and rebalance the load.
- If the washer is shaking violently, pause the cycle.
- Redistribute clothes evenly around the drum.
- For heavy items (blankets, rugs, jeans), wash fewer at once.
- Level the machine.
- Place a level on top of the washer front‑to‑back and side‑to‑side.
- Adjust the feet by turning them in or out until the bubble centers.
- Lock them in place if your model has jam nuts.
- Check the drain hose.
- Pull the washer slightly out.
- Inspect the hose for kinks, crushing, or clogs at the sink/standpipe connection.
- Make sure the hose end isn’t submerged in standing water—it should hook above the drain opening.
- Clean the drain pump filter (front‑loaders).
Many front‑load washers have a service panel at the bottom front:
- Run the machine on a cleaning cycle.
- Use a washing machine cleaner or a cup of white vinegar (if your manufacturer allows it).
- Select the hottest, longest cycle without clothes to help dissolve soap scum and residue that can affect performance.
When to stop DIY
- The washer hums but doesn’t drain at all (possible pump failure).
- There are oil stains under the machine or grinding sounds when spinning (bearing or transmission issues).
- Error codes keep returning after basic checks—look them up, and if they point to control boards or motors, that’s pro territory for most people.
5. Electric Oven That Heats Unevenly or Won’t Reach Temperature
If your electric oven burns cookies on one side and underbakes on the other—or never seems hot enough—start with simple checks before blaming the thermostat.
Step‑by‑step: Get Your Oven Heating Evenly
- Confirm the problem with an oven thermometer.
- Place an oven‑safe thermometer in the center of the middle rack.
- Set the oven to 350°F (175°C) and let it preheat fully.
- Compare the reading after 15–20 minutes to the set temperature.
- Visually inspect the heating elements.
- Turn the oven off and let it cool completely.
- Look at both the bake (bottom) and broil (top) elements.
- Check for breaks, bubbling, or burnt spots.
- If the bake element does not glow red during operation, it may be failing.
- Clean baked‑on spills that can smoke or affect heating.
- Use the manufacturer‑recommended cleaner or a paste of baking soda and water.
- Avoid getting cleaner on the door gasket.
- Don’t use abrasive pads on glass doors or coated interiors unless the manual says it’s safe.
- Reposition racks for better results.
- Use the middle rack for most baking.
- Use higher racks to brown or broil, lower racks for thick dishes like casseroles.
- Avoid placing pans directly against oven walls; allow air to circulate.
- Calibrate the oven temperature (if your control allows it).
Many ovens let you adjust the displayed temperature up or down:
When to stop DIY
- The oven trips the breaker repeatedly.
- You smell electrical burning or see sparking from an element.
- The control panel is unresponsive, or the display flickers—this often points to control board issues best left to trained repair techs.
Conclusion
Most day‑to‑day appliance “failures” are really maintenance and airflow problems waiting to be solved with a flashlight, a brush, and a few minutes of focused work. By methodically checking vents, filters, seals, hoses, and basic settings, you can often restore performance, extend appliance life, and avoid at least some service calls.
The key is knowing where the DIY line ends: once you hit refrigerant systems, gas valves, or complex electronics, your best move is to stop guessing and bring in a professional. Until then, these step‑by‑step checks give you a solid, safe starting point whenever your hardest‑working appliances start acting up.
Sources
- [U.S. Department of Energy – Appliances and Equipment](https://www.energy.gov/energysaver/appliances-and-electronics) – General guidance on appliance operation and energy‑efficient use
- [Consumer Product Safety Commission – Clothes Dryer Safety](https://www.cpsc.gov/ClothesDryerSafety) – Official safety advice and fire‑prevention tips for dryers and venting
- [Mayo Clinic – Preventing Household Injuries](https://www.mayoclinic.org/healthy-lifestyle/adult-health/in-depth/home-safety/art-20047739) – Broader home safety best practices relevant to DIY work
- [GE Appliances Support](https://www.geappliances.com/ge/service-and-support/) – Model‑specific manuals and troubleshooting for major household appliances
- [Whirlpool Product Help](https://producthelp.whirlpool.com/) – Manufacturer guides, maintenance steps, and troubleshooting for washers, dryers, dishwashers, and more
Key Takeaway
The most important thing to remember from this article is that this information can change how you think about Appliances.


