If you’ve ever stared at a warning light or listened to a strange noise and thought, “This is going to be expensive,” you’re not alone. But many small car issues can be handled at home with simple tools, a bit of patience, and solid instructions. These aren’t fantasy repairs—these are realistic, driveway‑friendly jobs that can save you real money and help you understand your car better.
Below are five step‑by‑step repair projects that most DIY enthusiasts can tackle safely. Think of this as a practical playbook for rolling up your sleeves without getting in over your head.
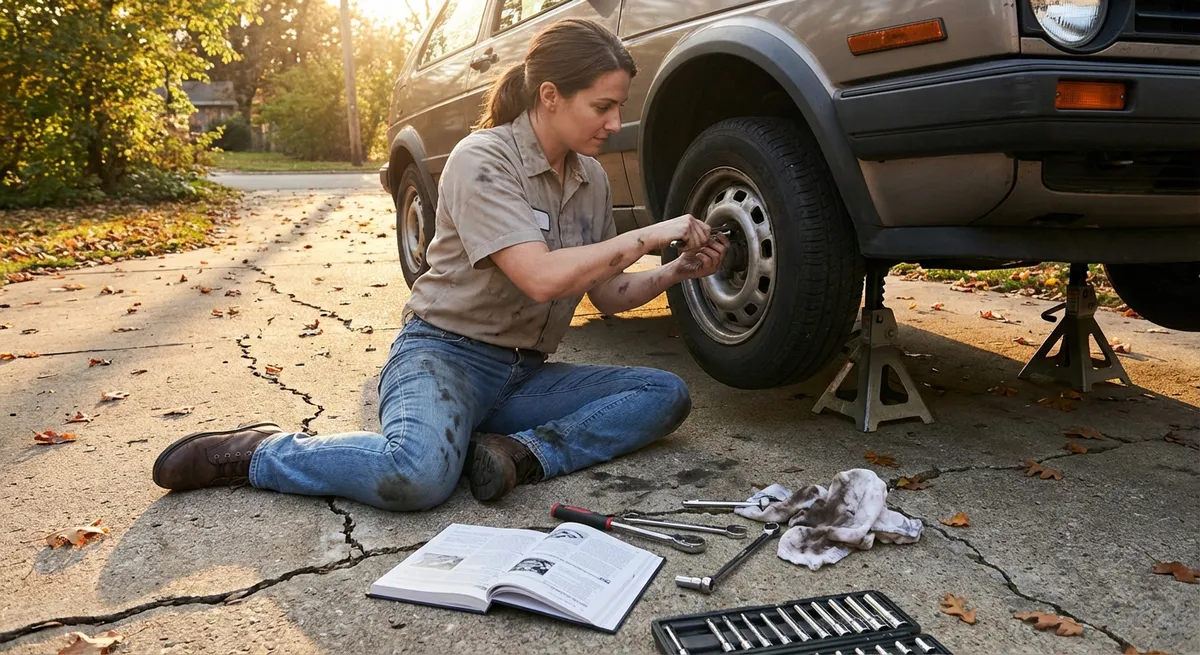
1. Swapping Out Worn Brake Pads (Front Disc Brakes)
Worn brake pads don’t just squeal—they increase your stopping distance and can damage more expensive parts. Replacing front disc brake pads is one of the most popular DIY jobs because it’s straightforward if you work carefully and methodically.
What you’ll need:
Jack and jack stands, lug wrench, basic socket set, C‑clamp or brake piston tool, flat screwdriver, brake cleaner, new pads, gloves, eye protection.
Step‑by‑step:
Secure the car and loosen lugs
Park on level ground, engage the parking brake, and chock the rear wheels. Slightly loosen the front wheel lug nuts while the car is still on the ground.
Lift and remove the wheel
Jack up the front of the car and place it securely on jack stands. Finish removing the lug nuts and take off the wheel to expose the brake assembly.
Remove the caliper (not the bracket yet)
Locate the caliper bolts on the back of the caliper. Remove them with the socket/ratchet. Gently slide the caliper off the rotor and support it with a wire or bungee so it doesn’t hang from the brake hose.
Pull the old pads and inspect hardware
The pads slide or clip out of the caliper bracket. Note their orientation so you can match the new ones. Check the anti‑rattle clips and hardware—replace if corroded or bent.
Compress the piston
Place the old pad against the caliper piston and use a C‑clamp or piston tool to slowly push the piston back into the caliper. This creates room for the thicker new pads. Watch the brake fluid reservoir to make sure it doesn’t overflow.
Install new pads
Apply any included brake lube sparingly to the pad backing plates and hardware (never on the friction surface). Slide or clip the new pads into the bracket in the same orientation as the originals.
Reassemble and torque
Reinstall the caliper over the new pads. Torque the caliper bolts to manufacturer spec (found in a repair manual or reliable online database). Reattach the wheel, hand‑tighten the lugs, lower the vehicle, then torque lug nuts in a star pattern.
Pump the pedal and test
Before driving, pump the brake pedal several times until it firms up to seat the pads. Perform a slow test drive, listening for abnormal noises and checking for proper braking feel.
2. Replacing an Oxygen (O2) Sensor That Triggers a Check Engine Light
A failing oxygen sensor can cause poor fuel economy, rough idle, and a glowing “Check Engine” light. Many cars use threaded O2 sensors that can be changed with basic hand tools once you identify the faulty one.
What you’ll need:
OBD‑II scanner, O2 sensor socket or wrench, penetrating oil, jack and stands (if needed), new sensor (correct part number), gloves and eye protection.
Step‑by‑step:
Scan the code
Plug an OBD‑II scanner into the port under the dash. Read the code and freeze‑frame data. Codes like P0130–P0167 usually relate to O2 sensors. The code description will indicate sensor position (e.g., Bank 1 Sensor 2).
Identify sensor location
Consult a repair manual or reliable online diagram to locate the exact sensor (upstream vs. downstream, Bank 1 vs. Bank 2). Front sensors are typically near the exhaust manifold; rear sensors are usually after the catalytic converter.
Access safely
If the sensor is under the car, securely raise and support the vehicle on jack stands. Let the exhaust cool completely—O2 sensors live in hot exhaust pipes and can burn you if you rush.
Pre‑treat with penetrating oil
Spray a small amount of penetrating oil on the sensor threads and let it soak for 10–15 minutes. This helps loosen rust and minimizes the chance of stripping threads.
Unplug and remove the sensor
Disconnect the electrical connector first, noting its routing and clips. Use an O2 sensor socket or wrench to turn the sensor counter‑clockwise and remove it from the exhaust bung.
Prep and install the new sensor
Most new sensors come with anti‑seize on the threads; if not, apply a small amount (keeping it off the tip). Thread the new sensor by hand first to avoid cross‑threading, then snug with the socket to manufacturer torque specs.
Reconnect wiring and secure
Plug in the connector and route the wiring exactly as before, clipping it away from hot exhaust and moving components.
Clear the code and verify
Use the scanner to clear the code, then start the car. Let it reach operating temperature and confirm the check engine light remains off and fuel trims look normal (if your scanner supports that).
3. Fixing a Sluggish Power Window (Without Replacing the Motor)
A power window that moves slowly or intermittently doesn’t always mean a dead motor. Dirt, dried‑out tracks, and weak electrical connections can all cause issues—and are often easier and cheaper to fix.
What you’ll need:
Trim removal tools, Phillips/flat screwdrivers, silicone spray (not petroleum‑based), contact cleaner, clean rags, basic socket set.
Step‑by‑step:
Check basics first
Try the window from both driver and passenger switches. If one works better than the other, the weaker switch may be failing. Listen for the motor—if you hear it straining, the mechanism may be binding rather than electrically dead.
Inspect and clean window tracks
With the window partway down, spray silicone lubricant into the felt/rubber channels on both sides of the glass. Run the window up and down several times to spread the lubricant and see if speed improves.
Remove door panel for access
Disconnect the battery (to avoid accidental deployment of side airbags if present). Use trim tools to gently pop off the door panel after removing any hidden screws (under armrests, in door pulls, behind small covers).
Check connectors and switches
Inspect the electrical connectors at the window motor and switch. Use contact cleaner on the pins if they look dirty or corroded. Reseat the connectors firmly.
Lubricate regulator and pivot points
With the panel off, watch the window mechanism as it moves. Lightly lubricate metal pivot points and sliders (avoid overspraying onto the glass or speaker). Do not use heavy grease on plastic tracks—it can gum up in cold weather; silicone or light spray lubricant works better.
Test before reassembly
Reconnect the battery temporarily and operate the window with the panel off. If speed and smoothness are restored, you’ve likely solved the problem. If the motor still sounds weak and moves slowly, it may indeed need replacement.
Reinstall the door panel
Disconnect the battery again, then reinstall the panel, aligning clips and screws. Reconnect the battery once finished and test the window from both switches.
4. Stopping a Small Engine Oil Leak at the Valve Cover Gasket
Seeing oil on top of the engine or along its sides is stressful, but many minor leaks come from a tired valve cover gasket. Replacing this gasket is a moderate DIY job that can prevent bigger issues (and keep your driveway cleaner).
What you’ll need:
Socket set, torque wrench, gasket scraper or plastic razor blades, brake cleaner, new valve cover gasket, RTV sealant (only if specified), shop towels.
Step‑by‑step:
Confirm the leak source
Clean the suspected area with brake cleaner and a rag. After a short drive, recheck for fresh oil. If you see oil seeping around the valve cover perimeter or pooling in spark plug wells, the gasket is a good candidate.
Remove components blocking access
Disconnect the battery. Remove engine covers, ignition coils, and any hoses or brackets attached to the valve cover. Label connectors and take photos if needed so you remember the routing.
Unbolt and remove the valve cover
Loosen the valve cover bolts in a criss‑cross pattern. Gently pry the cover loose if it’s stuck—use plastic tools to avoid gouging the aluminum head. Lift the cover away and set it on a clean surface.
Clean the mating surfaces
Peel off the old gasket and any rubber grommets. Use a gasket scraper or plastic blade to remove old gasket material from the cover and cylinder head. Wipe with brake cleaner until both surfaces are clean, dry, and smooth.
Install the new gasket
Press the new gasket into the groove on the valve cover. Some engines require small dabs of RTV sealant at sharp corners or where the timing cover meets the head—only apply where the service manual specifies.
Reinstall and torque correctly
Position the valve cover carefully over the head without disturbing the gasket. Install the bolts finger‑tight, then torque them in a criss‑cross pattern to the manufacturer’s specified value. Over‑tightening can cause leaks or crack the cover.
Reassemble and check for leaks
Reinstall coils, hoses, brackets, and any covers you removed. Start the engine and let it idle while you watch the gasket area. After a short drive, recheck for any new oil seepage.
5. Refreshing Faded Headlights for Safer Night Driving
Cloudy, yellowed headlights are more than an eyesore—they reduce light output and can compromise night visibility. Restoring them is a simple, low‑cost project that can dramatically improve your view of the road.
What you’ll need:
Headlight restoration kit or wet/dry sandpaper (e.g., 600, 1000, 2000 grit), masking tape, spray bottle with water, plastic polish, UV‑resistant clear coat (if not included), microfiber cloths.
Step‑by‑step:
Wash and mask the area
Clean the headlight lenses with car soap and water. Dry thoroughly. Use masking tape to protect the paint and trim around the headlights—you’ll be sanding right up to the edges.
Initial sanding to remove oxidation
If heavily oxidized, start with 600‑grit wet sandpaper. Keep the lens and paper wet with your spray bottle. Sand in one direction (e.g., horizontal) with light pressure until the yellowed, rough layer is removed and the surface looks evenly cloudy.
Refine with higher grits
Move to 1000‑grit, sanding in the opposite direction (e.g., vertical) to remove the scratches from the previous step. Finish with 2000‑grit, again changing direction. Always keep the surface wet and wipe occasionally to check your progress.
Polish the plastic
Dry the lens and apply a small amount of plastic polish to a microfiber cloth or foam pad. Rub in firm, circular motions until the lens becomes noticeably clearer. You can repeat this step for more clarity.
Apply a UV‑resistant coating
The clear factory UV layer has been sanded off, so you must add protection. Apply the UV‑resistant clear coat or sealant included in your kit—or a dedicated headlight UV sealant—following the directions carefully. This step prevents the lenses from quickly re‑yellowing.
Cure and inspect at night
Allow the coating to cure for the recommended time before getting the headlights wet. After dark, test your lights on a quiet road or driveway. You should see a sharper, brighter beam pattern and improved visibility.
Conclusion
Many car repairs feel mysterious until you see them broken down into small, repeatable steps. The five projects above are designed for DIYers who want real, achievable wins: better braking, fewer warning lights, smoother windows, cleaner engines, and safer night driving.
Always work safely: support the vehicle properly, wear protection, and stop if something doesn’t look right. When in doubt, compare your steps to a factory service manual or a trusted repair database. The more you learn now, the more confident you’ll be the next time your car tries to send you straight to the shop.
Sources
- [NHTSA – Vehicle Maintenance and Safety](https://www.nhtsa.gov/equipment/tires-maintain-and-drive-safely) – U.S. government guidance on maintaining vehicles safely and preventing breakdowns
- [AAA – Car Care Resources](https://exchange.aaa.com/automotive/car-care/) – Practical maintenance tips, safety advice, and explanations of common vehicle issues
- [YourMechanic – Brake Pad Replacement Basics](https://www.yourmechanic.com/article/how-to-change-brake-pads-by-mia-bevacqua) – Step‑by‑step brake pad replacement overview with photos
- [Environmental Protection Agency – Vehicle Emissions Basics](https://www.epa.gov/transportation-air-pollution-and-climate-change/vehicles-and-engines) – Background on how components like oxygen sensors affect emissions and efficiency
- [Consumer Reports – Headlight Restoration Advice](https://www.consumerreports.org/cro/headlights/how-to-restore-cloudy-headlights/index.htm) – Independent testing and recommendations for restoring cloudy headlights
Key Takeaway
The most important thing to remember from this article is that this information can change how you think about Auto Repair.


