Keeping your car running well doesn’t always mean an expensive trip to the shop. With basic tools, some patience, and safe habits, you can handle a surprising number of repairs right in your driveway. This guide walks through five practical, step‑by‑step fixes that real DIYers can tackle without a full mechanic’s toolbox.
Each repair is chosen because it delivers real-world payoff: fewer breakdowns, better fuel economy, and more confidence behind the wheel.
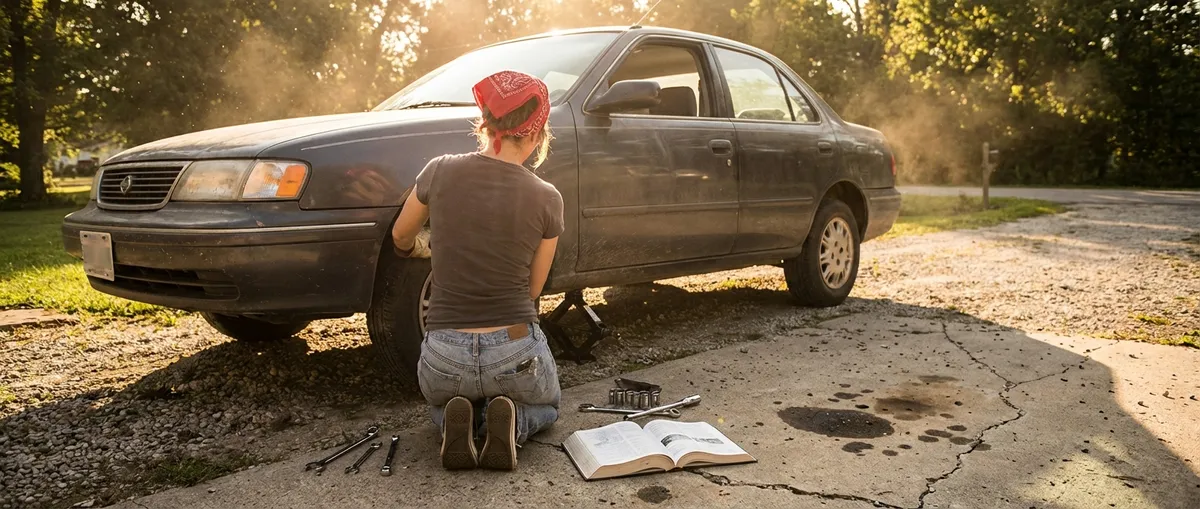
Before You Start: Safety and Setup Matter More Than Tools
Before touching a wrench, getting safety and setup right will save you busted knuckles, stripped bolts, and real danger.
First, park on a flat, solid surface, set the parking brake, and keep the car in Park (automatic) or in gear (manual). If you’re lifting the car, always use proper jack stands rated for your vehicle’s weight—never rely on the jack alone.
Wear safety glasses when working under the car or around fluids, and use gloves when handling chemicals like brake cleaner, coolant, or battery acid. Keep a basic kit on hand: a socket set (metric and SAE), screwdrivers, pliers, a torque wrench, a tire pressure gauge, a work light, shop towels, and a catch pan for fluids.
Finally, pull out your owner’s manual. It’s your blueprint for things like fluid types, maintenance intervals, torque specs, and fuse locations. When in doubt, stop and look it up rather than guessing. A few extra minutes of reading can prevent a broken part—or a dangerous mistake.
Step 1: Replacing Worn Wiper Blades for Clear, Safe Visibility
If your wipers streak, chatter, or leave unwiped bands on the glass, they’re beyond their useful life. Luckily, this is one of the easiest and most rewarding DIY fixes.
What you’ll need: New wiper blades correctly sized for your car, a clean rag, and glass cleaner.
Step-by-step:
- Check your sizes.
Look in your owner’s manual or an online parts catalog to find the correct blade lengths for driver, passenger, and rear (if equipped). They can be different sizes.
- Lift the wiper arm carefully.
Gently pull the wiper arm away from the windshield until it locks in the upright position. Don’t let it snap back—the metal arm can crack the glass.
- Release the old blade.
Most blades use a small tab where the blade meets the arm. Press or slide the tab while sliding the blade down and off the hook. Note how it comes off; you’ll reverse this for the new one.
- Attach the new blade.
Line up the new blade’s connector with the arm hook. Slide it until you hear or feel a click. Tug gently to be sure it’s locked in.
- Clean the glass and test.
Wipe the windshield with cleaner and a rag to remove road film. Gently lower the arms back to the glass and test them with washer fluid. Look for smooth, silent wiping with no missed sections.
Replacing wiper blades yourself costs far less than shop labor, and perfectly clear visibility in heavy rain is a serious safety upgrade.
Step 2: Swapping an Old Engine Air Filter for Better Performance
A clogged air filter chokes your engine, reducing power and fuel economy. Changing it usually takes less than 10 minutes and requires almost no tools.
What you’ll need: A replacement air filter that matches your vehicle, possibly a screwdriver or basic socket, and a clean rag.
Step-by-step:
- Locate the air filter box.
Pop the hood and look for a usually rectangular black plastic box with a large hose running to the engine’s intake. Your owner’s manual will show you its location.
- Open the air box.
Release the clips, screws, or clamps holding the top on. Keep hardware in a small tray or magnet so nothing gets lost in the engine bay.
- Remove the old filter.
Lift the filter straight out. Note its orientation—how it sits and which side faces up or front.
- Inspect the air box.
Wipe out leaves, dust, or debris with a clean rag. Don’t let dirt fall down the intake tube.
- Install the new filter.
Place the new filter in the same orientation as the old one. It should sit flat with a tight seal around the edges. Misalignment can let unfiltered air into the engine.
- Reassemble and check.
Reinstall the lid, tighten screws or reattach clips, and double-check that everything is seated properly and no hoses are pinched or loose.
You likely won’t feel a dramatic performance surge, but a fresh filter helps your engine breathe properly and supports better fuel efficiency over time.
Step 3: Replacing a Blown Headlight Bulb So You Can See (and Be Seen)
Driving with a burned-out headlight is both unsafe and a fast ticket. The fix is usually straightforward, and you can often do it without removing the headlight assembly.
What you’ll need: Correct replacement bulb(s), clean gloves, possibly a screwdriver or small socket, and your owner’s manual.
Step-by-step:
- Confirm the bad bulb.
Turn on your headlights and walk around the car. Check low beam, high beam, and, if possible, ask someone to confirm what’s working while you toggle controls.
- Get the correct bulb type.
Bulbs are not one-size-fits-all. Look up the exact part number in your owner’s manual or an online catalog. Consider replacing both sides at once; if one failed, the other may be near the end of its life.
- Access the bulb from behind.
Open the hood and locate the rear of the headlight assembly. You’ll usually find a wiring connector going into a plastic or rubber cover. Unplug the connector and remove any cover or retaining ring.
- Remove the old bulb carefully.
Release any spring clip or twist-lock mechanism and gently pull the bulb straight out. Don’t twist or pry aggressively—sockets can be fragile.
- Install the new bulb without touching the glass.
Wear clean gloves or hold the bulb by its base. Skin oils on the glass can cause hot spots and early failure. Insert it in the same orientation as the old one until fully seated, then secure any clips or rings.
- Reconnect and test.
Reinstall covers, plug the wiring connector back in, and turn on the lights. Check alignment and brightness against a wall or garage door.
With fresh bulbs, night driving becomes far less stressful, and you’re more visible to other drivers.
Step 4: Fixing a Slow Tire Leak with a Plug (Temporary but Effective)
A slow leak from a nail or screw in the tread is common and frustrating. A tire plug kit can get you rolling safely again, especially when a shop visit isn’t immediately possible. Treat this as a temporary repair and get the tire professionally inspected and patched from the inside as soon as you can.
What you’ll need: Tire plug kit (includes reamer, insertion tool, plugs), pliers, tire pressure gauge, air source (compressor or gas station), and soapy water in a spray bottle.
Step-by-step:
- Find the leak.
Inflate the tire to the recommended pressure (on the door jamb sticker). Spray soapy water on the tread and sidewalls—the leak will create bubbles. Most DIY-safe repairs are in the tread area, not the sidewall or shoulder.
- Mark and inspect the puncture.
If you see a nail or screw in the tread, mark the spot with chalk or tape. If the damage is in the sidewall or shoulder, do not plug it—the tire should be replaced.
- Remove the object.
Use pliers to pull out the nail or screw. Be ready: air will start escaping immediately.
- Prepare the hole with the reamer.
Push the reaming tool from the kit into the hole and work it up and down a few times to clean and size the opening. It will feel tight; that’s normal.
- Insert the plug.
Thread a plug strip through the eye of the insertion tool so it’s centered. Coat it with the supplied rubber cement if the kit includes it. Push the plug into the hole until only about ½ inch remains outside, then pull the tool straight out quickly. The plug should stay in place.
- Trim and re-inflate.
Use a knife or razor to trim excess plug flush with the tread. Re-inflate the tire to spec, spray soapy water again, and confirm no bubbles appear.
- Plan a professional follow-up.
Even if it holds air, schedule a proper internal patch/plug or tire replacement. A quick plug is useful, but long-term safety is better served with a shop repair.
For many DIYers, this is one of the most empowering roadside-style skills: you can stop a slow leak from derailing your week.
Step 5: Cleaning a Corroded Battery Terminal for Reliable Starts
If your engine cranks slowly, your lights dim when starting, or you see white/green crust on the battery posts, corrosion might be the culprit. Cleaning it up can restore electrical flow and prevent no-start surprises.
What you’ll need: Safety glasses, gloves, wrench to loosen battery terminals, battery terminal brush or wire brush, baking soda, water, small container, and petroleum jelly or battery terminal protectant.
Step-by-step:
- Power down and protect yourself.
Turn off the engine, remove the key, and ensure all accessories are off. Wear safety glasses and gloves—battery acid is corrosive and can burn skin and eyes.
- Disconnect the negative terminal first.
Loosen the nut on the negative (–) terminal and wiggle the clamp off. Then disconnect the positive (+). Always remove negative first and reconnect it last to reduce the chance of accidental short circuits.
- Mix a neutralizing solution.
Combine about a tablespoon of baking soda with a cup of water. This neutralizes acid and helps break up corrosion.
- Apply the solution and scrub.
Pour or dab the baking soda solution onto the corroded areas. It may fizz—that’s normal. Use a battery brush or wire brush to scrub the posts and inside the terminal clamps until metal is bright and clean.
- Rinse and dry.
Wipe off the residue with a damp rag or carefully rinse with a small amount of clean water, avoiding splashing other engine components. Dry everything thoroughly with a clean cloth.
- Protect and reconnect.
Lightly coat the battery posts and the inside of the clamps with petroleum jelly or a dedicated battery terminal protectant. Reconnect the positive terminal first, then the negative. Tighten snugly but don’t overtighten to avoid damaging clamps.
- Test your start.
Start the engine and observe cranking speed and lights. If the car fires up more strongly and consistently, the cleanup likely solved a big part of the issue.
Keeping terminals clean is simple preventative maintenance that can save you from a dead-battery surprise in a parking lot or driveway.
Conclusion
You don’t need a lift, a full set of specialty tools, or years of training to make your car safer and more reliable. By tackling straightforward jobs like replacing wiper blades and bulbs, refreshing the air filter, plugging a tread puncture temporarily, and cleaning battery terminals, you build real confidence with every fix.
The key is knowing your limits: use your owner’s manual, follow safe practices, and don’t hesitate to hand bigger or critical safety repairs (like brakes and steering) to a qualified professional. But for everyday reliability and peace of mind, these driveway‑ready repairs are a smart way to keep your car—and your skills—in great shape.
Sources
- [National Highway Traffic Safety Administration (NHTSA) – Vehicle Maintenance Tips](https://www.nhtsa.gov/road-safety/vehicle-maintenance) - Federal guidance on basic maintenance and safety-critical components
- [AAA – Car Care Resources & DIY Maintenance](https://exchange.aaa.com/automotive/car-care/) - Practical how-to information and maintenance advice for vehicle owners
- [U.S. Department of Energy – Fuel Economy: Keeping Your Car in Shape](https://www.fueleconomy.gov/feg/maintain.jsp) - Explains how maintenance items like air filters and tire care affect fuel efficiency
- [Bridgestone Tires – Tire Repair Basics](https://www.bridgestonetire.com/learn/maintenance/tire-repair/) - Details what types of punctures can be safely repaired and best practices for tire fixes
- [Interstate Batteries – How to Clean Battery Terminals](https://www.interstatebatteries.com/blog/how-to-clean-battery-terminals) - Step-by-step instructions and safety notes for battery terminal cleaning
Key Takeaway
The most important thing to remember from this article is that this information can change how you think about Auto Repair.


