When an appliance fails, it usually picks the worst possible moment—right before guests arrive, in the middle of dinner, or on laundry day. The good news: many “uh‑oh” moments are caused by simple issues you can safely diagnose and fix yourself. With a few basic tools and a systematic approach, you can get key appliances back in action and avoid at least some repair bills.
This guide walks through five practical, step‑by‑step repairs that DIY‑minded homeowners can tackle with confidence, plus safety checks so you know when to stop and call a pro.
Safety First: Know Your Limits Before You Start
Before you grab a screwdriver, slow down and make sure you’re set up to work safely. A careful five minutes here can prevent an expensive—or dangerous—mistake.
- Disconnect power every time.
Unplug the appliance from the wall. For hard‑wired units (like some dishwashers or built‑in microwaves), switch off the correct breaker at the service panel and verify power is off using a non‑contact voltage tester.
- Shut off water and gas when needed.
For washers, dishwashers, and refrigerators with ice/water dispensers, close the water shut‑off valve. For gas ranges or dryers, turn the gas shut‑off valve to the off position before you touch anything downstream of it.
- Protect yourself.
Wear safety glasses when working near moving parts, springs, or under cabinets. Use cut‑resistant gloves around sharp metal edges inside appliance cabinets.
- Use the right tools.
A basic kit goes a long way: Phillips and flathead screwdrivers, nut drivers or a socket set, adjustable wrench, needle‑nose pliers, and a flashlight or headlamp. A simple digital multimeter is extremely useful for electrical checks if you’re comfortable using one.
- Know when to stop.
Walk away and call a professional if you smell gas, see burnt wiring, find standing water near electrical parts, or if a repair requires opening sealed refrigeration systems, working inside a microwave’s high‑voltage section, or modifying gas piping.
Step‑By‑Step Fix: Refrigerator That’s Running Warm
A refrigerator that isn’t cold enough is often suffering from poor airflow or dirty components—not a dead compressor. These are checks most DIYers can handle.
- Confirm the symptoms.
Place an appliance thermometer in the fridge and freezer. After at least 4 hours with the door closed, your fridge should be around 37–40°F (3–4°C), freezer around 0°F (‑18°C). If both are high, continue below.
- Check temperature settings and door seals.
Make sure the control isn’t accidentally set too warm. Inspect door gaskets for cracks, tears, or debris. Close a dollar bill in the door and gently pull—if it slips out easily all around the perimeter, your seal may be leaking cold air and needs cleaning or replacement.
- Clear internal airflow.
Don’t block air vents inside the fridge and freezer with boxes or bags. Leave a bit of space at the back and sides of shelves so cold air can circulate.
- Clean the condenser coils.
Unplug the fridge. Pull it away from the wall. Locate the condenser coils—either on the back of the unit or behind a lower front kick panel. Use a coil brush and vacuum to remove dust and pet hair. Dirty coils make the compressor work harder and reduce cooling efficiency.
- Check the condenser fan (if accessible).
With the unit still unplugged, inspect the fan near the compressor. Spin it gently with a finger or a plastic tool—if it feels stuck or gritty, debris may be lodged in it. Clear any obstructions. Plug the fridge back in and confirm the fan starts when the compressor runs. If it doesn’t, the fan motor may need replacement (often still DIY‑friendly with a model‑specific guide).
If the fridge still doesn’t cool after these steps—and you hear clicking or short cycling from the compressor area—stop there. Issues with sealed systems or refrigerant require a licensed technician.
Step‑By‑Step Fix: Washing Machine That Won’t Drain
A washer full of water at the end of a cycle is often due to a clog rather than a failed pump. Clearing that blockage is usually straightforward.
- Power down and bail out.
Unplug the washer. Use a small container or cup to bail water into a bucket until the drum is light enough to tilt if needed. Have towels ready for spills.
- Inspect the drain hose.
Pull the washer away from the wall. Check that the drain hose at the back isn’t kinked, crushed, or blocked. Disconnect it from the standpipe or sink and visually inspect the end for clogs (coins, lint, small clothing items).
- Check the drain filter or pump clean‑out (front‑loaders).
Many front‑loaders have an access panel at the bottom front. Place a shallow pan and towels under it, then open the panel. Unscrew the filter or drain plug slowly—water will pour out. Remove lint, coins, buttons, and other debris. Rinse the filter and reinstall it snugly.
- Run a drain/spin test.
Reconnect the drain hose and position it properly in the standpipe. Plug the washer in and run a “drain and spin” cycle with no clothes. Watch the drain hose to confirm a strong, steady flow of water.
- Listen for the pump.
If no water moves and you don’t hear the drain pump humming, or you hear a loud grinding sound, the pump itself may be damaged and require replacement. Many pumps are held by a few screws and hose clamps, but replacing them safely requires you to work confidently around wiring and seals—check your model’s service manual before proceeding.
If water backs up out of the standpipe or laundry sink while the washer drains, the problem may be a clogged household drain, not the machine. In that case, focus on clearing your home’s plumbing or call a plumber.
Step‑By‑Step Fix: Electric Dryer With No Heat
When an electric dryer tumbles but doesn’t heat, the cause is frequently airflow or a safety device doing its job—not an immediate sign the appliance is finished.
- Rule out a tripped breaker.
Electric dryers typically use a 240‑volt circuit with two breakers tied together. If one side trips, the motor can run on 120 volts but the heater won’t. Check your main panel; if the dryer breaker is tripped or partly tripped, reset it firmly to ON.
- Clean the lint trap and housing.
Remove the lint screen and vacuum around and inside its housing with a narrow attachment. Even if you clean the screen regularly, lint can accumulate below it and restrict airflow.
- Inspect and clean the exhaust duct.
Unplug the dryer. Gently pull it away from the wall and disconnect the vent hose. Check the hose and the wall vent opening for lint buildup, crushed sections, or bird nests. Clean thoroughly using a vent brush or vacuum. Consider replacing long, crushed, or plastic ducting with smooth, rigid metal duct for better airflow.
- Test airflow.
Reconnect the vent and run the dryer on a timed heat setting. Go outside to the exterior vent: you should feel a strong, warm airflow. Weak flow suggests further blockage in the duct, which you’ll need to clear end‑to‑end.
- Check common safety resets.
Some dryers have a manual reset button on a thermal limiter or high‑limit thermostat accessible once the rear panel is removed (unplug first). If you find a small red reset button, press it gently. If it clicks and the dryer heats again, that’s a sign it overheated—usually from bad airflow. If it trips again soon after, stop and address the root cause or call a technician.
If you’re comfortable with a multimeter and the dryer is unplugged, you can test continuity of the heating element and thermal fuses. Any part that shows “open” when it should be closed will need replacement—use parts designed for your exact model.
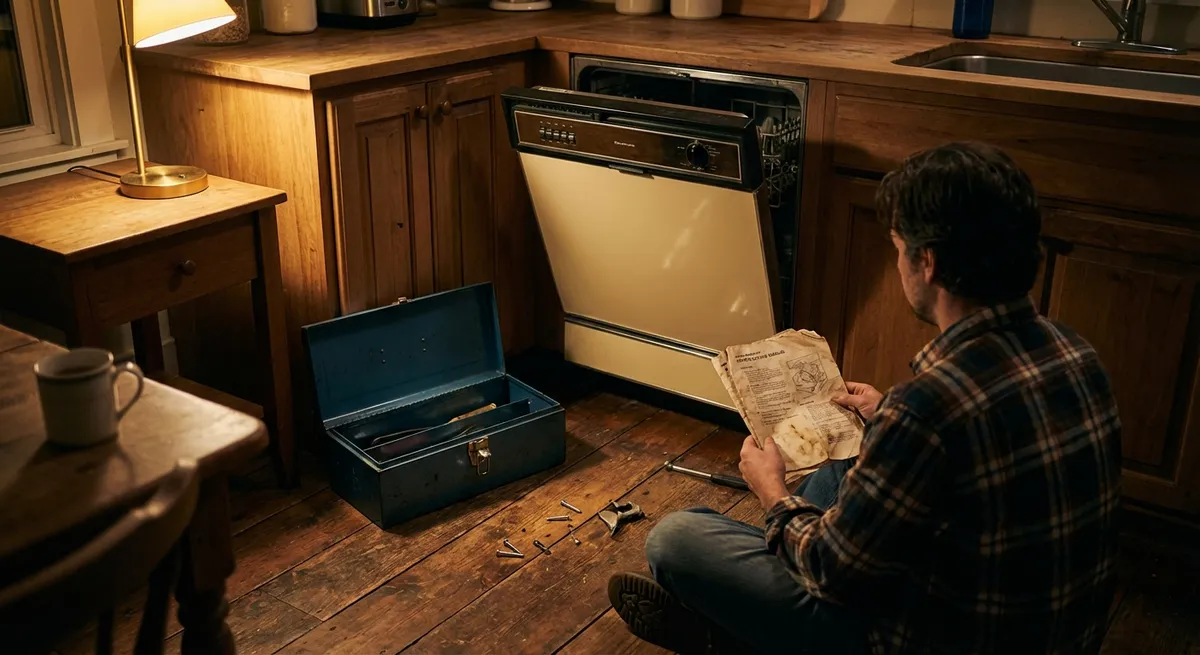
Step‑By‑Step Fix: Dishwasher Leaving Dishes Dirty
When a dishwasher stops cleaning well, the problem is rarely “it’s worn out.” More often, it’s dirty, misloaded, or starved of hot water.
- Check spray arms for clogs.
Remove the lower rack. Lift off the lower spray arm (usually it twists or lifts off). Inspect the spray holes for food particles, seeds, or mineral buildup. Use a toothpick or small brush to clear them. Do the same for the upper spray arm if it’s removable.
- Clean the filter and sump.
Many modern dishwashers have a removable filter assembly at the bottom—typically a twist‑lock design. Take it out and rinse it thoroughly under running water. Wipe any debris from the sump area below it but avoid forcing anything down the drain.
- Confirm adequate water temperature.
Run your kitchen sink hot water until it’s as hot as it gets, then measure with a thermometer if available. Most manufacturers recommend around 120°F (49°C) for effective cleaning. If your water is significantly cooler, adjust your water heater (within safe limits) or use a dishwasher “sanitize” or “high temp wash” option if available.
- Load dishes to allow spray coverage.
Avoid nesting bowls and cups; angle them so water can reach inside. Keep larger plates from blocking the path of the spray arms. Ensure tall items don’t jam the upper spray arm from spinning freely.
- Run a cleaning cycle.
With the dishwasher empty, place a dishwasher‑safe cup of white vinegar on the top rack and run a hot cycle. This helps dissolve grease and mineral deposits inside the tub and lines. Alternatively, use a commercial dishwasher cleaner following the manufacturer’s instructions.
If dishes are still dirty and you’re hearing unusual grinding noises or no water sloshing at all, there may be a failing circulation pump or inlet valve, which typically requires part replacement and sometimes pro service.
Step‑By‑Step Fix: Electric Oven That Bakes Unevenly
Uneven baking can ruin a batch of cookies and your trust in your oven. Before assuming the thermostat is bad, check for common, fixable issues.
- Visually inspect the heating elements.
For an electric oven, look at the bake (bottom) and broil (top) elements. They should be intact, with no blisters, breaks, or bright spots when heating. If a section doesn’t glow or has visible damage, that element likely needs replacement.
- Test the oven temperature with a separate thermometer.
Place an oven‑safe thermometer in the center of the middle rack. Set the oven to 350°F (about 177°C) and let it preheat for at least 20–30 minutes. Compare the displayed oven temperature to the thermometer reading.
- Check for hot and cool spots.
Move the thermometer to the front, back, left, and right positions on the same rack, allowing time for the reading to stabilize at each location. Big differences (25°F or more) can indicate airflow issues or a failing element.
- Calibrate the control (if your model allows).
Many electronic controls let you adjust the displayed temperature up or down in small increments. Check your oven’s user manual: you might be able to offset the temperature to match your thermometer. This doesn’t fix an element problem but can correct minor calibration issues.
- Avoid blocking airflow and use proper rack positions.
Don’t line the oven floor with foil; it can reflect heat and interfere with circulation. For even baking, use the center rack and avoid packing pans too tightly together.
If the oven never reaches set temperature or fluctuates wildly, the temperature sensor (thermistor) or control board may be at fault. Those are often replaceable with model‑specific instructions, but if you’re not comfortable working around mains voltage, leave that to a qualified technician.
Conclusion
Most everyday appliance problems start small: dust‑choked coils, clogged filters, kinked hoses, and misused settings. Tackling these issues with a calm, methodical approach can bring a “broken” appliance back to life in under an hour—and teach you more about how your home actually works.
As you gain confidence with straightforward fixes like cleaning filters, checking airflow, and inspecting visible parts, you’ll get better at spotting early warning signs and knowing when to DIY and when to call in help. That balance is the real goal: a home that runs smoothly, with you in control of the basics and professionals handling the truly risky or complex jobs.
Sources
- [U.S. Department of Energy – Appliances and Electronics](https://www.energy.gov/energysaver/appliances-and-electronics) – General guidance on efficient operation and maintenance of common home appliances
- [Consumer Product Safety Commission – Home Electrical Safety Checklist (PDF)](https://www.cpsc.gov/s3fs-public/513.pdf) – Practical safety tips for working around household electrical devices and circuits
- [Mayo Clinic – Electrical Injuries: First Aid](https://www.mayoclinic.org/first-aid/first-aid-electrical-burns/basics/art-20056688) – Important information on what to do (and avoid) in case of accidental electrical injury
- [Energy Star – Refrigerator Performance and Maintenance Tips](https://www.energystar.gov/products/appliances/refrigerators/refrigerator_tips) – Official recommendations on keeping refrigerators operating efficiently, including coil cleaning
- [University of Wisconsin–Madison Extension – Clothes Dryer Exhaust Safety](https://fyi.extension.wisc.edu/news/2013/02/21/clothes-dryer-exhaust-safety/) – Details on dryer vent cleaning, airflow, and fire‑prevention best practices
Key Takeaway
The most important thing to remember from this article is that this information can change how you think about Appliances.


